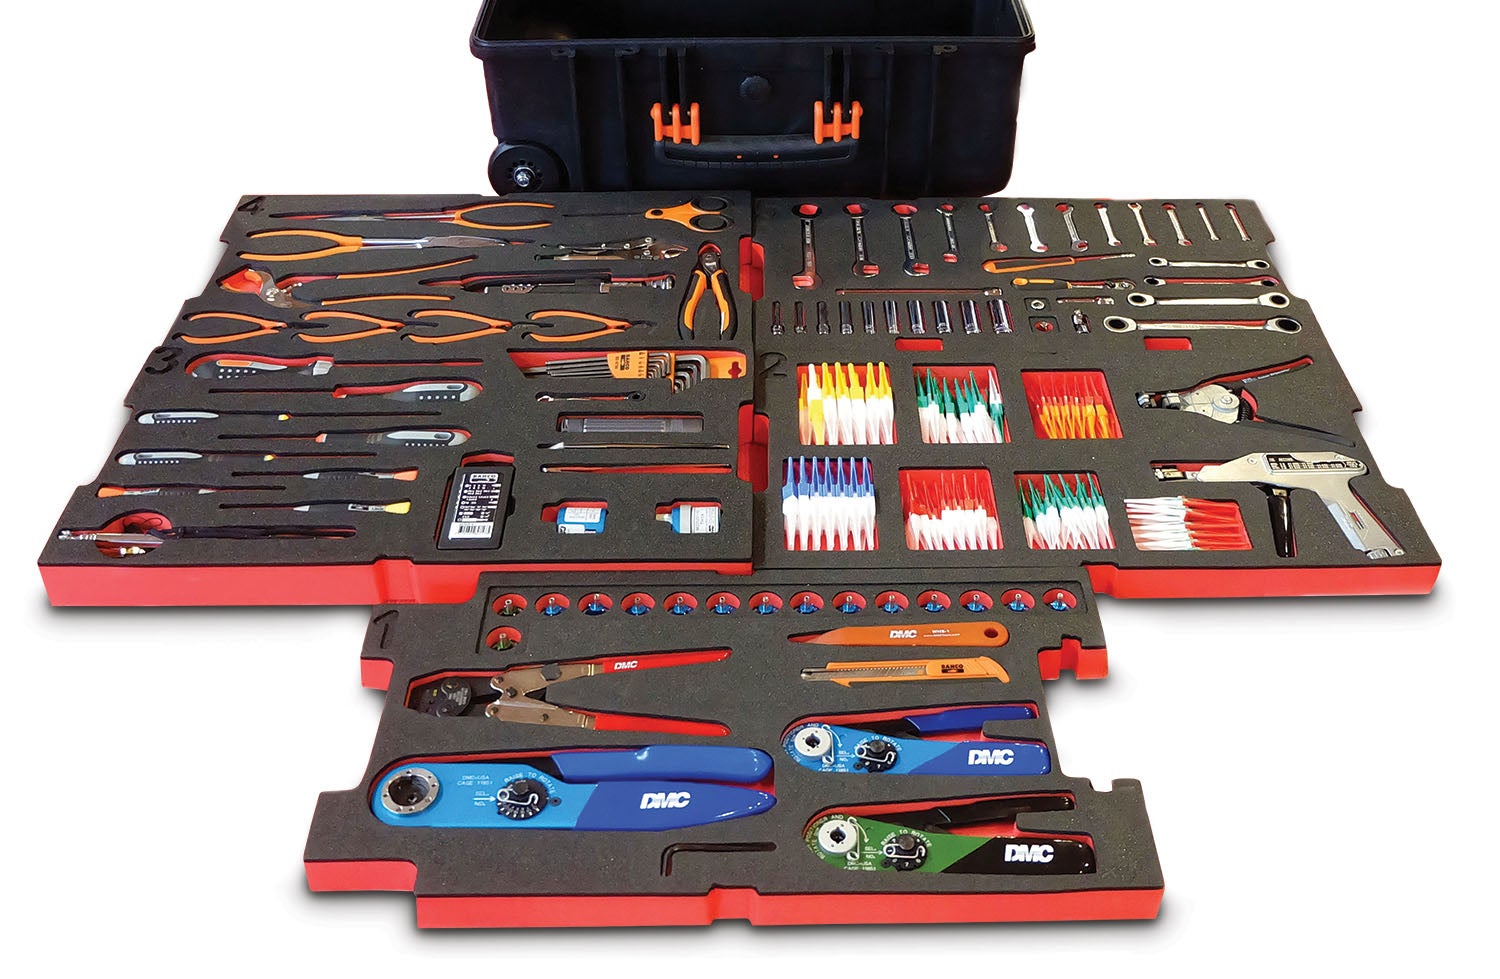
In the 1980s classic movie Fast Times at Ridgemont High, Sean Penn’s character Jeff Spicoli bragged that his television repairman father had the ultimate set of tools to fix the Camaro he just wrecked. And if you’re building an aircraft, you too likely have an ultimate set of tools, but maybe not the right ones to tackle the avionics portion of the project.
 That’s why we thought it would be a good idea to suggest some of the most useful tools and accessories you might source to get the avionics job done the right way the first time. Some you might already have, but maybe not the other specialty tools and supplies that you’ll need for the entire job. The modest dollar investment and the effort in organizing your avionics workspace will be worth it.
Tour an Install Floor
If you have the chance, look at how the typical professional avionics shop works for tips on setting up your work area. You’ll see well-organized workstations segregated for the task at hand at the good shops. Most shops have designated wiring and soldering benches where specialty tools, spools of wire, connectors and other harness-building supplies are close at hand. There might also be a designated bench for doing sheet-metal work. Organization is key when it comes to working with wiring. So is good lighting, which should be high on your list of shop accessories for wiring the avionics.

There is no shortage of good LED work lights—handheld, headlight, overhead and stand lights—that can make a huge difference in wiring the systems right the first time. Try as you might, you likely won’t make it through a major wiring job without mis-pinning a connector. It happens. Still, if you haven’t yet started the wiring, get ready for a humbling realization that your eyesight has indeed deteriorated because trying to read the tiny pin designations stamped on the back of interface connectors is a serious challenge made more difficult in low-light conditions.
And that’s why you want to have a good magnifying glass close at hand, and preferably one with a built-in lamp. These aren’t expensive, and I sourced a decent 4-inch LED magnifying clamp lamp with a 3-diopter lens at the Home Depot for under $50. It magnifies objects something like 1.75 times. For working in the aircraft, grab an old-fashioned handheld magnifier so you can get a closer look at connectors.

And because at some point you’ll be lying on your back and standing on your head learning how to be both a contortionist and avionics troubleshooter, pick up a handheld telescoping lighted inspection mirror. The $15 investment will pay back big-time as you struggle to read the back of the connectors (upside down and backward) after the equipment is mounted in the aircraft. Oh, and for times when you drop that screw or other small metal object into the bowels of the airframe, have a telescoping magnet stick to help fetch it.
While on the topic of hand tools, it goes without saying that you’ll need the usual collection of SAE and metric sockets, an Allen wrench set with durable handles, nut drivers, open-end wrenches, screwdrivers of all sizes and handle lengths, plus a good rechargeable drill with extra batteries. Again, you’ll probably have all these anyway for the rest of the build, but many will serve double duty for avionics work.
You’ll want a bunch of extension cords and power strips. While it seems trivial, my experience is that you can never have enough to power the lights, soldering gun and battery chargers.
Prefab Avionics Kits
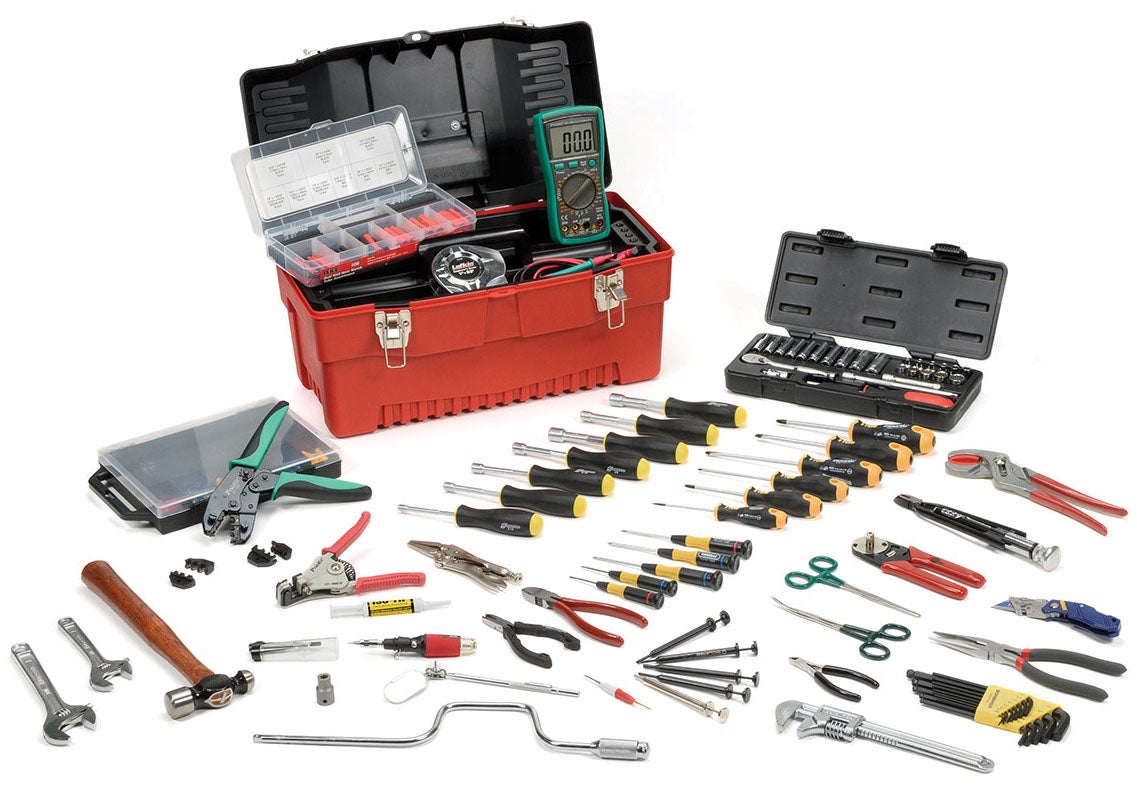
To take stock of the wide variety of hand tools and accessories that will come in handy for avionics work, check out some prepackaged kits aimed at avionics installers. For example, I found a couple at Aircraft Spruce, including the $914 Avionics Maintenance Kit. It’s loaded with all kinds of useful stuff that could reduce the overwhelming chore of sourcing some tools individually. Even if you prefer to buy the tools separately, prepackaged kits can be a good backstop for remembering stuff that you’ll likely make good use of. Yes, Snap-on Tools still sets a high standard for quality and replacement support, and you’ll pay dearly, but there are other high-quality choices. You likely have formed your own opinion on a brand line, and it’s tough to argue that when it comes to hand tools, you generally get what you pay for.
The moderately priced Spruce kit includes a 19-inch toolbox, a 13-piece Allen wrench set, 8-inch needlenose pliers, diagonal cutters (extremely important), six-piece screwdriver kit, Vise-Grip pliers, safety wire pliers (don’t forget the safety wire), a five-piece mini screwdriver kit (which you’ll definitely use at some point), a butane soldering iron and soldering paste, adjustable wrench, Cannon plug pliers, Apex bit holder, an inspection mirror, five-piece pin extractor set, an automatic wire stripper, a D-sub closed-barrel crimping tool, a pin insertion/extractor tool, two 6-inch forceps (straight and curved), a 20-amp multimeter, mini Vampliers, a ball-peen hammer, a seven-piece nut driver set and a folding utility knife.
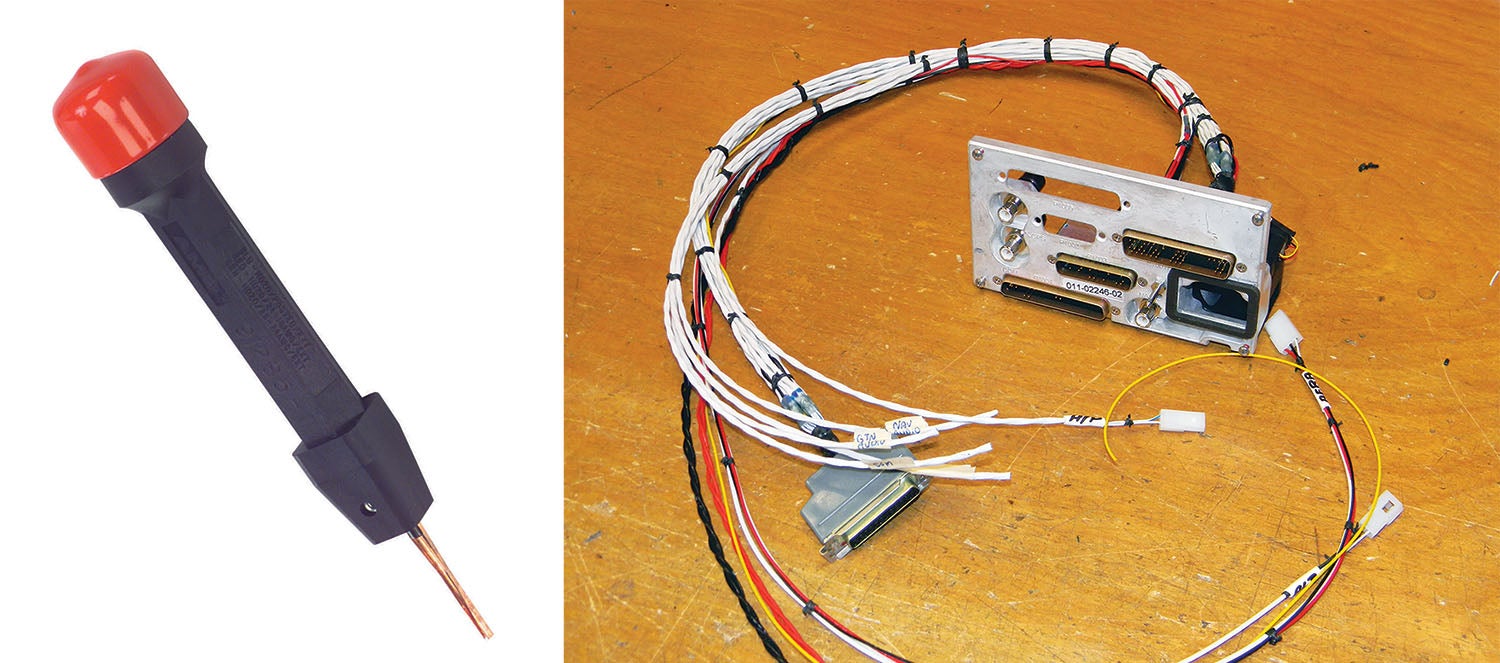
I like that the Spruce kit has various contact pin insertion/removal tools. These inexpensive tools (plastic body and metal tips) are necessary for extracting a broken pin or removing or moving a mis-installed pin in the connector. The tools are color-coded based on the gauge of the pins they work with, either high-density or low-density pins.

Soldering Stations, Heat Guns
Since you aren’t doing avionics work unless you’re soldering, you’ll want to set up a soldering station equipped with a sturdy bench vise. You really don’t need to spend a lot of money on one since you won’t be soldering on an assembly line, and soldering stations have come a long way since the bad old days. If I were buying a new one for short-term use (think about how much or little soldering you’ll do when the avionics are finished), one choice might be the under-$150 five-piece Weller 70-watt WE1010NA digital. It’s packed with useful features, including a digital display for dialing in and locking the precise temperature (it heats up to 900° F), has a standby mode and comes with common ETA-type toolless tips, sponge, a pencil-style molded grip and a safety rest—pretty much everything you need.

Speaking of heat, don’t forget a decent heat gun. You’ll need one for molding heat shrink, melting solder sleeves and for other chores when building wiring bundles. Prices are all over the board. One preferred brand is Steinel, and the entry-level professional gun sells for around $270 and has a barrel tip and a 1500-watt heater with a convenient, easy-to-use thumbwheel switch for varying the heat output between 167 and 1166° F. Another at a mid-price point is the Milwaukee model 8975-6, which heats from 570 to 1000°, but I’ve found that having a lower temperature range is more valuable than a higher one, especially for molding plastics. My toolbox houses a few heat guns, and frankly, the one that runs the hottest melts a bit too aggressively. It’s an old Wagner Spraytech HT1000 with a pretty narrow heat range—from 750 to 1000° F. The comparable new model is dirt cheap at around $30, but if I were sourcing a new one, I would spend the extra bucks for one with a wider (and lower) temperature spread.

Multimeter, Crimper
No avionics toolbox is complete without a decent quality multimeter, and my go-to is the Fluke 107. It’s compact but not too compact to get lost in the shuffle of a busy job. You don’t have to break the bank, but you want one that’s rugged enough that it won’t break when you drop it inside the engine cowling or on the concrete or asphalt. What I like about the Fluke 107, aside from its quality and accuracy, is that aside from voltage, resistance, continuity, frequency, duty cycle measuring, and capacitance, it measures current up to 10 amps. It has a backlit display, and it comes with durable leads. It’s reasonably priced at around $110, and Fluke’s customer support is pretty good.

When it comes to the nitty-gritty of building those harnesses, you’ll need a good crimping tool, and the longtime go-to is the eight-impression Daniels AF8, or “Big Blue Crimper.” It’s not cheap at around $400 plus turret heads, but there are over 1000 heads available to make it work with a variety of crimps and closed-barrel contacts. Used properly, this ratcheting crimp tool is the best way to get consistent, perfect crimps every time. Our own Paul Dye says, “Someone can have my DMC after they pry it from my cold, dead hands.” Works good, and D-sub crimps last a long time.
And while you’re stocking that drawer, get a good pair of wire strippers (Aircraft Spruce has a wide variety), plus a high-quality cutting tool. My ancient Snap-on diagonal cutter is almost my favorite tool in the box. But be careful with that precision Snap-on cutting head and resist clipping tie wraps and other tough surfaces that can damage the tip.

Top Off the Supplies
While not really tools, don’t forget to equip your avionics bench with essential install wiring supplies. Don’t be one of those builders who is constantly mooching off the local avionics shop. This includes sourcing your own supply of two-, three- and four-pin Molex connectors, solder, tie wraps, butt splices, ring terminals, lacing cord, solder sleeves, a variety of sizes (and colors) of heat shrink, fuses and, of course, wire. You’ll also want a variety of well-organized stainless screws, nuts and washers.

And because avionics projects inevitably include at least some metalwork, especially for antennas and work on the instrument panel, stock a variety of metal filing tools, a Dremel tool with cutoff wheels, and some “pop” rivets, Cleco tools and solid rivets. If you’re building a metal airplane, you’ll surely have plenty of the latter (and you’ll likely never want to see them ever again once you’re done). Don’t overlook bigger tools—including a bench grinder—when you need to make some crude modifications to the hardware.
Last, keep all these tools and supplies well organized and with any luck, you’ll get the avionics powered up right and tight the first time. Plus, you’ll be well equipped to troubleshoot later on, just like the pros.
Photos: Larry Anglisano, courtesy Aircraft Spruce & Specialty.




I’ve been curious what kind of tool boxes or organization methods folks prefer in their hanger or home workshop. I sell Tanos Systainers at Systainer.Store, and was planning to attend Sun ‘n Fun expo this year, but it won’t work out with some other timing. There is such a variety of tools and tasks in building a plan, that I’d love to learn how one organizes the tools and materials so as to not get overwhelmed.
SteinAir sells a toolkit that includes all the tools their techs use for $275.