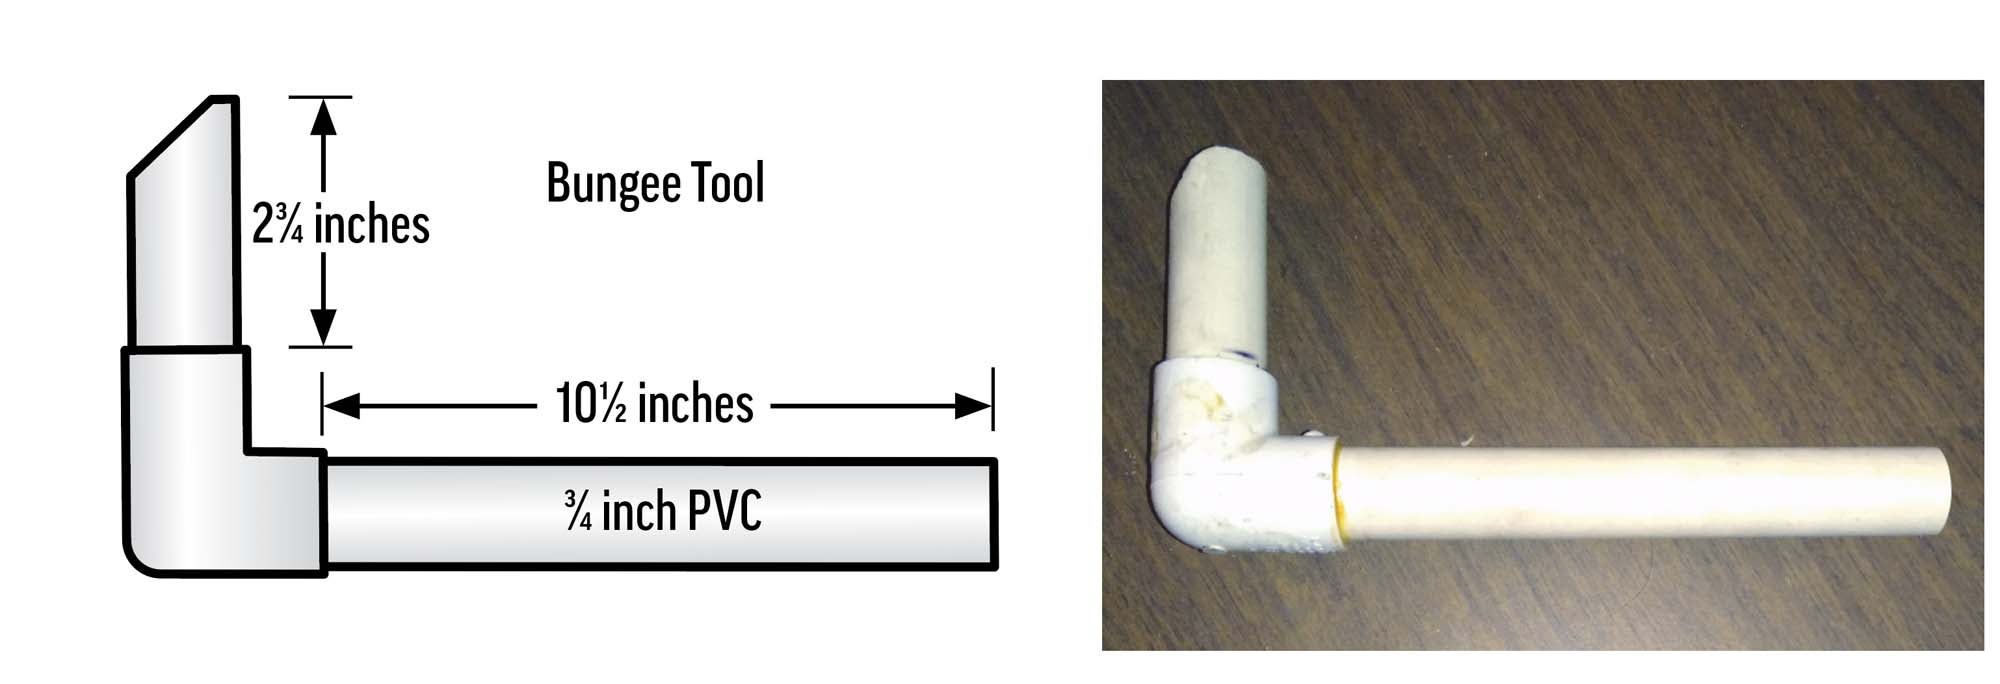
 Over time and many landings, the Zenith nose gear bungee will weaken. It is then time to replace it. This task is made easier with a simple tool made from 3/4-inch PVC pipe and a 3/4-inch PVC elbow. But before we dive into replacing the bungee, let’s take a closer look at how the Zenith nose gear works and why it needs a bungee in the first place.
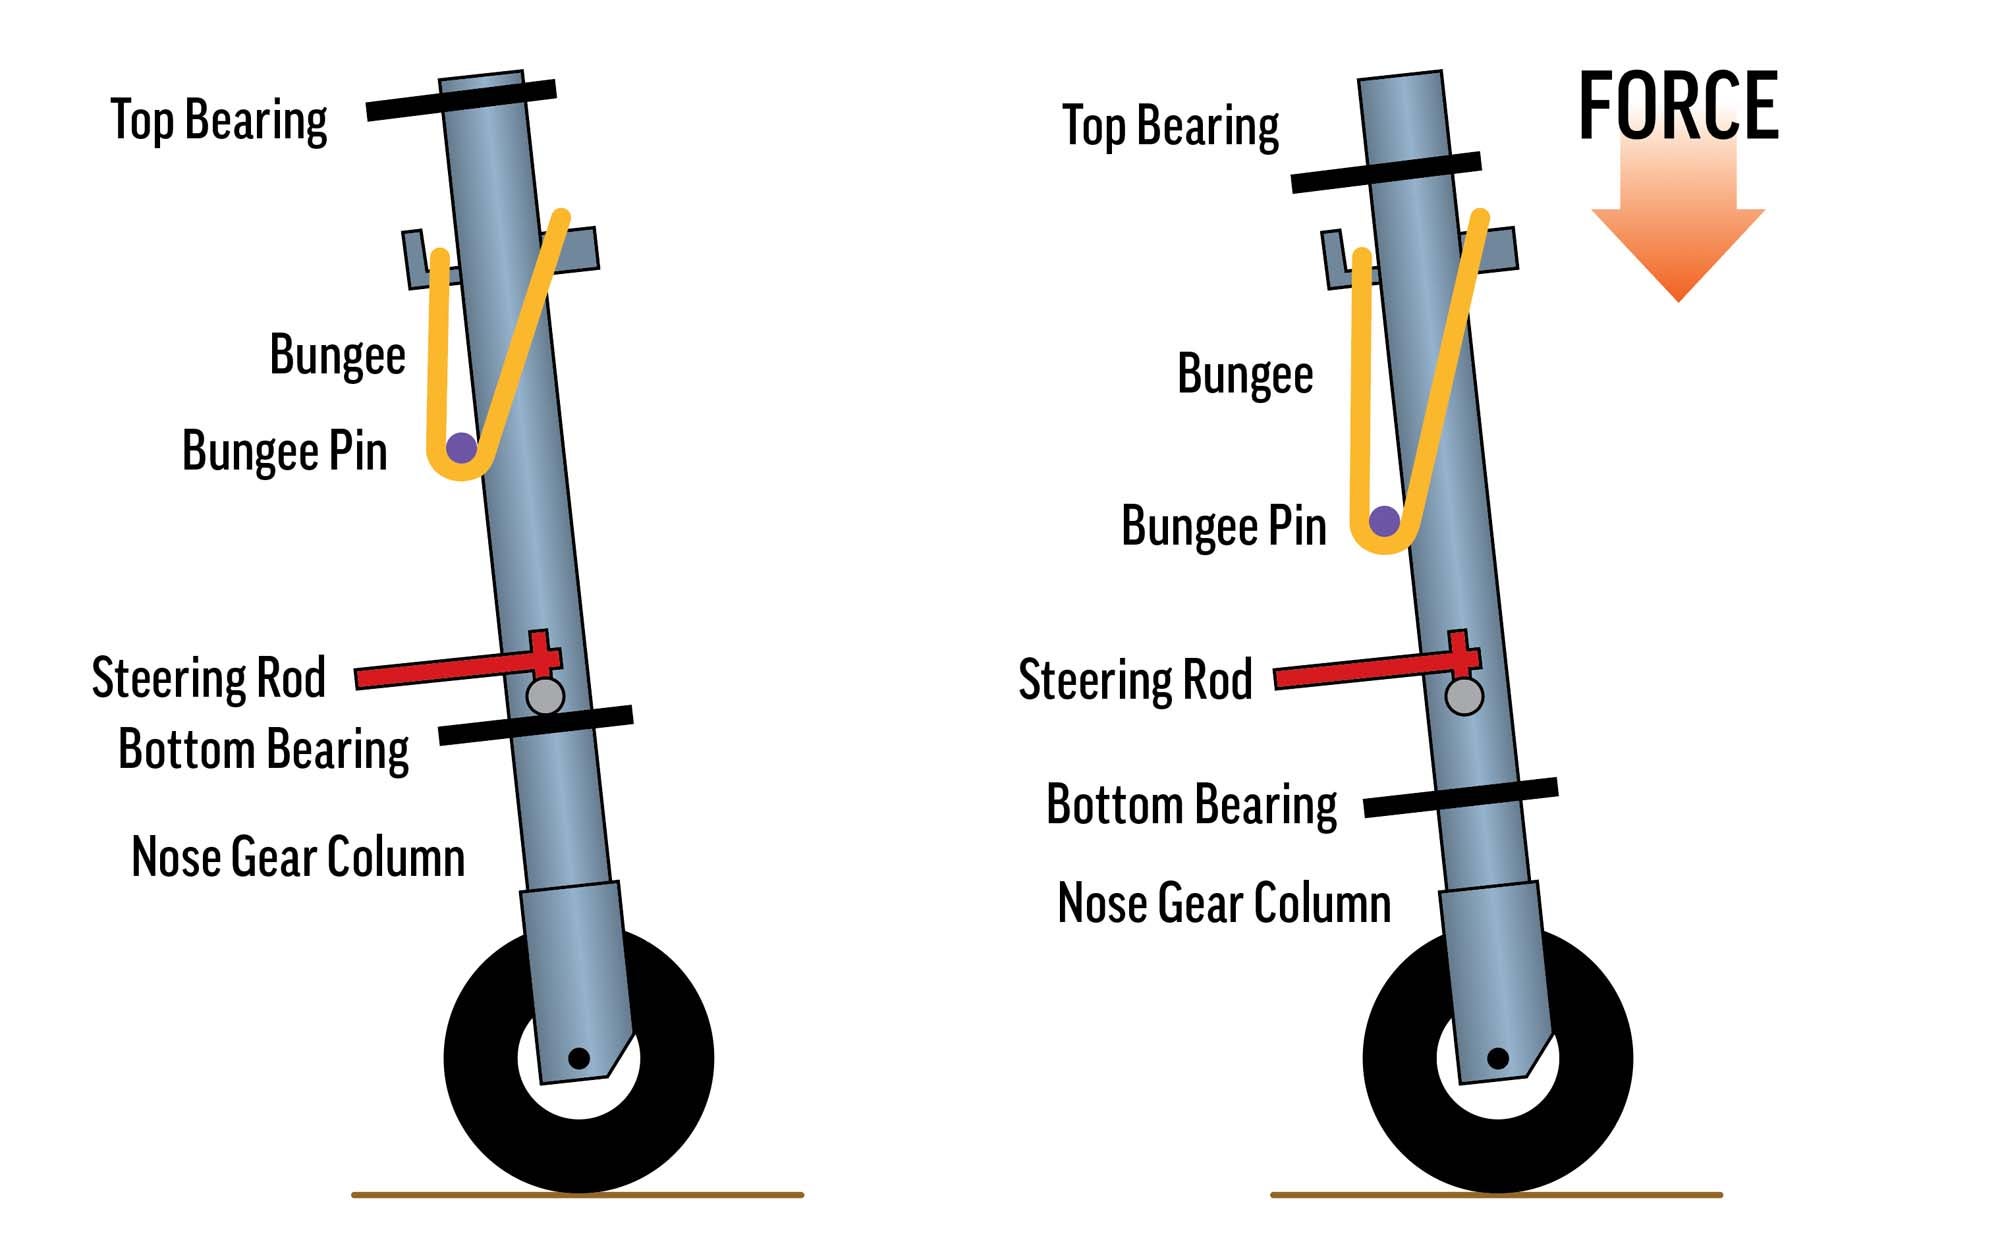
Anatomy of the Zenith Nose Gear Action
The Zenith nose gear column is free to rotate and move vertically within the top and bottom bearings. The bearings and bungee pin are fixed to the firewall. Normally, the bungee pin—and thus the firewall—are lifted by the bungee because the firewall top ends are fixed to the nose gear column. As a downward force is applied to the front of the airplane, the nose of the airplane will lower and the nose gear bungee will stretch. However, the nosewheel steering rods stay with the nose gear column as the airplane lowers. (See “DIY Firewall Boots,” KITPLANES, September 2009.)
Bungee Replacement
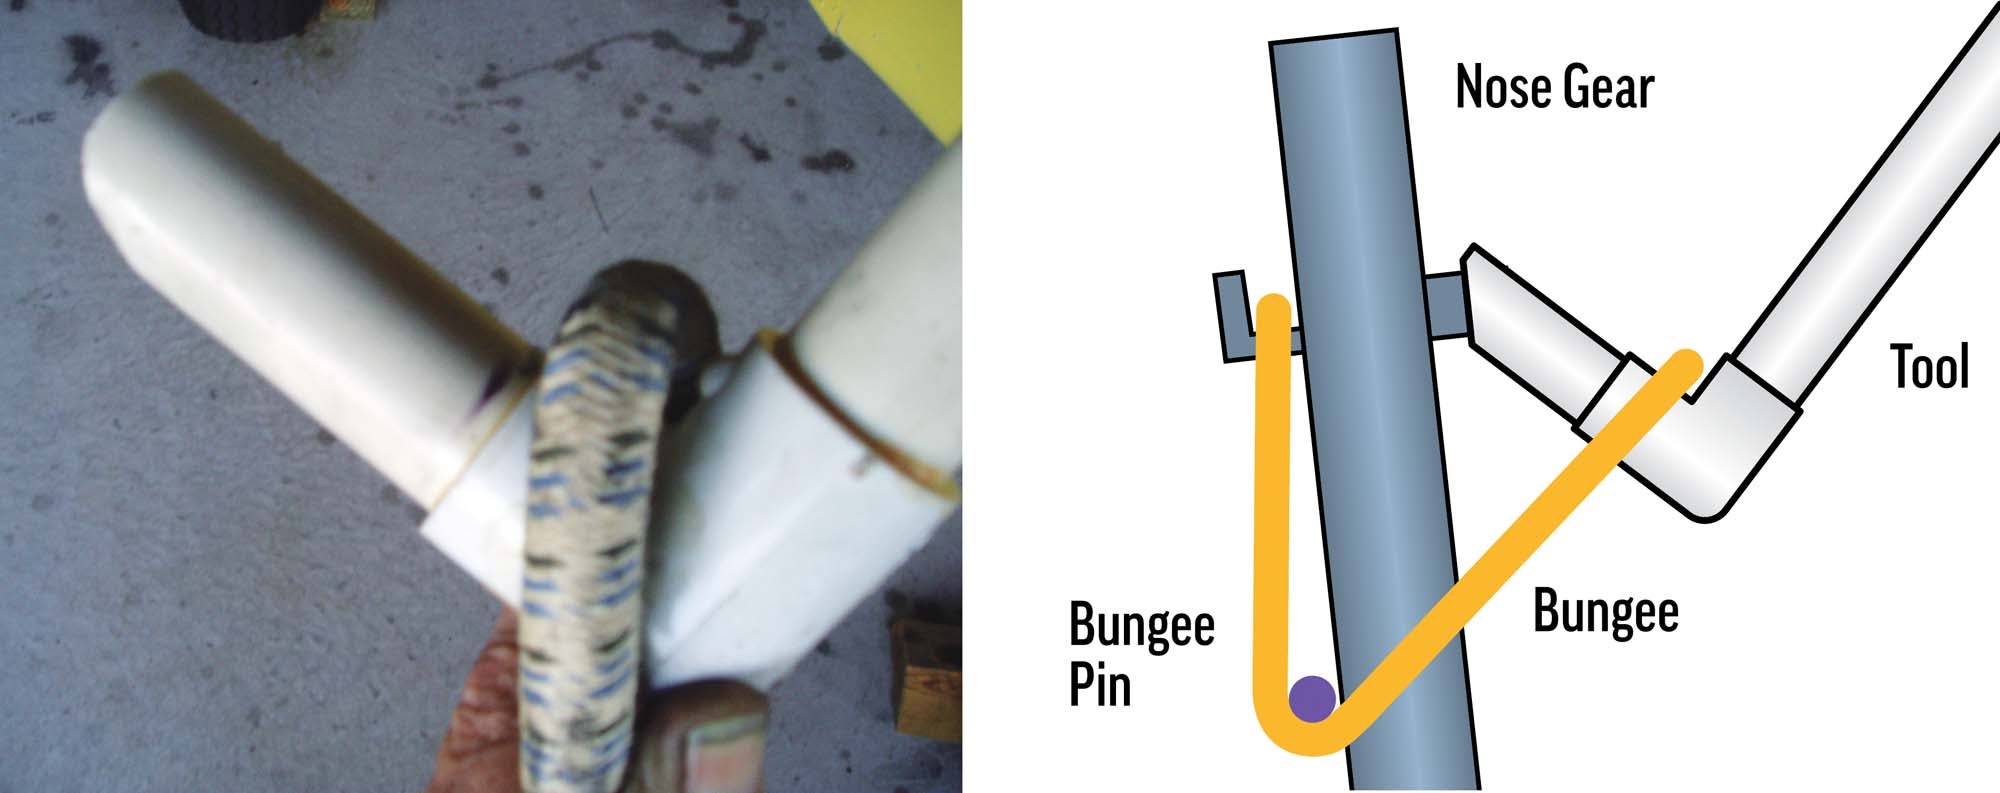
1. Start by making the bungee tool (Figure 1 and Photo 1).
2. Hang some weight on the tail tie-down to lift the nosewheel off the ground. Two cinder blocks worked for me on my CH 701 (Photo 2).
3. Then use a utility knife to slowly cut through the old bungee (Photo 3).
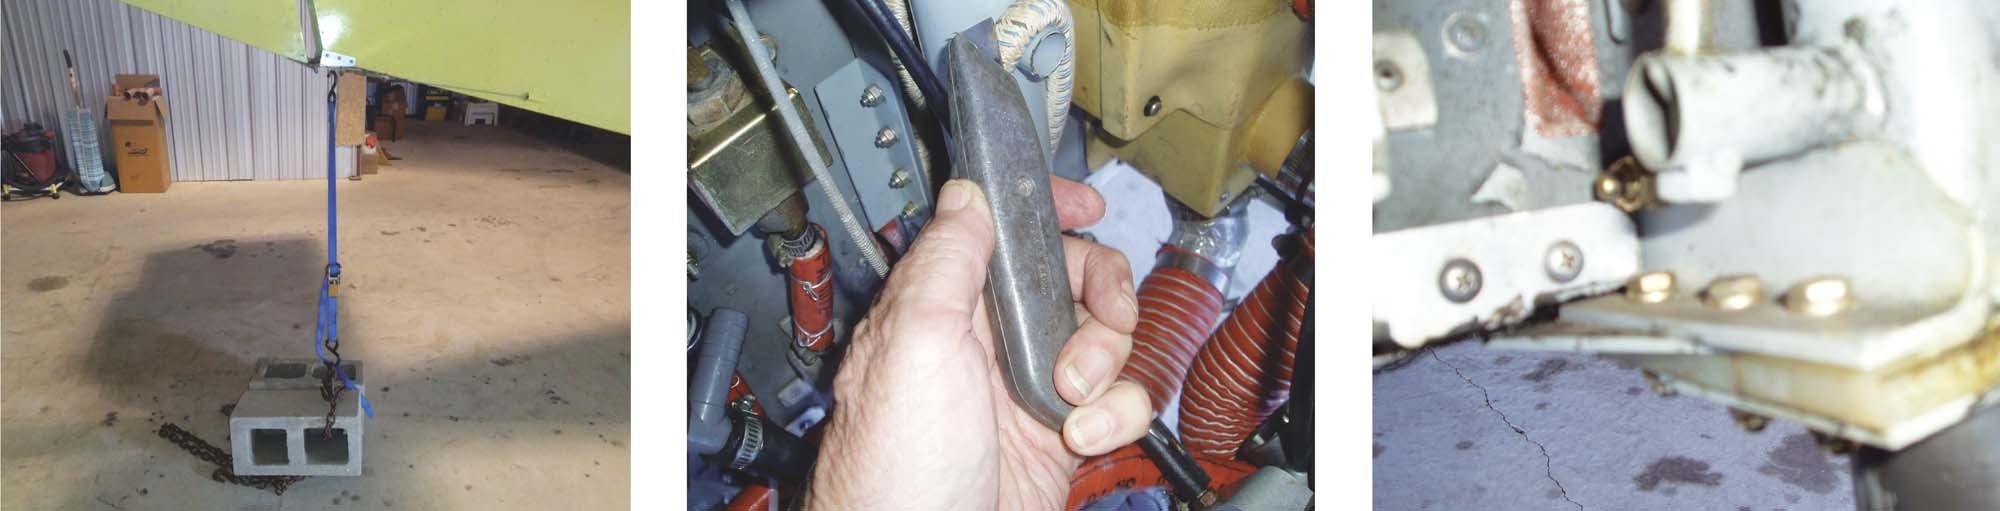
4. Next, remove the nose gear steering rods. Also remove the lower nose gear bearing pieces (Photo 4) and the nose gear top retainer (some Zeniths don’t have these). Then remove the nose gear and old bungee.
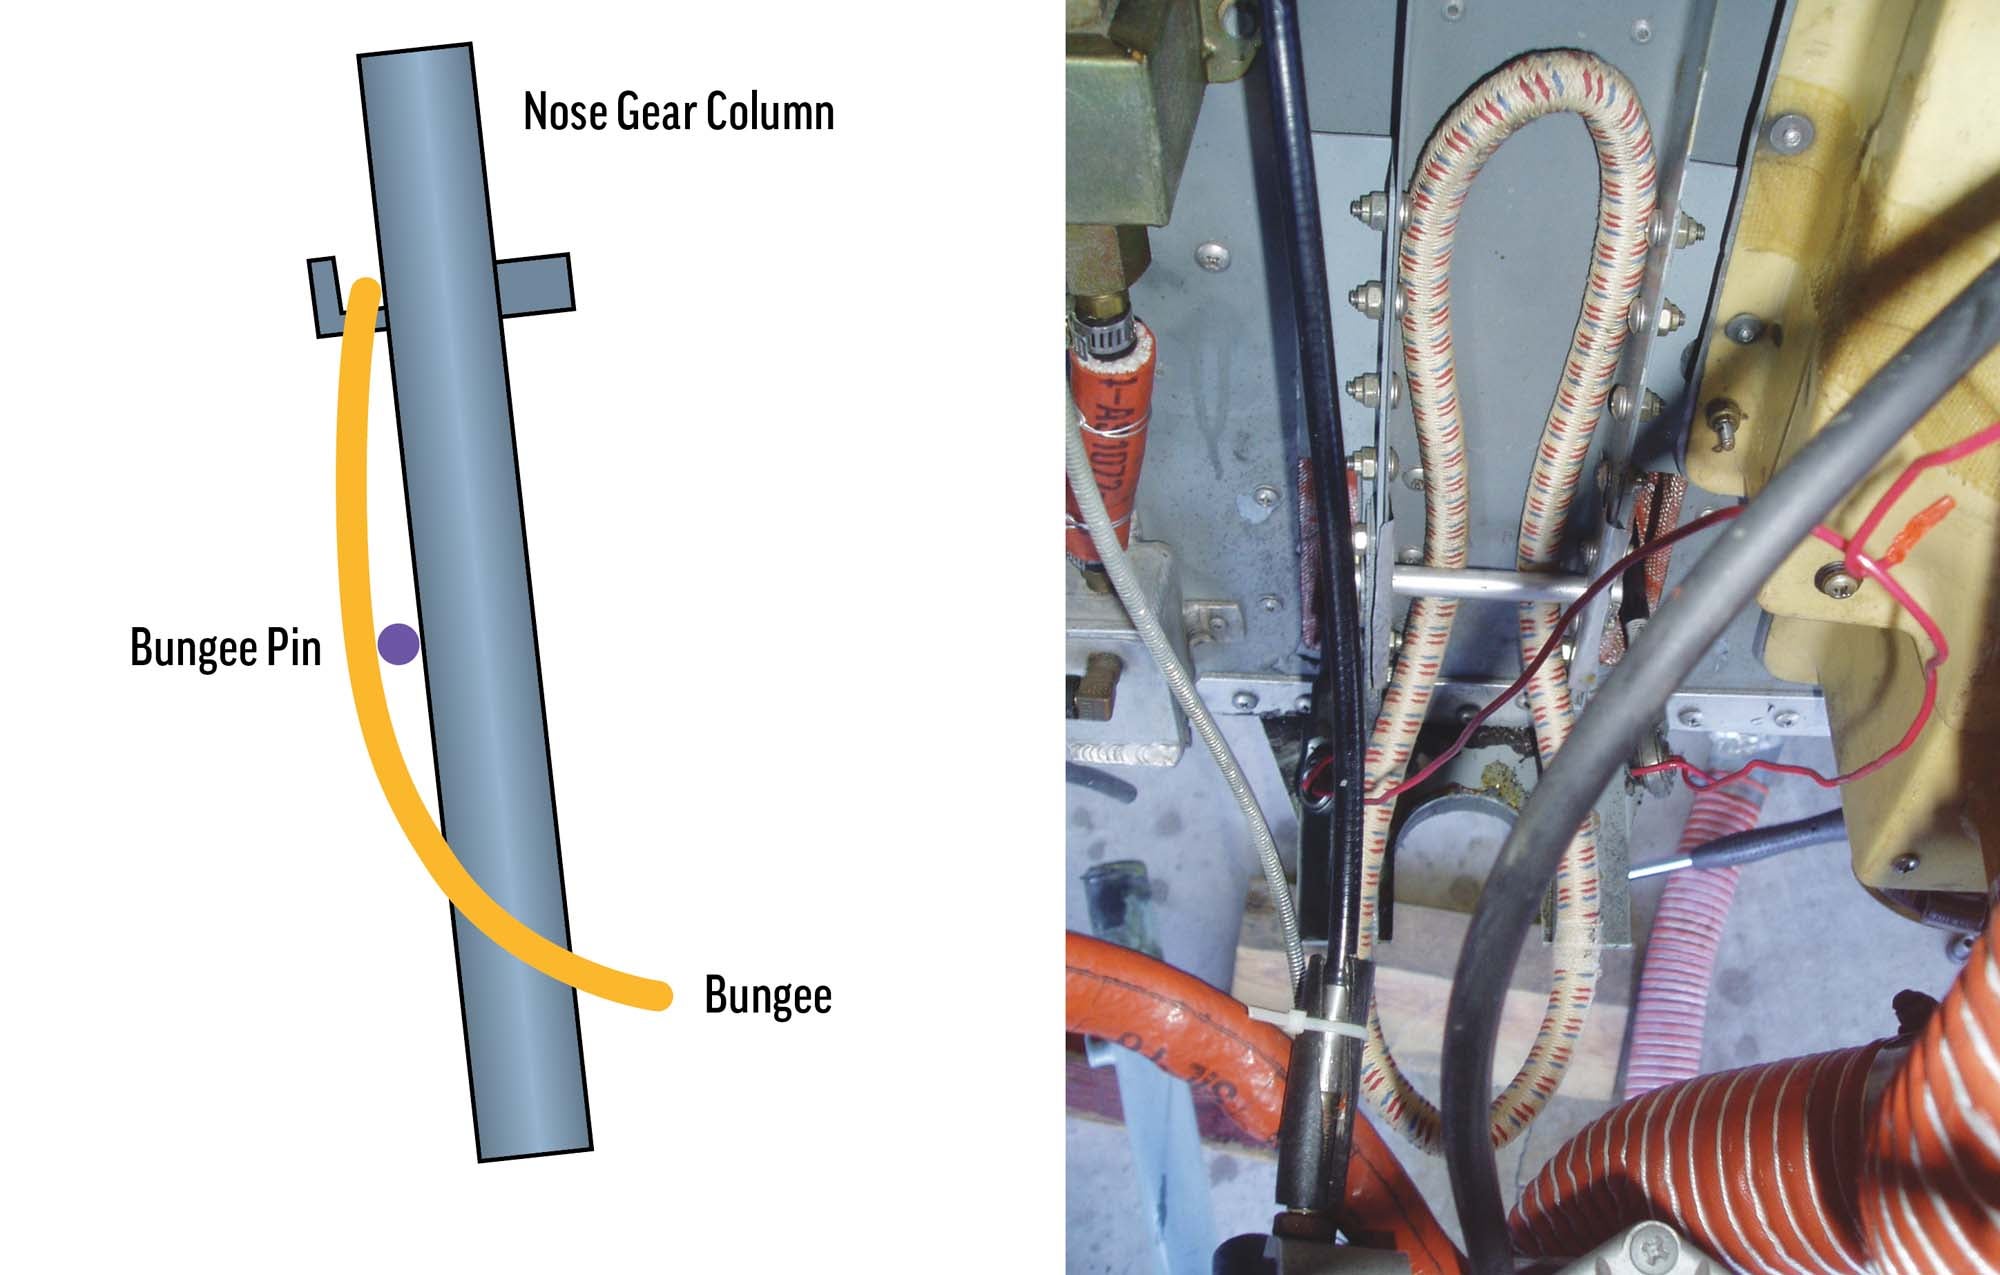
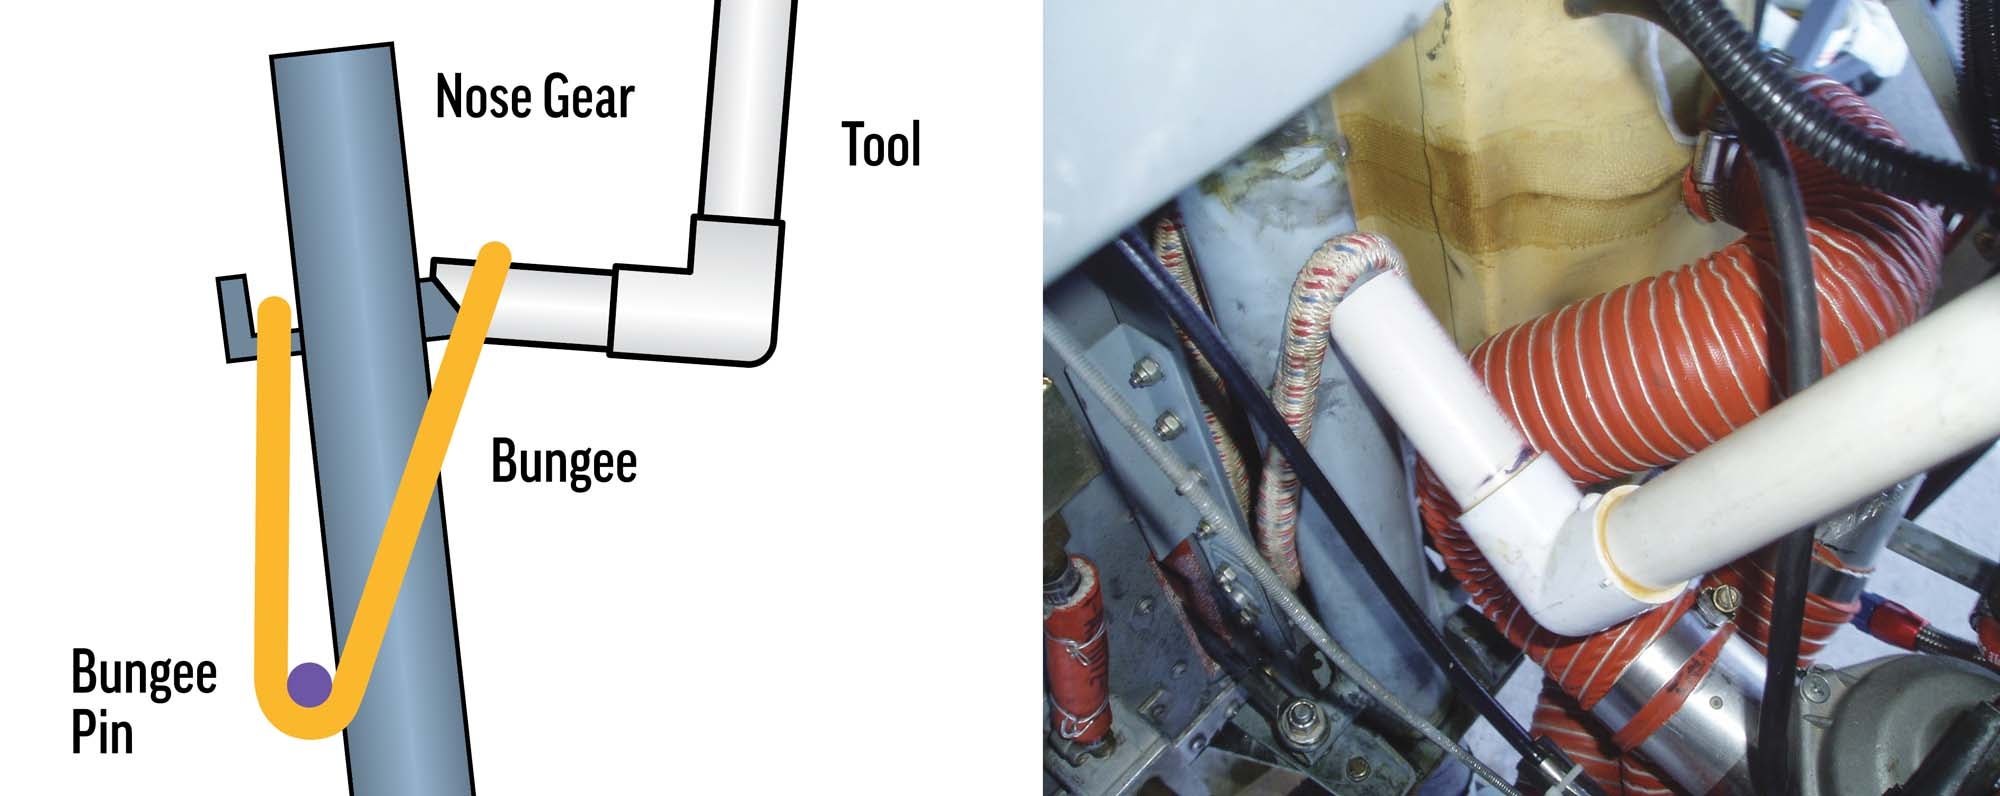
5. Push the new bungee about halfway up behind the bungee pin, which is behind the nose gear. Thread the nose gear column through the lower part of the bungee and through the top nose gear bearing while capturing the upper part of the bungee in the hook on the back side of the nose gear (Figure 2 and Photo 5).
protrusion on the nose gear (right).
6. Reinstall the bottom nose gear bearing pieces and the nose gear steering rods. Put the lower part of the bungee (now on the front side of the nose gear) on the tool you made (Photo 6). Position the tool over the protrusion on the front of the nose gear and lift on the tool (Figures 3 and 4).
7. With a little tug, the bungee will slide off the tool, which can then be removed (Photo 7).


 Wordless Workshop")


The Zenith bungee suspension system is ineffective. It makes the nose wheel very stiff to turn. There is an alternative that has been used by many people. Viking sells a spring nose gear that does an excellent job of keeping the nose up.
I have just completed modification of the main gear as well to a spring system. The dual bungee system on the mains is so stiff as too be unusable. The design of the wheel fork to the gear leg led to a failure and a wheel loss with a one wheel landing off the side of the runway.
There is no such thing as “can’t be improved”.
The homebuilding community is an example of this.
Unless you have one of the few Certified Zeniths convert to the Viking Spring and the problem is solve. it uses the same pick up points and is an easy conversion. Or convert to the new Strut with the rubber pucks.
N701TX has never been hard to steer. With a Jabiru 2200, lighter than the Rotax 912, a lesser strength bungee is in place.