The hydraulic brake systems on our homebuilt aircraft need to be filled with brake fluid before they can function. This process is often referred to as bleeding the brakes. Although this is a one-time procedure when the brakes are initially installed, there will be future occasions when we need to top off the system with replacement fluid. The process of bleeding has some variation depending on the brake manufacturer and configuration, but the principle is pretty much the same. Brake fluid needs to be injected into the lowest part of the system (typically the bleeder nipple on one of the brake calipers) and pumped to the top where the master reservoir is located. This pumping from the bottom helps air bubbles to propagate upward and out of the system to their highest point.
The equipment used by professional mechanics for brake bleeding can be a bit costly and somewhat complicated for the occasional use that we builders require. With creative selection of components, we can assemble our own satisfactory pumping apparatus that does the trick. Of course, always follow the manufacturer’s instructions for bleeding your brake system. What we will show here is a simple way to pump the brake fluid without using special equipment.
Three components are used to create the brake fluid pump: a simple high pressure oiling can with trigger (less than $10) and two short sections of tubing. The oiling can with trigger is a generic oiler that can be easily obtained (I purchased mine from Amazon for $8, search for “high-pressure oiler”). I recommend selecting one that is clear, so you can see what fluid is being used and how much is left at a glance. It should have a long spout, so we can slide a tube over it. The tube you choose should fit snuggly over the spout, the tighter the better. Plastic vinyl tubes can be obtained at your local hardware store. Simply try several until you find the best fit. My vinyl tubing turned out to be 3/8-inch OD with a -inch ID. Purchase a foot length of the tube; you can cut it later.
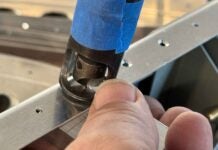
The biggest challenge is to now locate a piece of tubing that snugly fits over the brake bleeder nipple on your caliper. I found that the 1/4-inch nylon tubing used for brake and pitot lines (available from Aircraft Spruce) fit perfectly over my bleeder nipples with a secure, leak-free fit. It takes a good hard push to pop the tube over the nipple, but it will then stay on by itself and not leak while pumping. This nylon tubing has an OD of 1/4 inch, which fits perfectly inside the vinyl tubing. Getting the tubing sized properly is important; a fit that’s too loose will result in leaks and a mess you don’t need. Experiment with tubing sizes, starting with these recommendations, and once you have the right size, you are set for life!
With the tubing attached, simply open the bleeder nipple and commence pumping the oiler. It won’t take long to locate leaks in your tubing connections—slide them on farther to eliminate leaks. I witnessed one builder pumping so hard that the tubing continued to pop off the bleeder nipple and make a huge mess. You should not have to build that kind of pressure to bleed. It turned out that his reservoir cylinder was in a closed position from the brake pedal being partially applied and would not allow fluid travel. Once that problem was addressed, the fluid pumped without issue.
For about $10 of off-the-shelf components, you can bleed your brakes like the pros and save your money for other aviation essentials.


