The effect that COVID had on the homebuilt industry affected almost everyone. Parts, if you could get them, were often backordered for months—or years—and costs ballooned terribly. Glasair Sportsman and GlaStar builders were especially hit hard. While the shutdown of the company’s exalted Two Weeks to Taxi program garnered the headlines, DIY builders were orphaned indefinitely while the company regrouped for better days.
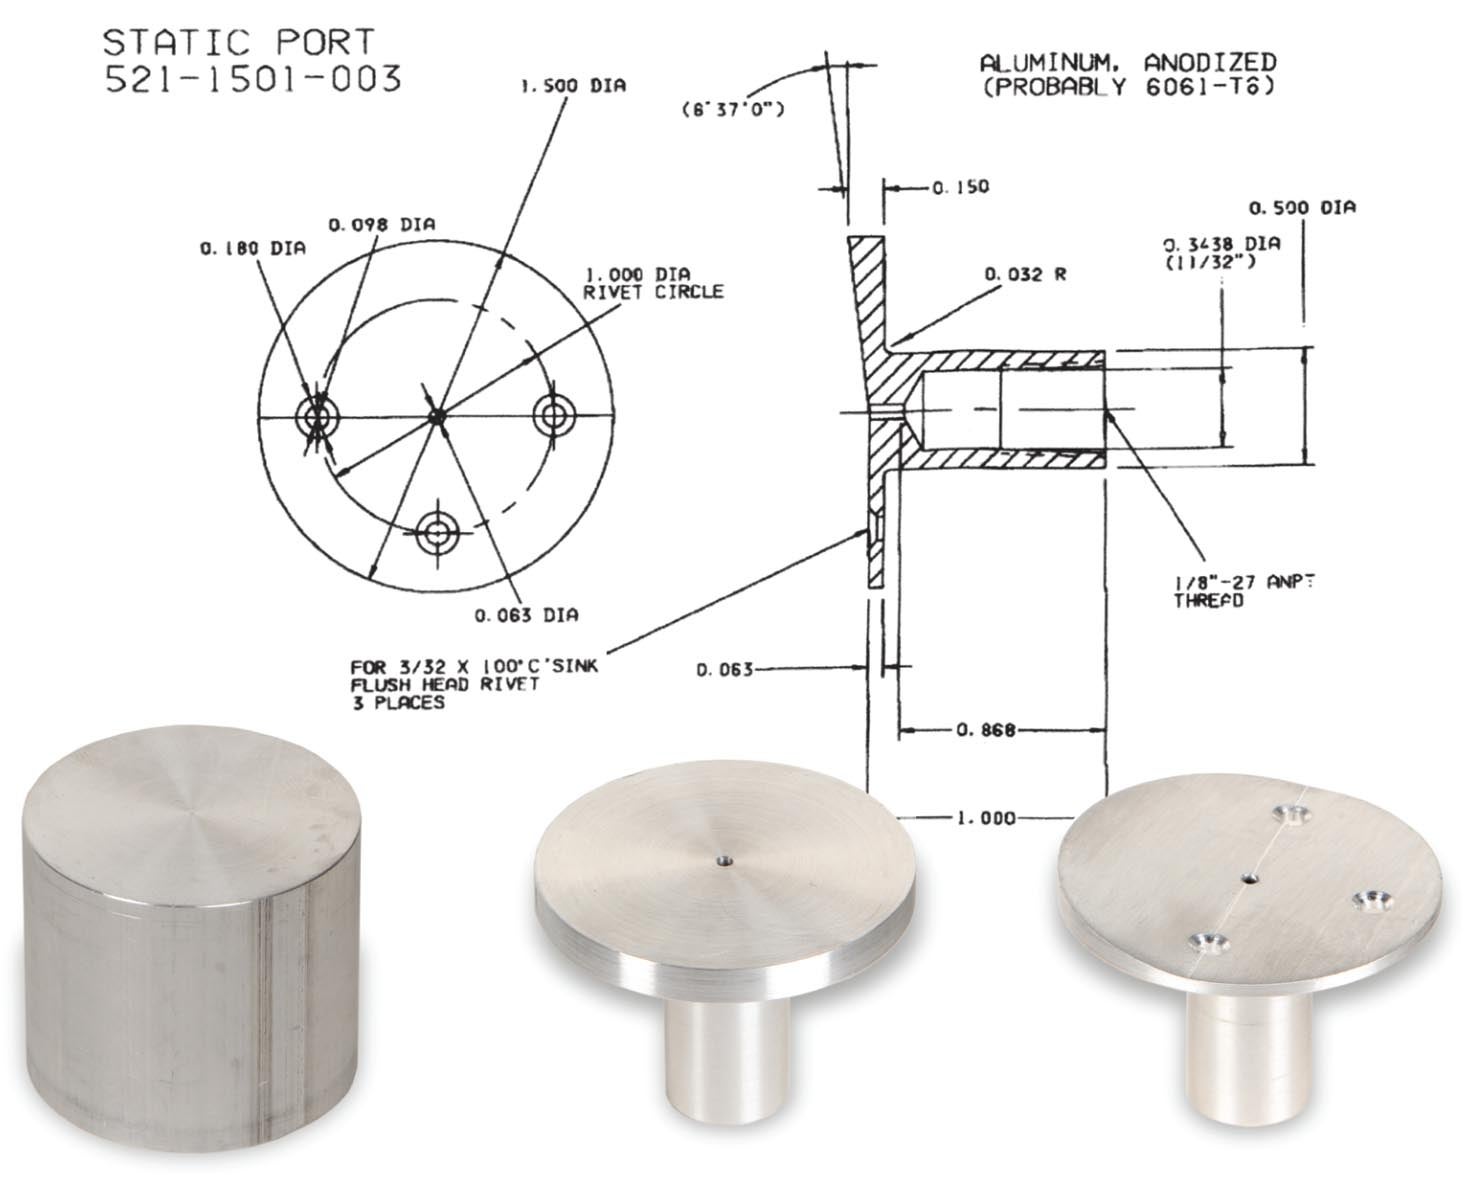
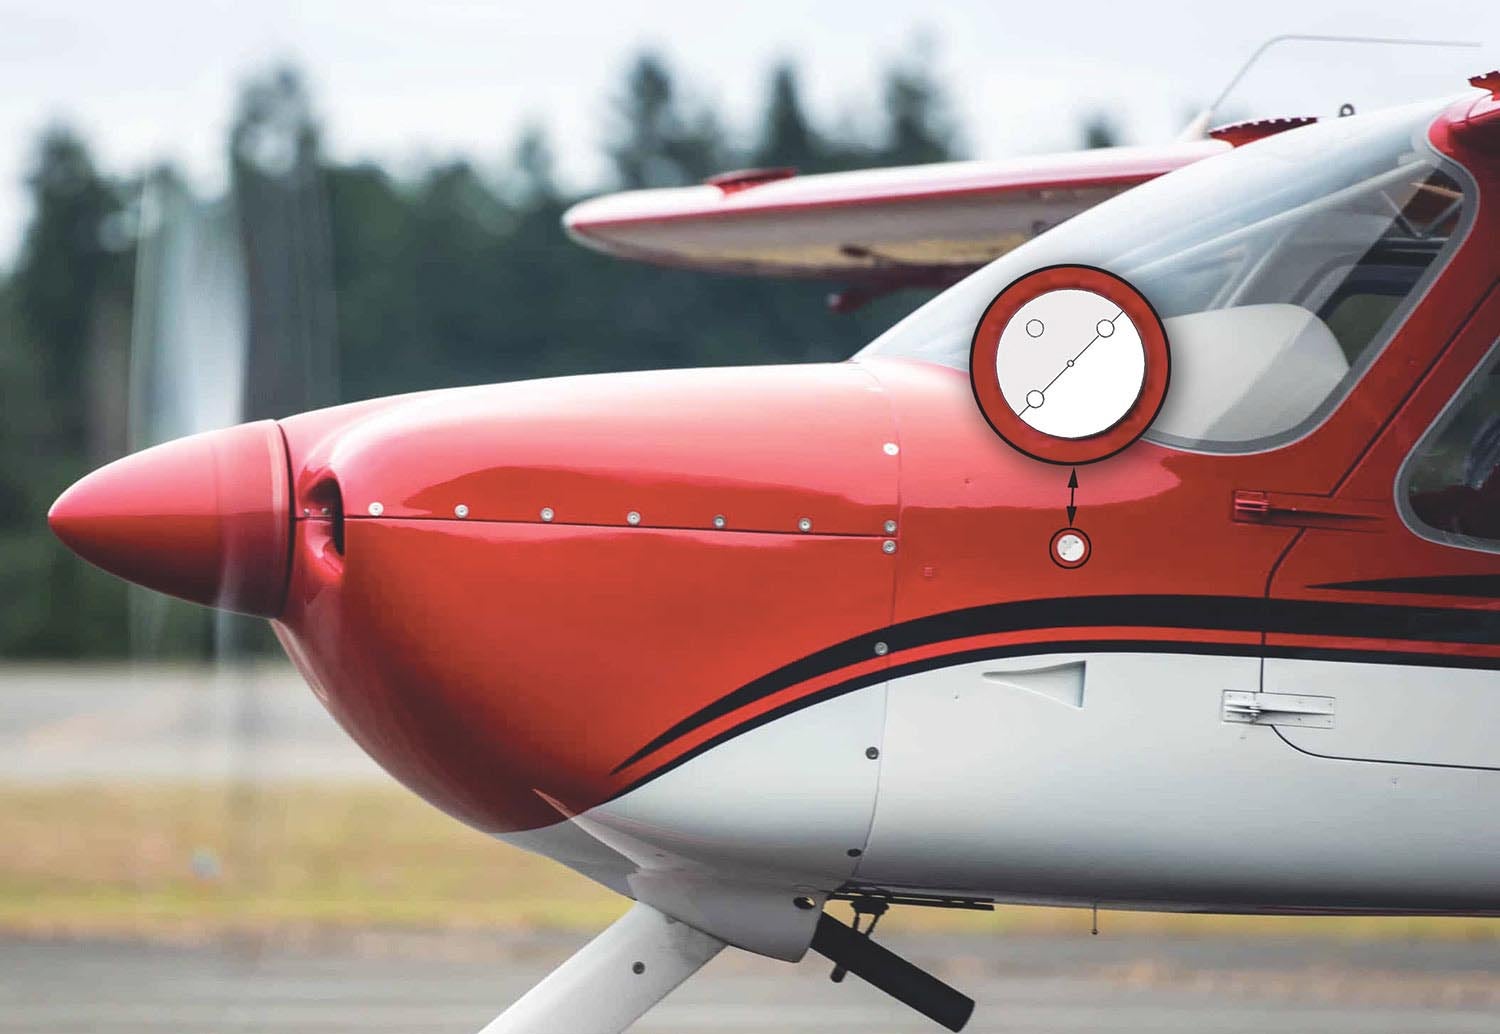
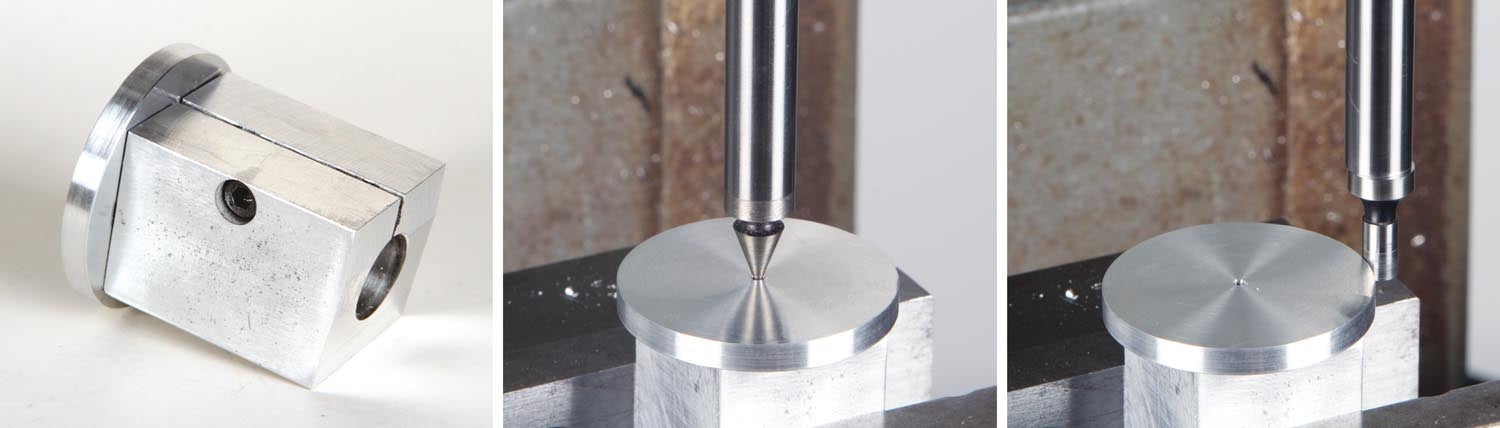
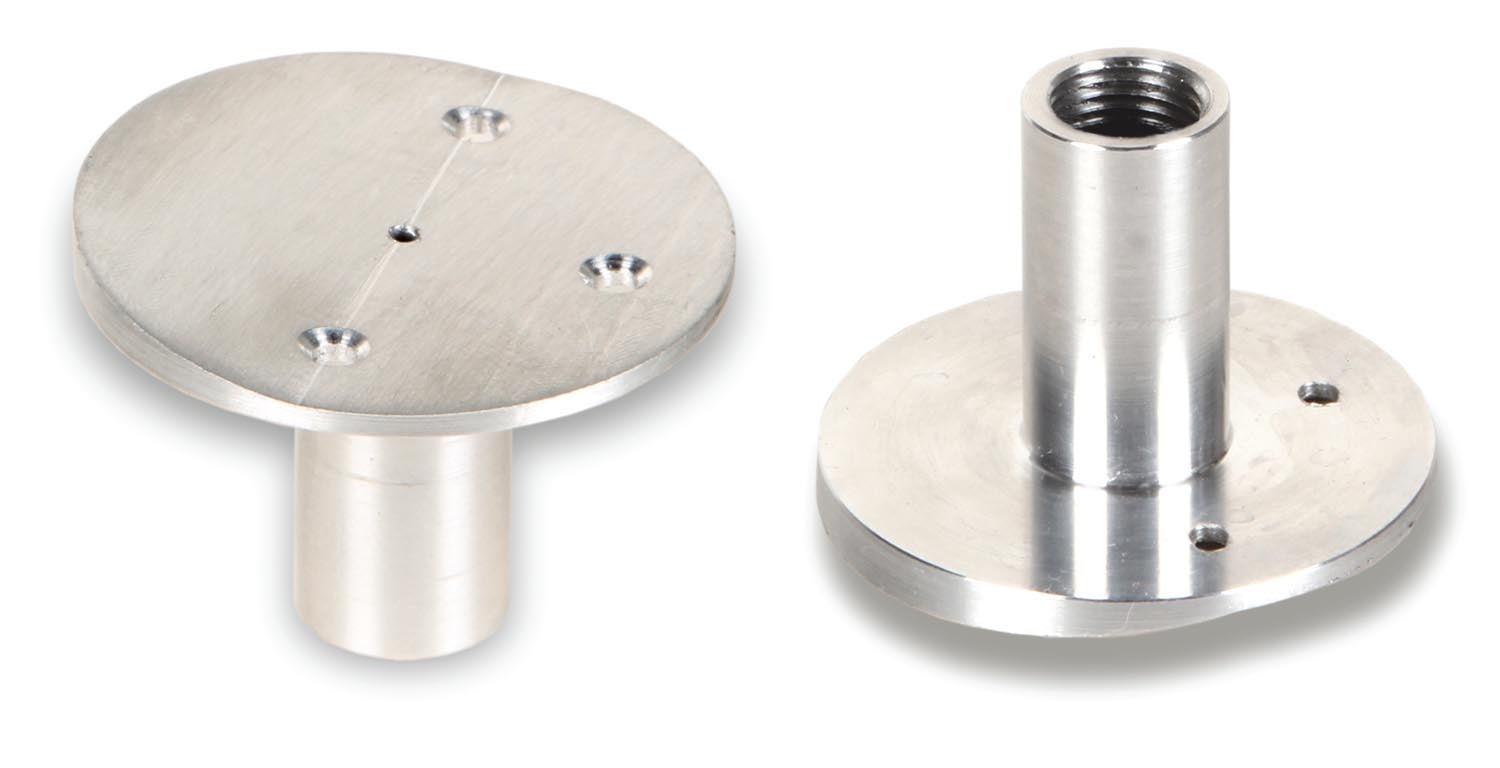
Sometime mid to late 2023, a thread emerged on the Glasair Owners’ group from builders seeking options for obtaining 521-1501-003 static ports. While most static ports are pretty basic—a flange with a small hole, or in the case of RVs, where a pop rivet (sans mandrel) replaces a bucked rivet—the Glasair design has a beveled segment that bisects the centerline of the port. This adds more than a minor complication to the machining process. According to a post by Arlo Reeves, “The shape was arrived at…after flight testing.” And so it was that this small and relatively unassuming little part was holding up progress for about two dozen builders.
Suggestions popped up for various solutions and one builder, Jan Detlefsen, even had a port 3D printed in aluminum. Eventually, builder Brian Hoffman from Michigan stepped in and offered to machine a batch based on a drawing that was derived from a factory part by another builder, Gus Gustavson.
In between all this, KITPLANES’ web editor, Omar Filipović, asked if I would be interested in looking at the part for a Home Shop Machinist column and (hint, hint) possibly make a few extras. I was happy to tackle the idea of how to make it in the home shop, but I am not set up for production. If it came down to it, I might have been persuaded to make a few for the most urgent in-need owners. But as it turned out, Brian offered to make as many as the community needed. Brian is what I call an “orphan part angel.” As those who got static ports from him know, the price he charged was a fraction of what the lowest-priced job shops wanted. So, basically, he did it for free (at least in terms of labor). If nothing else, it shows the value of having a solid owners group to support whatever kit you decide to build.
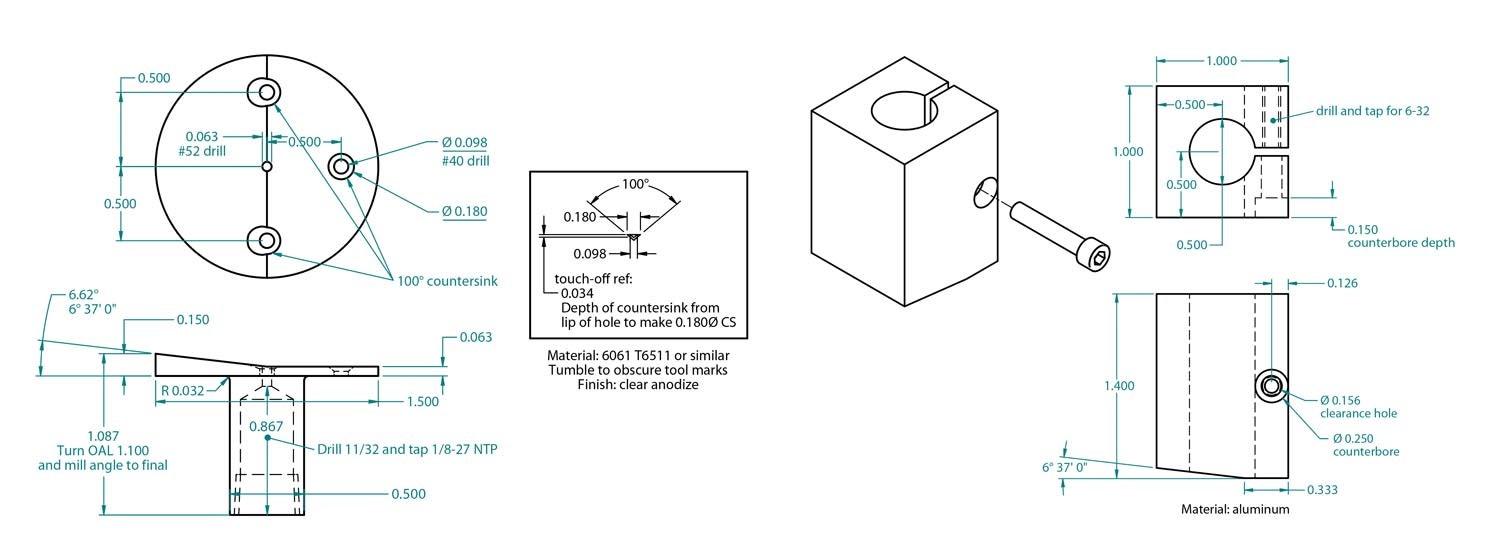
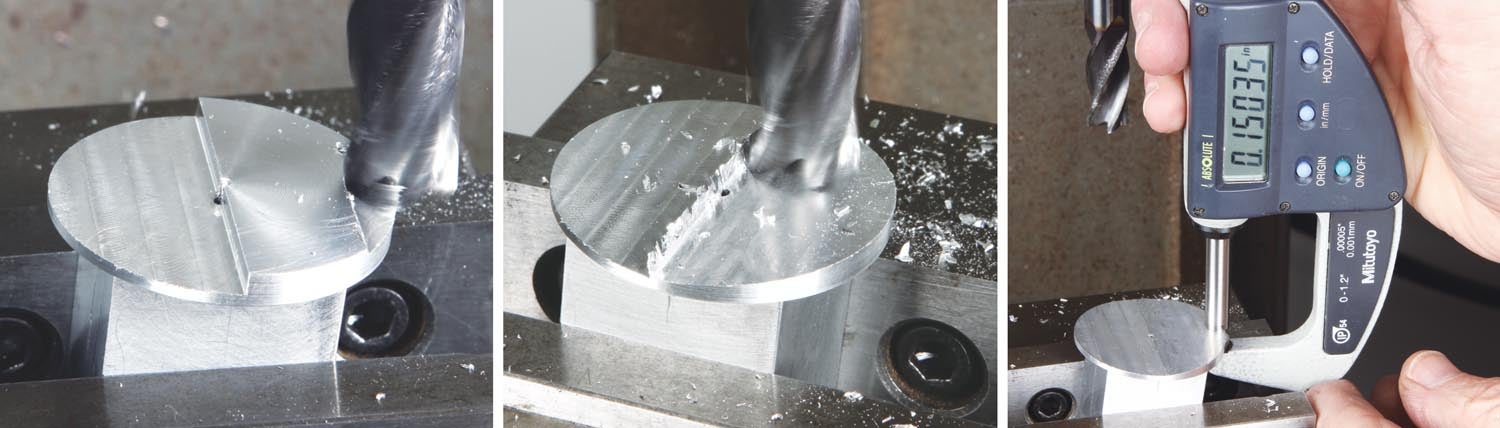
The challenge to making the static port was, as mentioned previously, machining the bevel per the dimensions in the Gustavson sketch. When you’re working from a sketch, where no tolerance limits are provided, it leaves no room for error! Machinists prefer to have engineering drawings over sketches. In other words, a drawing with not only the necessary dimensions, but general tolerances (except where noted to be higher or lower than the general tolerances), as well as specifications for edge treatments, surface roughness and finishing. So, when making a part or parts from a basic sketch like this, you need to take a few moments to think, Do I need to make this exactly like the sketch? Are the dimensions nominal (see sidebar below)? In the case of the Glasair pitot static port, the bevel feature is obviously critical. Why else would it be there?


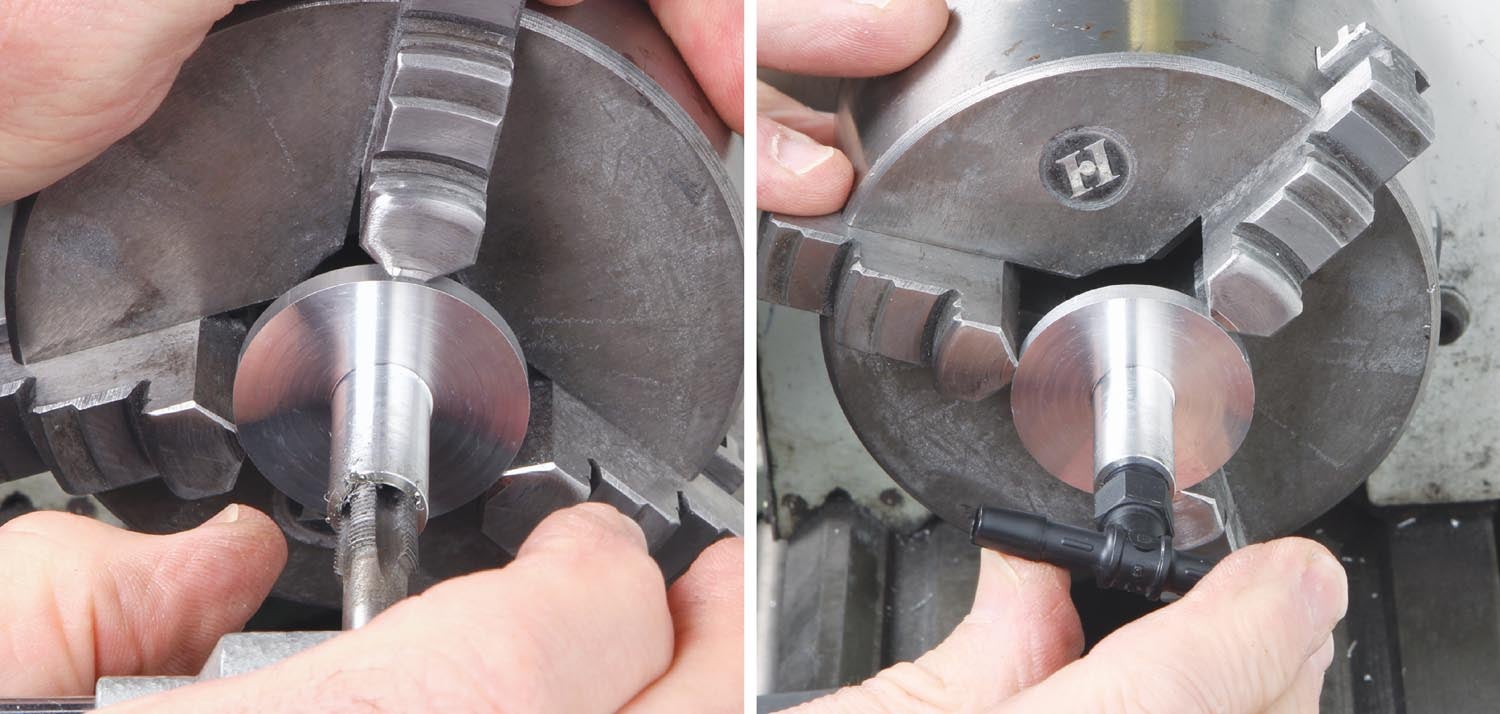
To get the bevel right, I spent some time making up a fixture block to clamp the part for milling the face. This solved two problems: how to hold a round part in a vise for milling and how to keep everything square.


 Wordless Workshop")


