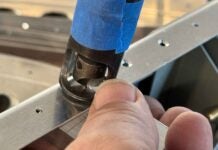
An example of a shop-made mill vise stop. Note the workpiece is set in the vise jaws using a set of parallels.
Although the title might suggest it, this is not about parallel parking, speeding tickets, or driving of any kind. This is about basic, but essential, everyday shop accessories: parallels, work stops, and travel limiters.
A work stop can be any number of accessories or methods used to position a part or tool. A mill vise stop is the most basic example. It’s usually in the form of two small jaws that grip the top edge of one vise jaw. It’s used as a backstop to locate parts for repetitious tasks or for repositioning work in process. They’re used to save time resetting zero or edge finding every time you return a piece to the mill for repeat—or additional—operations.
The carriage stop on the lathe is another type of work stop. But instead of positioning the workpiece, it’s used as a travel limiter for the lathe carriage. This can be very useful when making multiple passes to a square shoulder—such as reducing the end of a large shaft for a bearing. While most industrial-grade lathes come with a carriage stop, many small home shop and benchtop lathes omit them to lower the cost. This is only a minor annoyance since making one to custom fit your machine is an easy DIY project.
Parallels are another form of work stop. Parallels are sold in matched pairs, usually in sets. They are precision ground, three to six inches long, and usually 1/8-inch thick. They are used primarily in pairs, and on edge, to elevate parts in a vise to facilitate milling operations. But they can also be used lying flat as shims or as gauge blocks for marking or measuring.
This factory-supplied carriage stop features a graduated dial to fine tune the stop adjustment. Two screws on the bottom face clamp it to the lathe bed.
This is an example of a shop-made carriage stop for the author’s 8×14 bench lathe. Note the “fine-position” screw adjuster. It clamps to the lathe bed with two screws from the top. The counterbores tend to get clogged with swarf, so a better design would be to have the screws tighten from the bottom.
Most large milling machines have X-axis (left and right) travel stops. They’re typically just a bolt with a bushing, one on the left and one on the right, in the T-slot on the front of the mill table. The stop itself is a tang bolted on the center of the saddle. You simply position the bolts where you want to limit the table travel and tighten them. They have to be tight because the hand wheel is capable of exerting a lot of force to move the table. You can easily scoot them out of position if they’re not tight enough.
This set of three-inch-long parallels are ideal for a mini-mill. They start at inch tall and go up to 15/8 inch tall, in 1/8-inch increments.
My mini-mill does not have travel stops, so when I need to repeatedly traverse to a set point, I simply put a piece of masking tape on the front of the table where it lines up with the edge of the saddle. It’s not precision by any means, so I use it as a “move to about here” reference line, then go the last few thousandths to the required position on the hand wheel dial. Like a lot of things in the home shop, you sometimes have to use your imagination to get from A to B, or to go from A to stop at B, as the case may be.
Parallels allow you to quickly position parts for milling with assurance that the milled surface will be on a plane parallel to the mill table. The various heights provide flexibility to clamp parts for the task at hand. Shown here, a sliding T-nut for a custom iPad mount.
Close-up view of the X-axis travel limiters typical of most milling machines. You simply slide them to where you want them and tighten the nuts to fix them in place.
The mini-mill also comes with a rather robust Z-axis (up and down) stop. It clamps on to the dovetails using a floating jaw, similar to a gib, with a setscrew. Since the head moves up and down on the mini-mill for both drilling and milling (on larger mills the knee moves and the head is stationary), it can have a tendency to creep out of position when set for milling. The head does have a friction lock, but it’s not particularly effective, so the travel stop is provided to stabilize the head when milling.
The mini-mill doesn’t have X-axis stops, so the next best thing is making a line on masking tape to represent the “close to” position, then crank the last few thousandths to a precision stop using the numbers on the hand dial.


