One of the interesting things about the Subsonex kit is that it is easy to skip around from one task to another as you’re building. If I get tired of attaching piano hinges for control surfaces for instance, I can jump over to installing the oxygen system. Exhausted by working down in a footwell to install a ruder pedal? Time to go work on the fuel system!
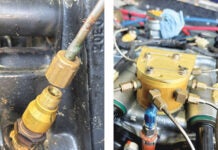
And one of the neat things about the jet is the simplicity of the fuel system. The big fuel tank behind the seat feeds a header tank via dual, parallel pumps. Then there is a fuel line that goes from the header tank, through a filter, an electric shutoff valve (controlled by the FADEC computer), and the fuel flow cube, then into the engine. The components all attach in a line, and you only make two fuel lines. Aside from working in a very tight space, its a piece of cake, as both of the lines you have to make are pretty simple, geometrically. The only trick is getting the length perfect, considering that you have to allow for the flare… but each have a little bit of S-curve in them, which allows you to fudge that length a touch. It all works out in the end.

Sonex has done a great job of including every fitting that you need from the fuel cap to the engine inlet–I haven’t had to dip into my shop supplies of AN fittings even once for this job (something which I consider normal for most projects). With most kit aircraft, the builder has considerable leeway and choice in power plants and components–but the fact that there is only one option in power for this little bird means that it is easy for them to kit exactly what you need!

Now… back to those control surface hinges… and it looks like the weather is clearing–maybe we can actually get some air time for a change!


