 As I said last month at the start of the “Eating the Elephant” series, this isn’t a series about how to drill holes or hold a Cleco plier. It’s a guide, from an experienced builder, about how to think about the build and, perhaps, offer ways to push through actual and perceived roadblocks. Because they’re inevitable in every build.
Probably like you, I hate backing up, turning around and undoing things that I had to work hard to do in the first place. It seems like a waste of effort, maybe a little bit of an admission that you made a mistake or forgot something. But when you build an airplane, it’s just a part of the process. That’s true whatever the material—metal, composites, tube and fabric.
No matter what part you’re working on, you’re almost certainly going to do it and then undo it. You’ll clamp things together, drill holes and insert Clecos to hold the parts together. Then you are going to remove the Clecos, pull the pieces apart and debur the holes. Then you’ll dimple them—and Cleco them back together.

Ready to rivet? Not so fast! Never rivet until you have no other choice, because you will likely discover that you forget to add those nut plates that will be inaccessible once the parts are permanently joined. Let me reiterate that: Do not rush ahead to the riveting. Pause, think about it, be doubly sure there’s nothing else you could do to that part before driving and pulling rivets. Again, this mindset applies to composite and tube-and-fabric aircraft as well as metal designs—only the processes and terminology change.
What is permanent? Nothing! I have drilled out a lot of rivets in my life—rivets that I thought were permanent—but it turned out they blocked access to something else that needed to be added. And sometimes you finish up a component at the end of a work session, sleep on it—and tear it apart the next time you are in the shop because you realized you could do it better. I’ll probably say this more than once in this series: This is not failure. This is intelligence, this is reality.
It’s actually progress even if it doesn’t feel like it.
Disassembly is something you have to come to grips with—and I know it’s hard, because I still don’t like it after all the time I’ve spent in the shop. If you’re building an airplane from a mature, well-proven kit with excellent instructions and you are building exactly as the plans show, then you might get away with less disassembly—at least the kind that comes from feeling your way through a new process or design. But it’s still going to happen simply because of the process of cutting, then trying the fit, then taking it apart to refine the fit. Many metal aircraft are reaching the point where all the holes are prepunched and the parts fit to within a thousandth of an inch, which is amazing. But even those excellent kits will have you trying and fitting in a few spots.
A Real-World Example
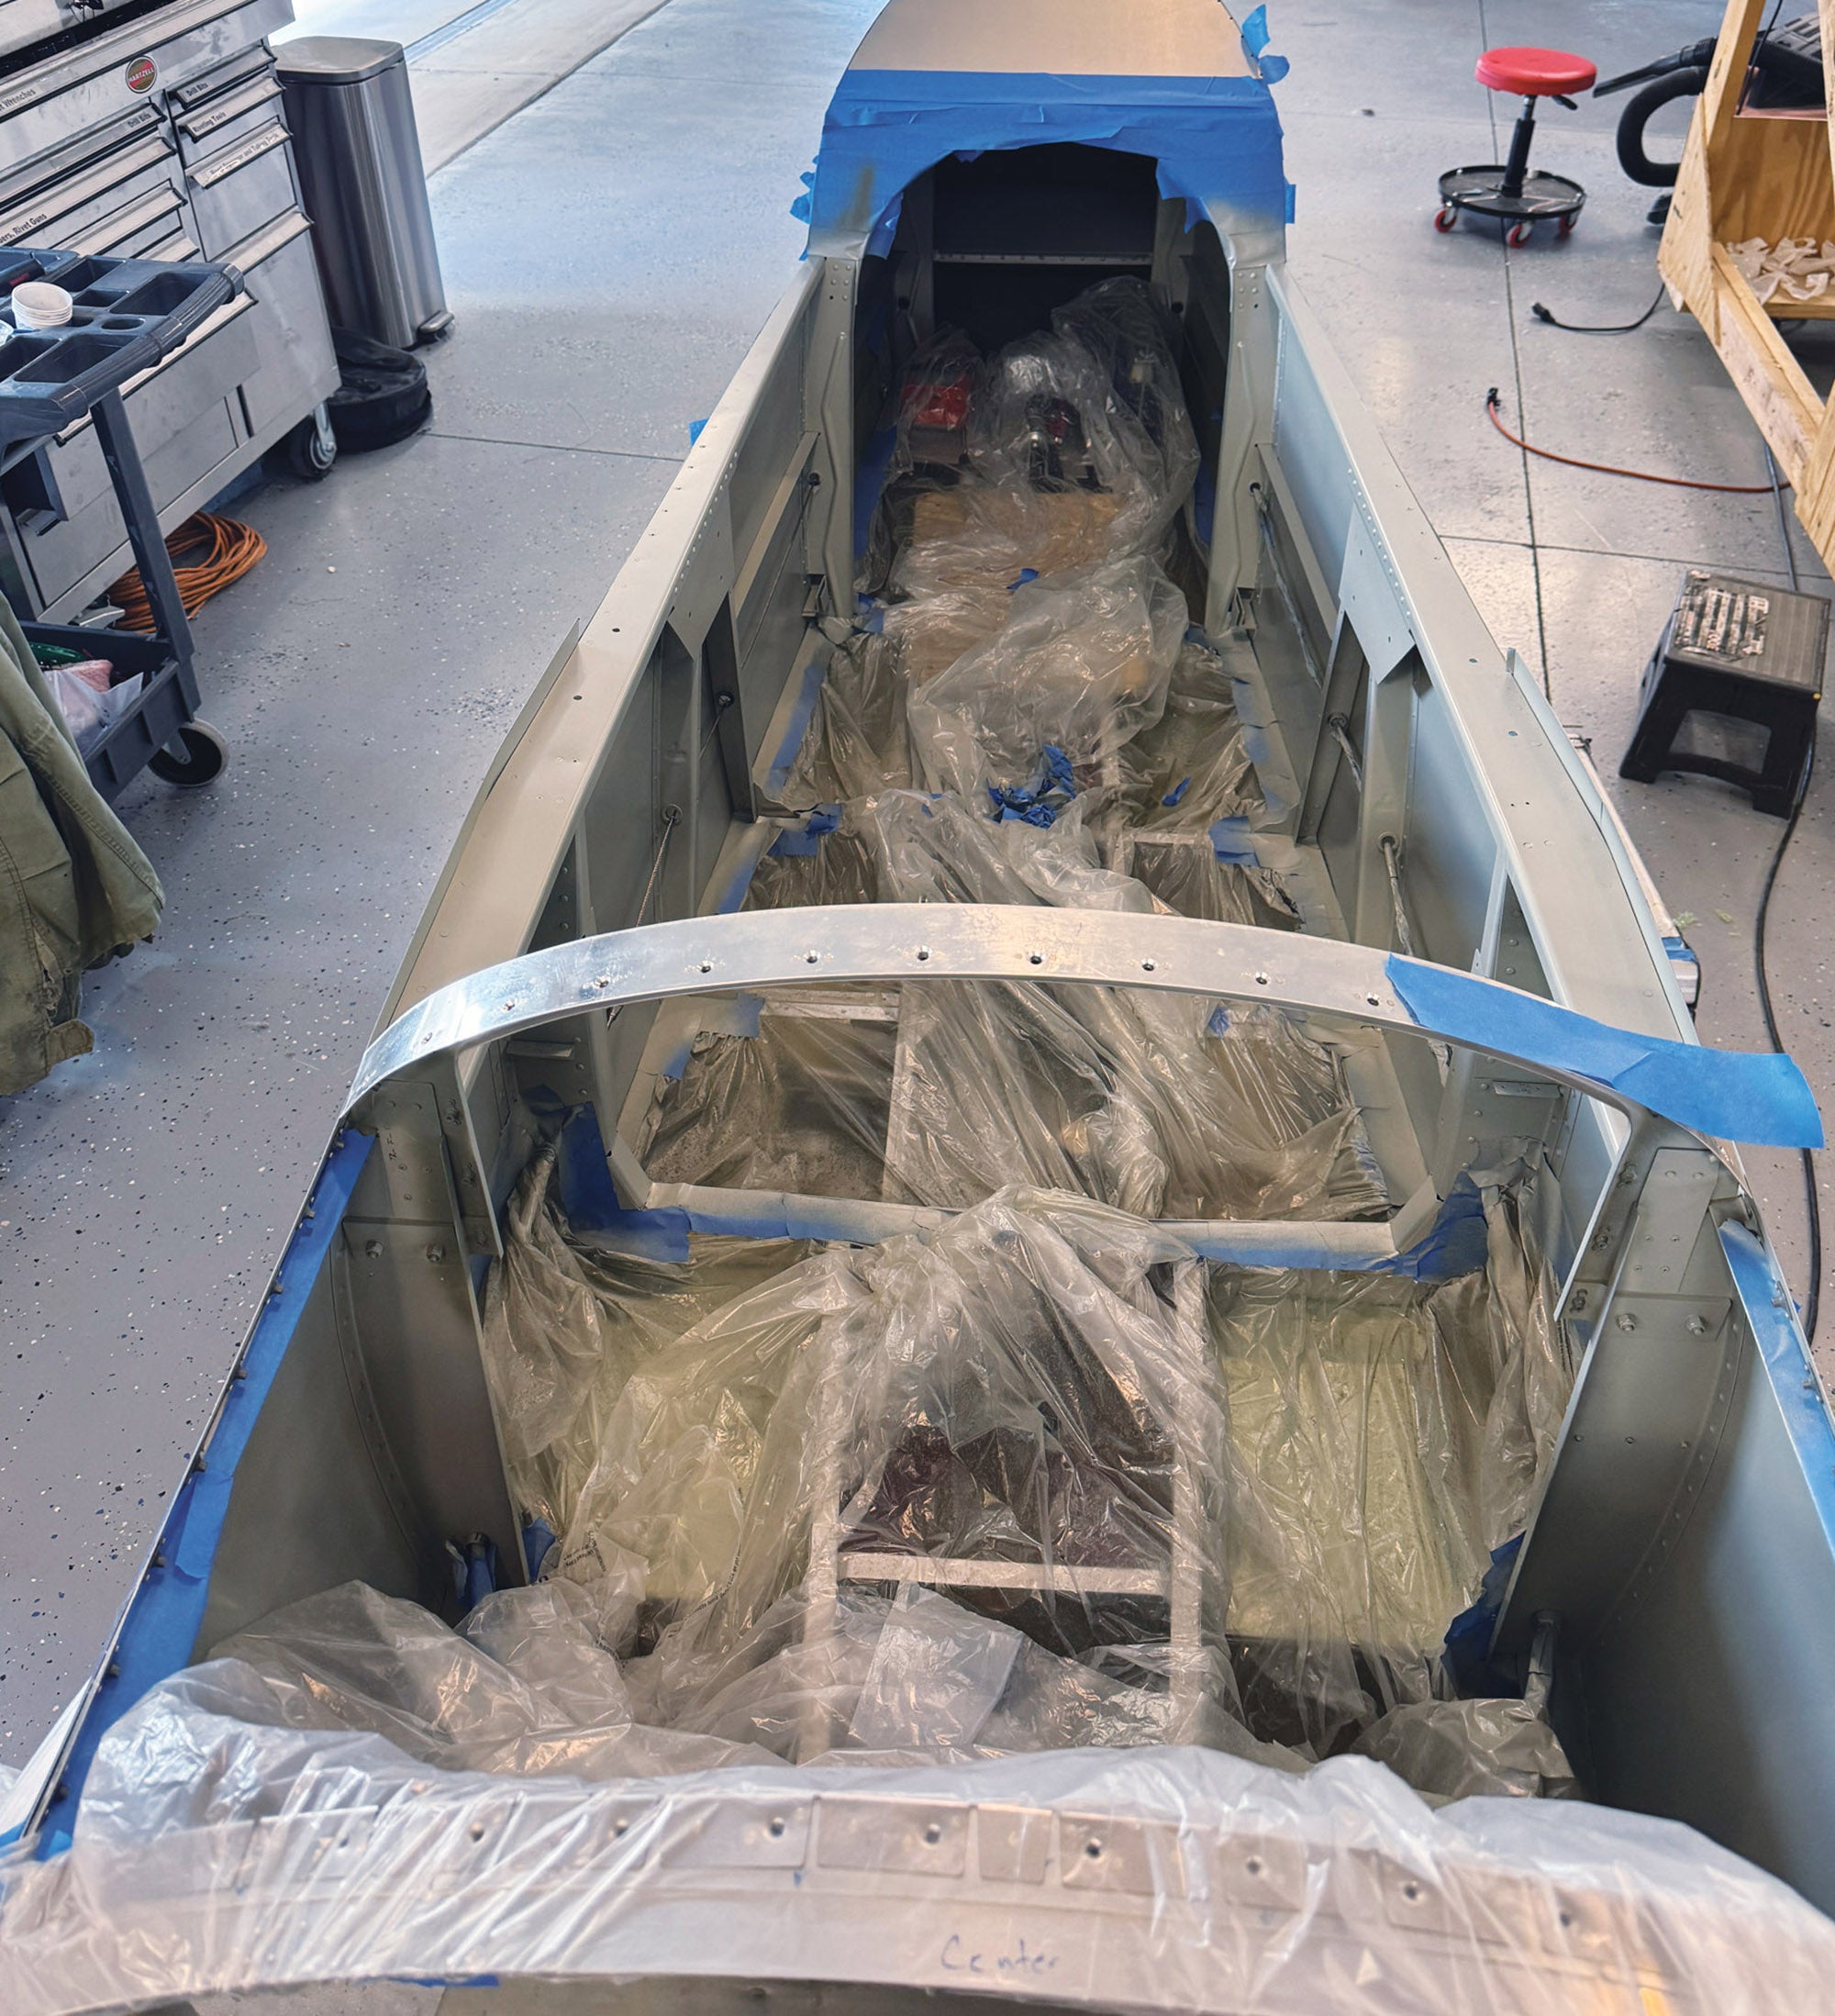
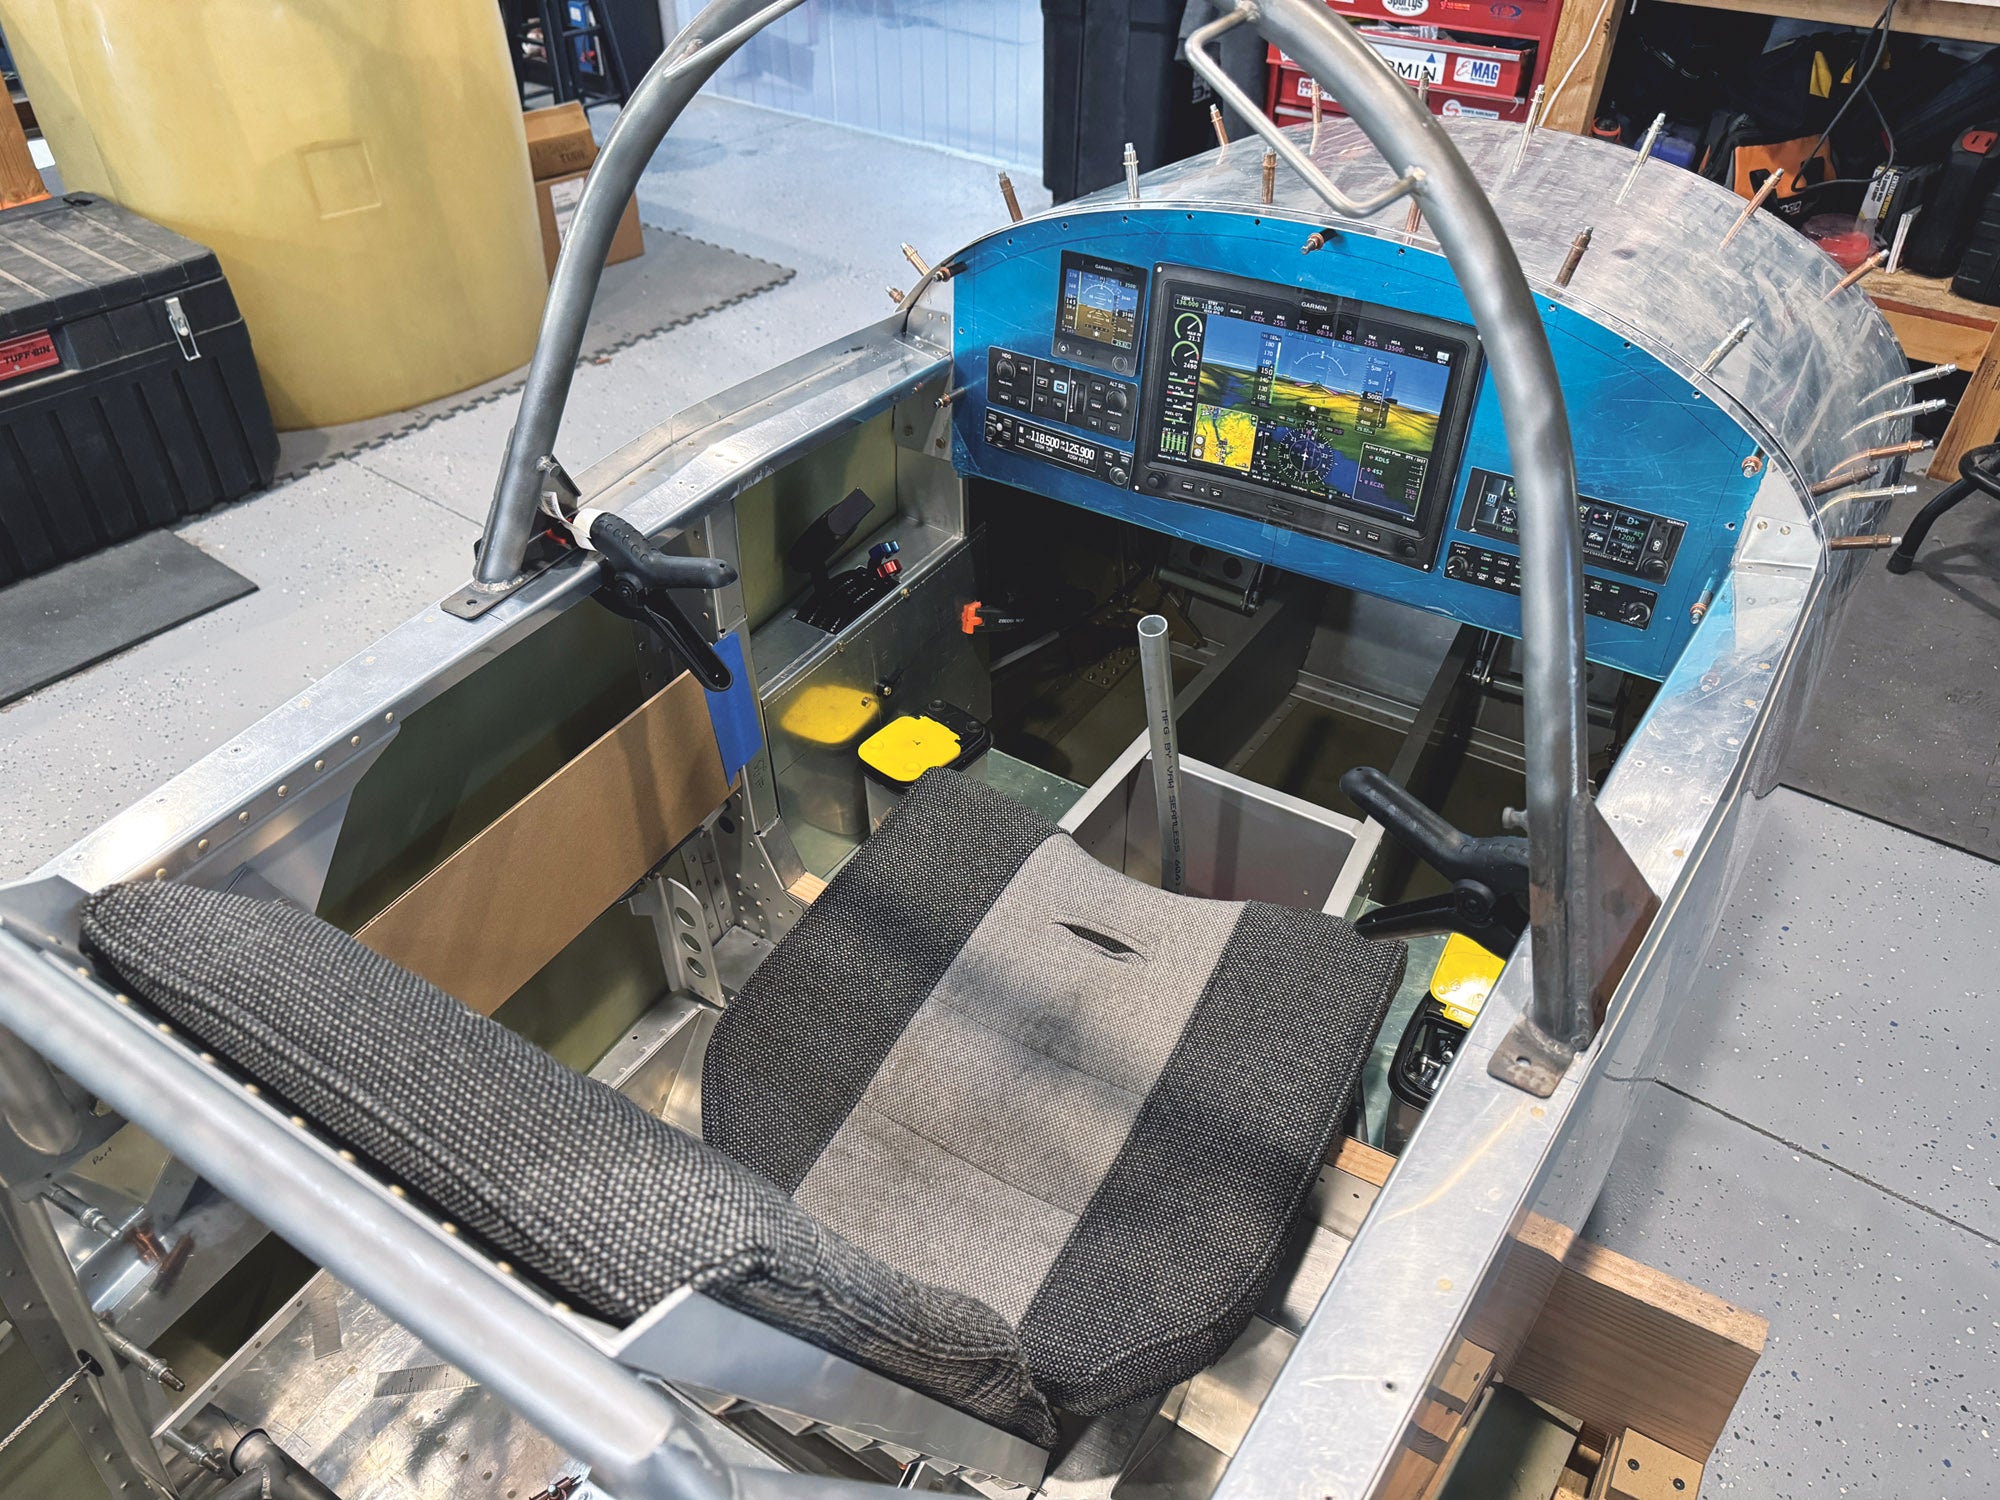
In the F1 Rocket I’m currently building, the interior is a blank canvas, which is a blessing (if you like a custom interior) or a curse (if you just want to build and have all the design work done for you). What that means is that you have floor panels and flight controls defined and cut for you—but the interior of the cockpit is simply the inside of the skins and the bulkheads, stringers and rivets.
That’s perfect for a minimalist who wants to build as light as possible—add some seat cushions, build a panel, mount a throttle and go fly. But I love doing cockpit design. For me that’s about pilot utility—not where the cup holders go. I do think about control and switch placement, where the avionics are put, how the panel looks—and I like storage so that everything has a place.
I began the Rocket project doing the normal trimming, drilling and fitting of the floor panels and baggage compartment panels. I then started adding side panels for storage. This involves a lot of cutting out “paper dolls” from heavy stock to come up with the basic sizes of panels, then transferring those to aluminum when you have them about right. More trimming follows until the angles and edges match perfectly. But all this trial and error means assembly and disassembly. You drill as few holes as possible to place Clecos to hold things together—and taking them back out is frustrating, even though you know going in that this is going to take many iterations.
Each panel that gets added needs to be thought out to make sure it doesn’t interfere with something else. But eventually I had pockets on either side of the pilot for all the loose stuff that accumulates when you use an airplane for travel. I also built armrests for the back seat, which will act as a mounting point for a rear-seat throttle and probably have some storage as well.
I built the seatbacks early in the process so that I could put them in place and sit in the cockpit to try the fit of the pockets and armrests early—an essential practice when customizing an interior. Without seat cushions, it can be a bit of a WAG. I have an RV-8 sitting in the shop maintenance bay just 10 feet away. It’s more or less an underpowered Rocket, so the seat cushions serve as temporary seats for the Rocket when needed.
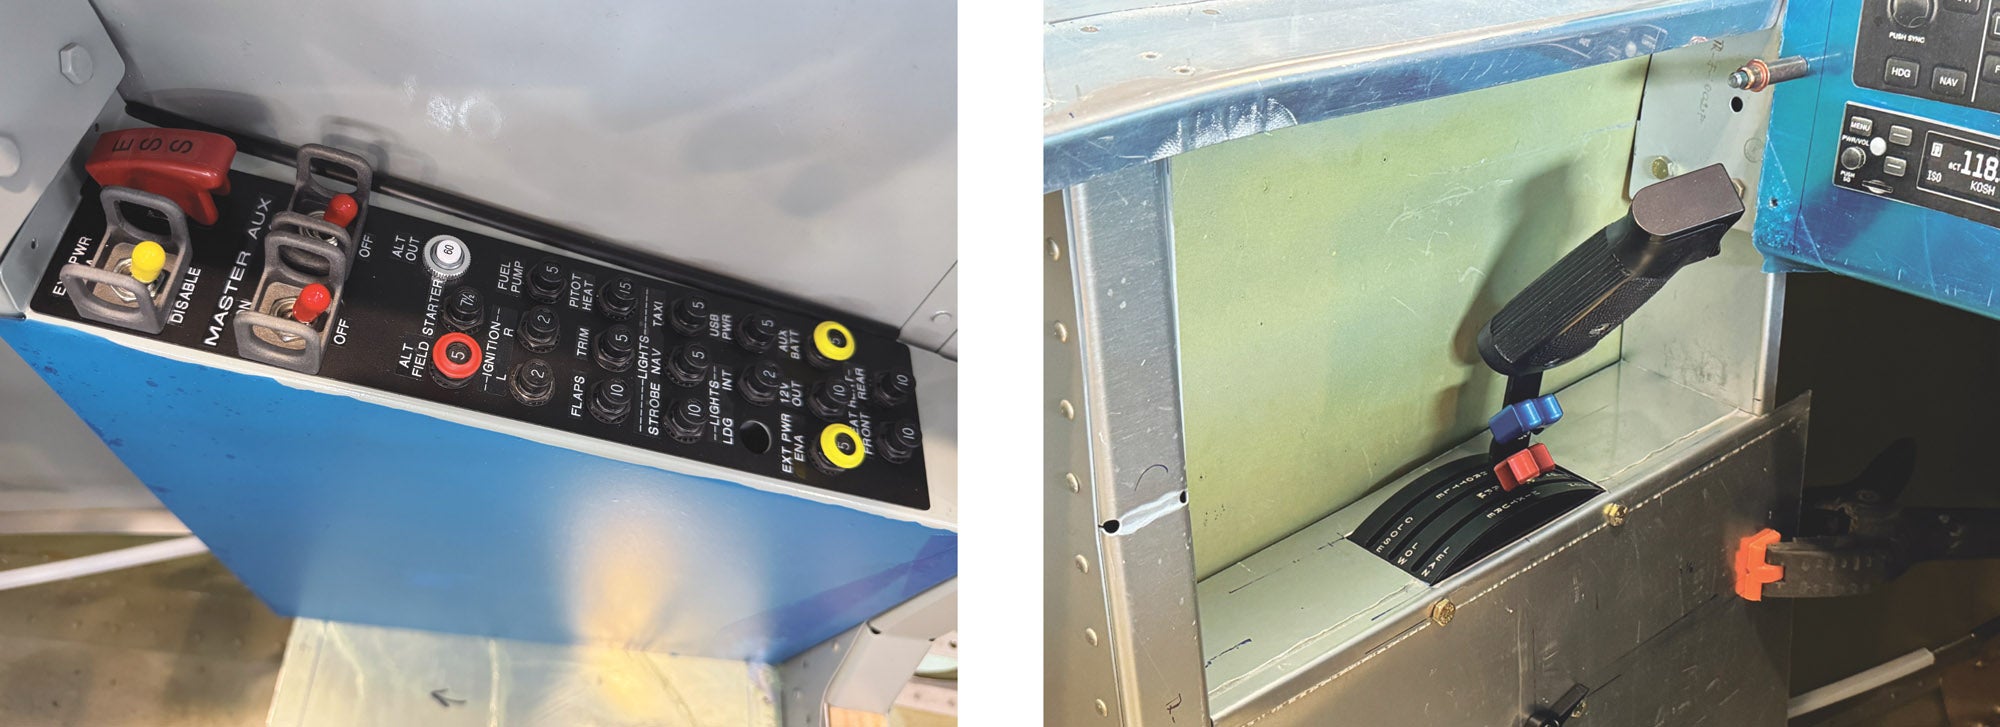
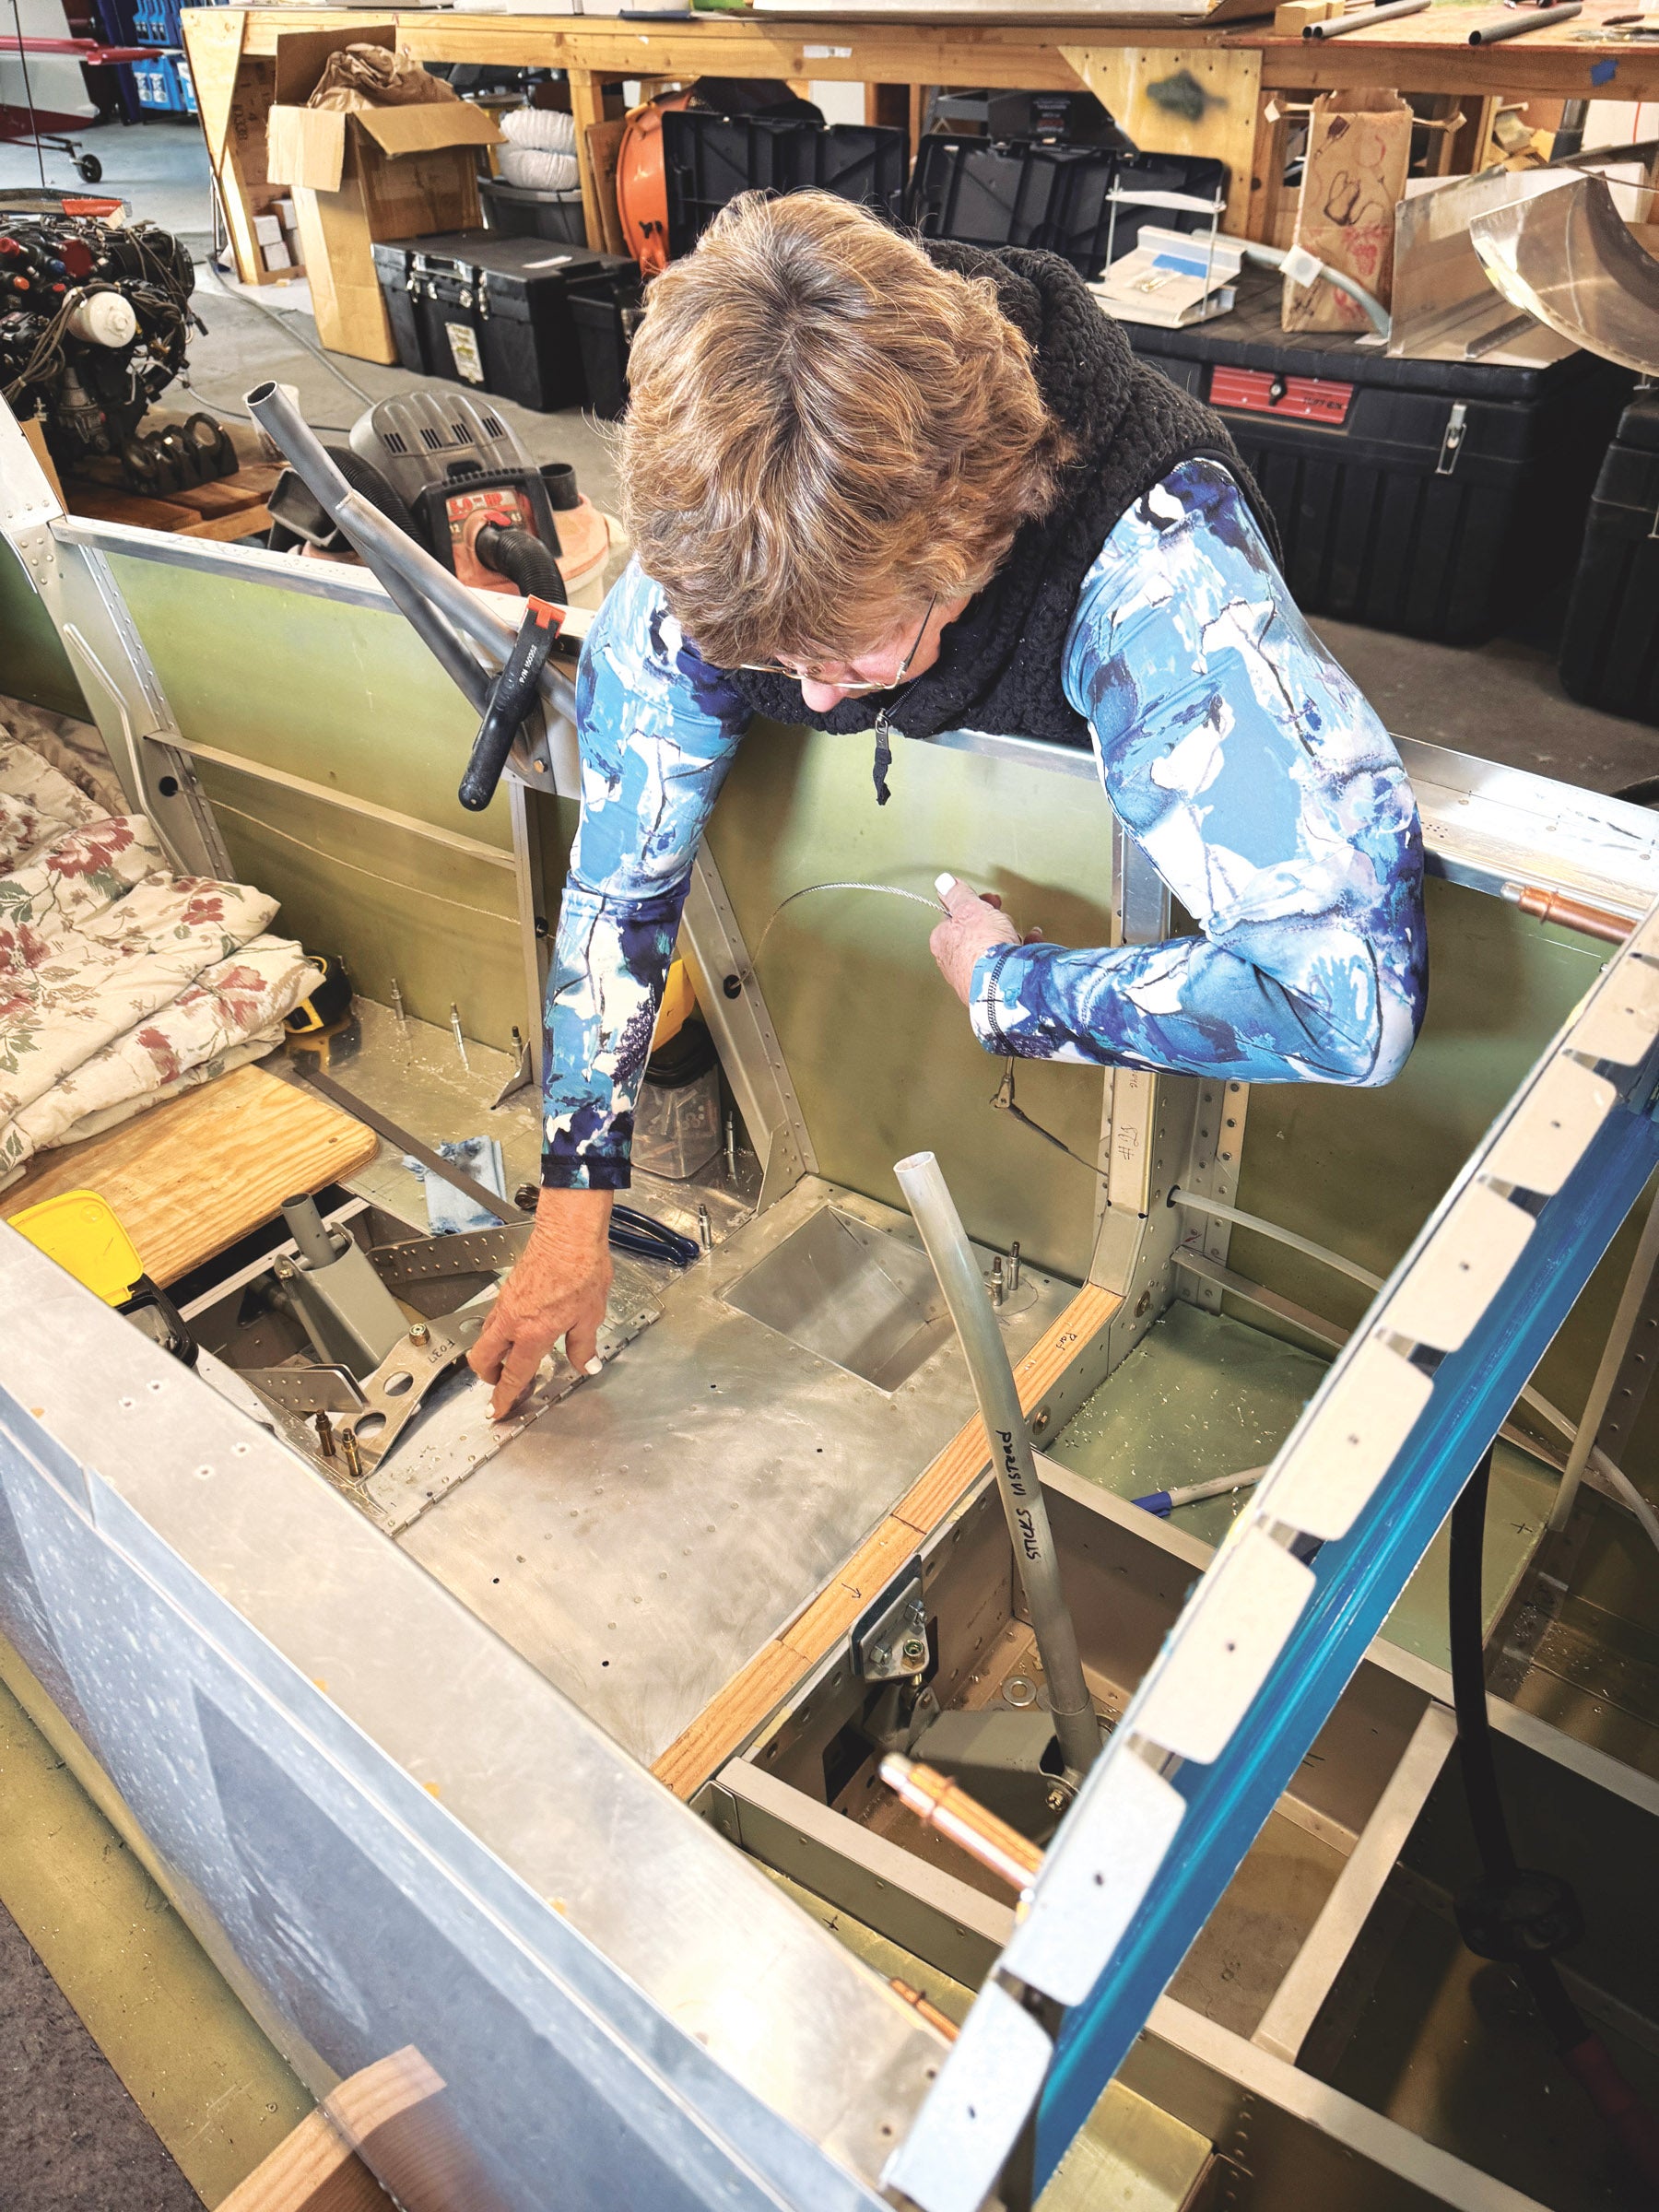
So the cockpit took shape. Eventually I had a reasonable design—which all had to come out to start running wires. I’m not exactly known for simple, Cub-like electrical systems and avionics, so I have endless wires to add. Trust me on this: It’s a lot easier to wire when the “canoe” is more open and sitting on the floor (or on a rotisserie).
The thing is, to run many of the wires, the floor has to come out. And that means I can’t sit in it until the floor goes back in. The floor is several pieces, and since the structural component that holds the rear of the control column in place sits on top of the floor, the sticks have to be unbolted when the floor comes out. So instead of a cockpit that you can sit in and make airplane noises, you go back to having essentially the same quickbuild fuselage that came off the truck. Months of work disappears onto storage shelves.
I honestly find myself stalking around the project for an entire work session (or two or three) looking for little things to do instead of taking all that stuff out. It’s just hard to go backward. But eventually I come to grips with it and pull out the Cleco pliers and ⅜-inch wrenches and start pulling the floors. All the time I keep thinking “I just want something to be finished.”
I have built a lot of airplanes, and I know the process. But I hate that “going backward” thing and spend too much time avoiding it. And every minute that you don’t want to back up is a moment lost to progress. It’s one thing to stand around the shop or sit at the workbench thinking through a problem and coming up with a solution or thinking about the design or figuring out what to buy. Or, crucially, what to do next. It is another thing to just keep putting off what you know you need to do and therefore not really accomplish anything in your shop time.
Ideally, we are all disciplined enough to just press ahead—take the dang thing apart and get on with the next step. But we all have off days (yeah, that’s a good way to say it…) and we aren’t always as efficient as we should be. So how to respond to getting stuck? Well for me, I just move on to something else.
So Many Steps
I like to say that if there are 10,000 steps to building an airplane, it often doesn’t make any difference in what order a lot of them need to be done. They all have to be checked off for the airplane to fly. So if you find yourself standing and brooding over the next step, just go do something else.
I generally tend to buy as much of what I need to complete an airplane up front—so I have all of the subkits and a lot of the finishing stuff and firewall-forward elements in hand. That gives me the flexibility to go work on some wiring if I am stuck on an interior part or go look over the instructions for the oxygen system. Maybe I’ll start working on that horizontal stabilizer jig that I know I have to build.
The key is not to complete a specific step in your time in the shop on a given day—it is to accomplish something before you leave the shop. That might sometimes just be sweeping the floor or putting tools away. In my interior project, I got to a point where I was enjoying the somewhat finished look of the side panels, and instead of taking them apart, I left them that way and went to build up the wiring harnesses for the avionics. That did mean pulling the actual instrument panel out and cutting and drilling it for all the bits and pieces that had to be mounted. But it took me away from that darn fuselage that had me frustrated and let me get involved with a complex wiring harness build instead.
Custom: The Other Time Sink
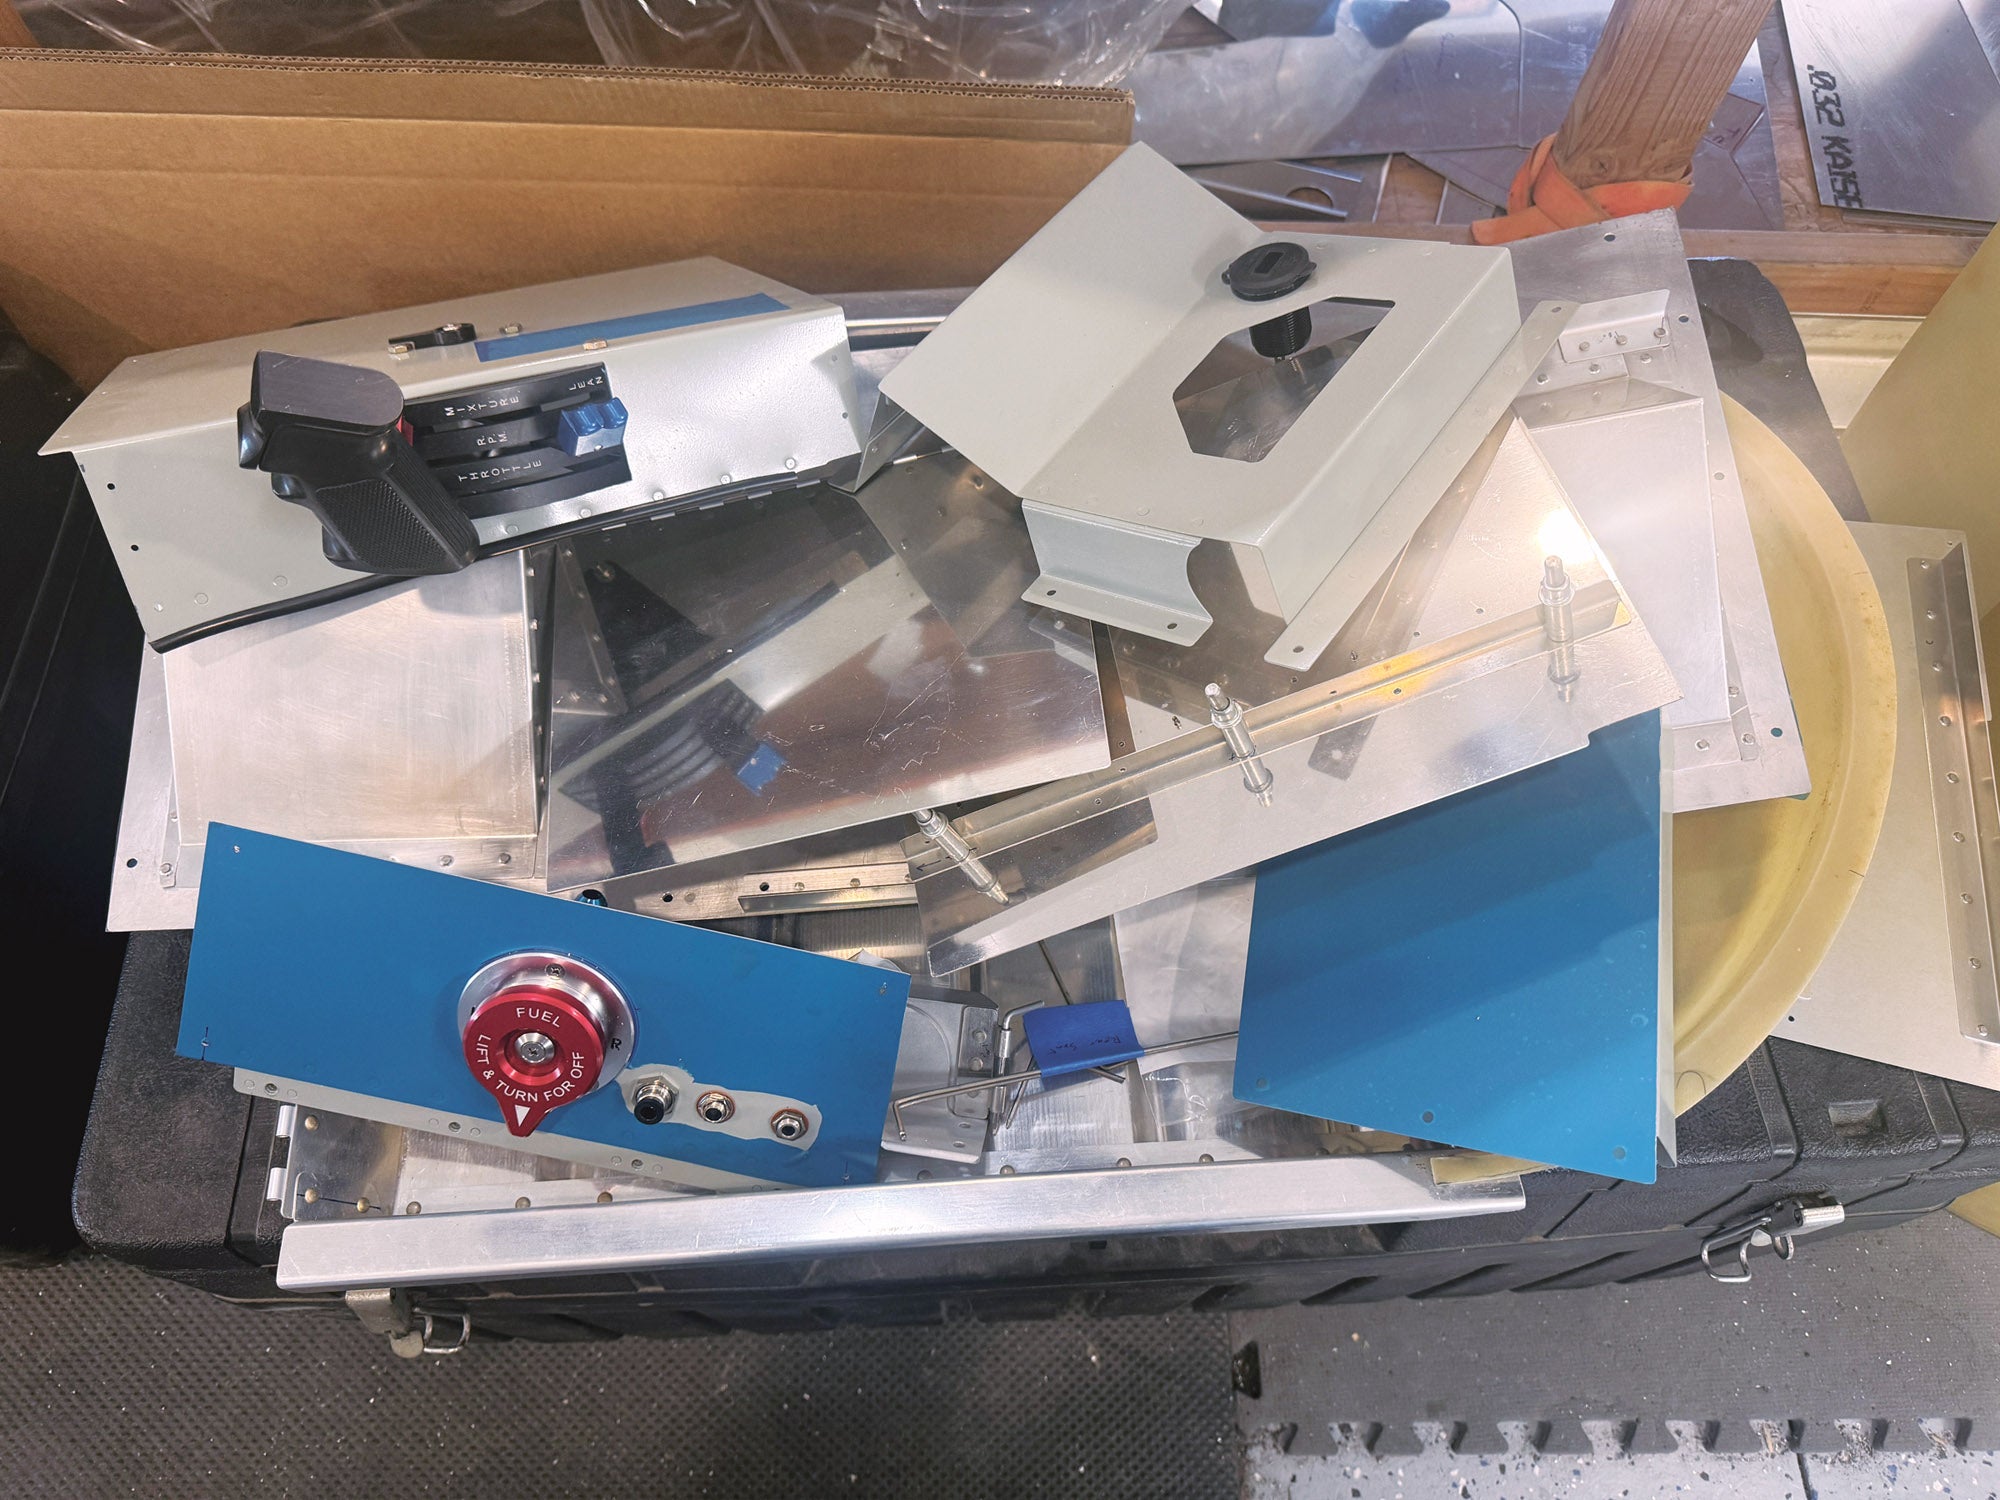
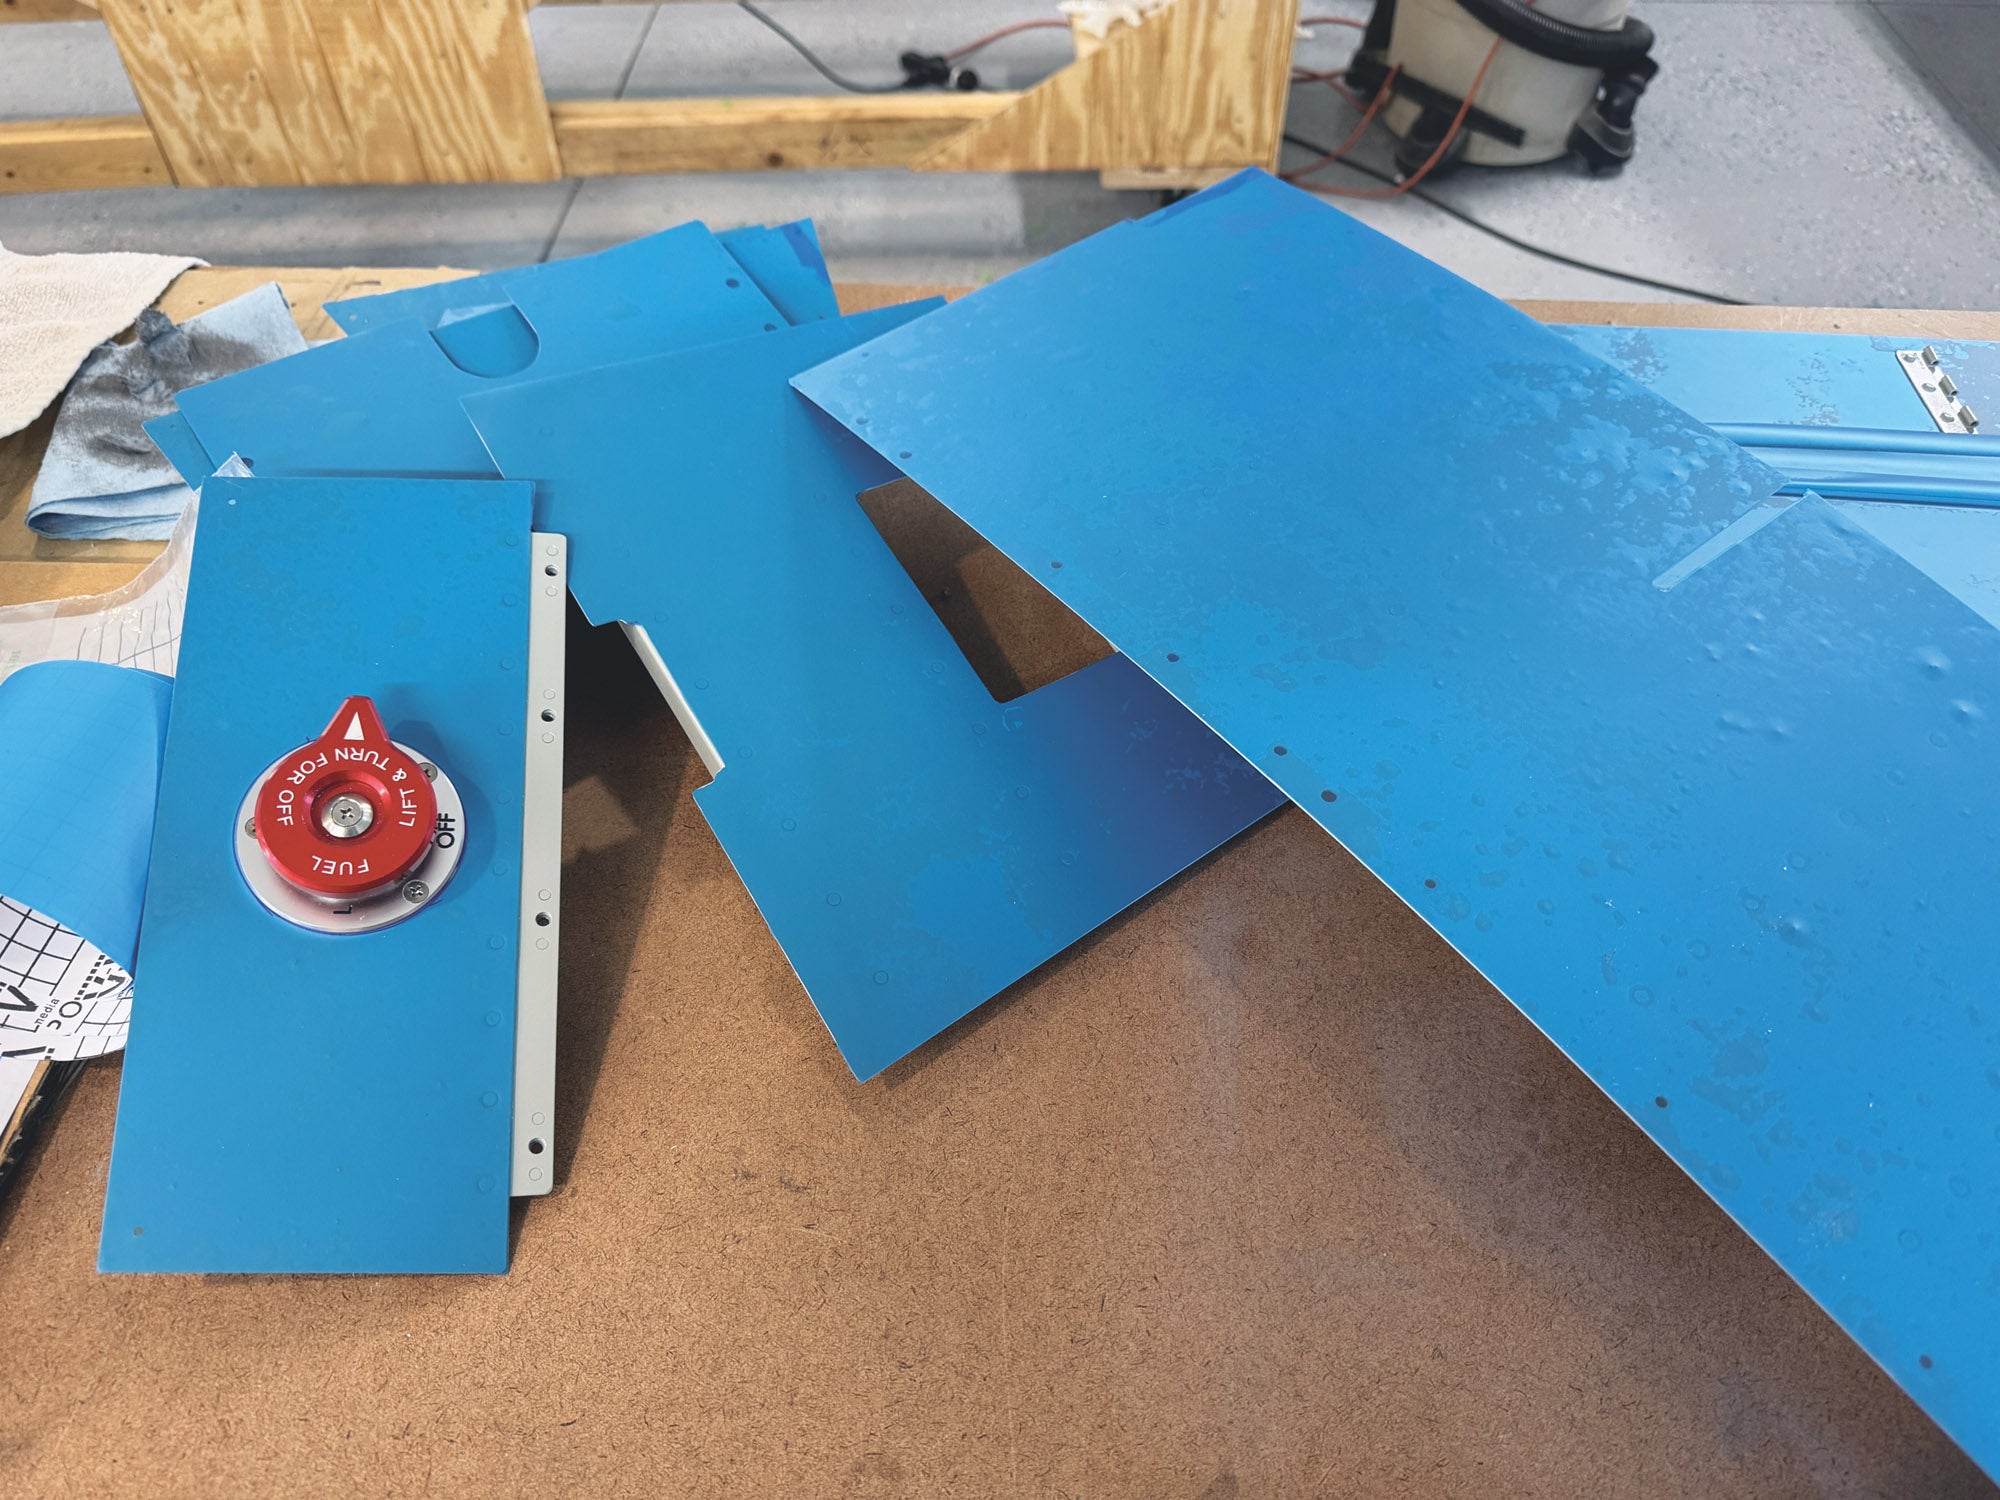
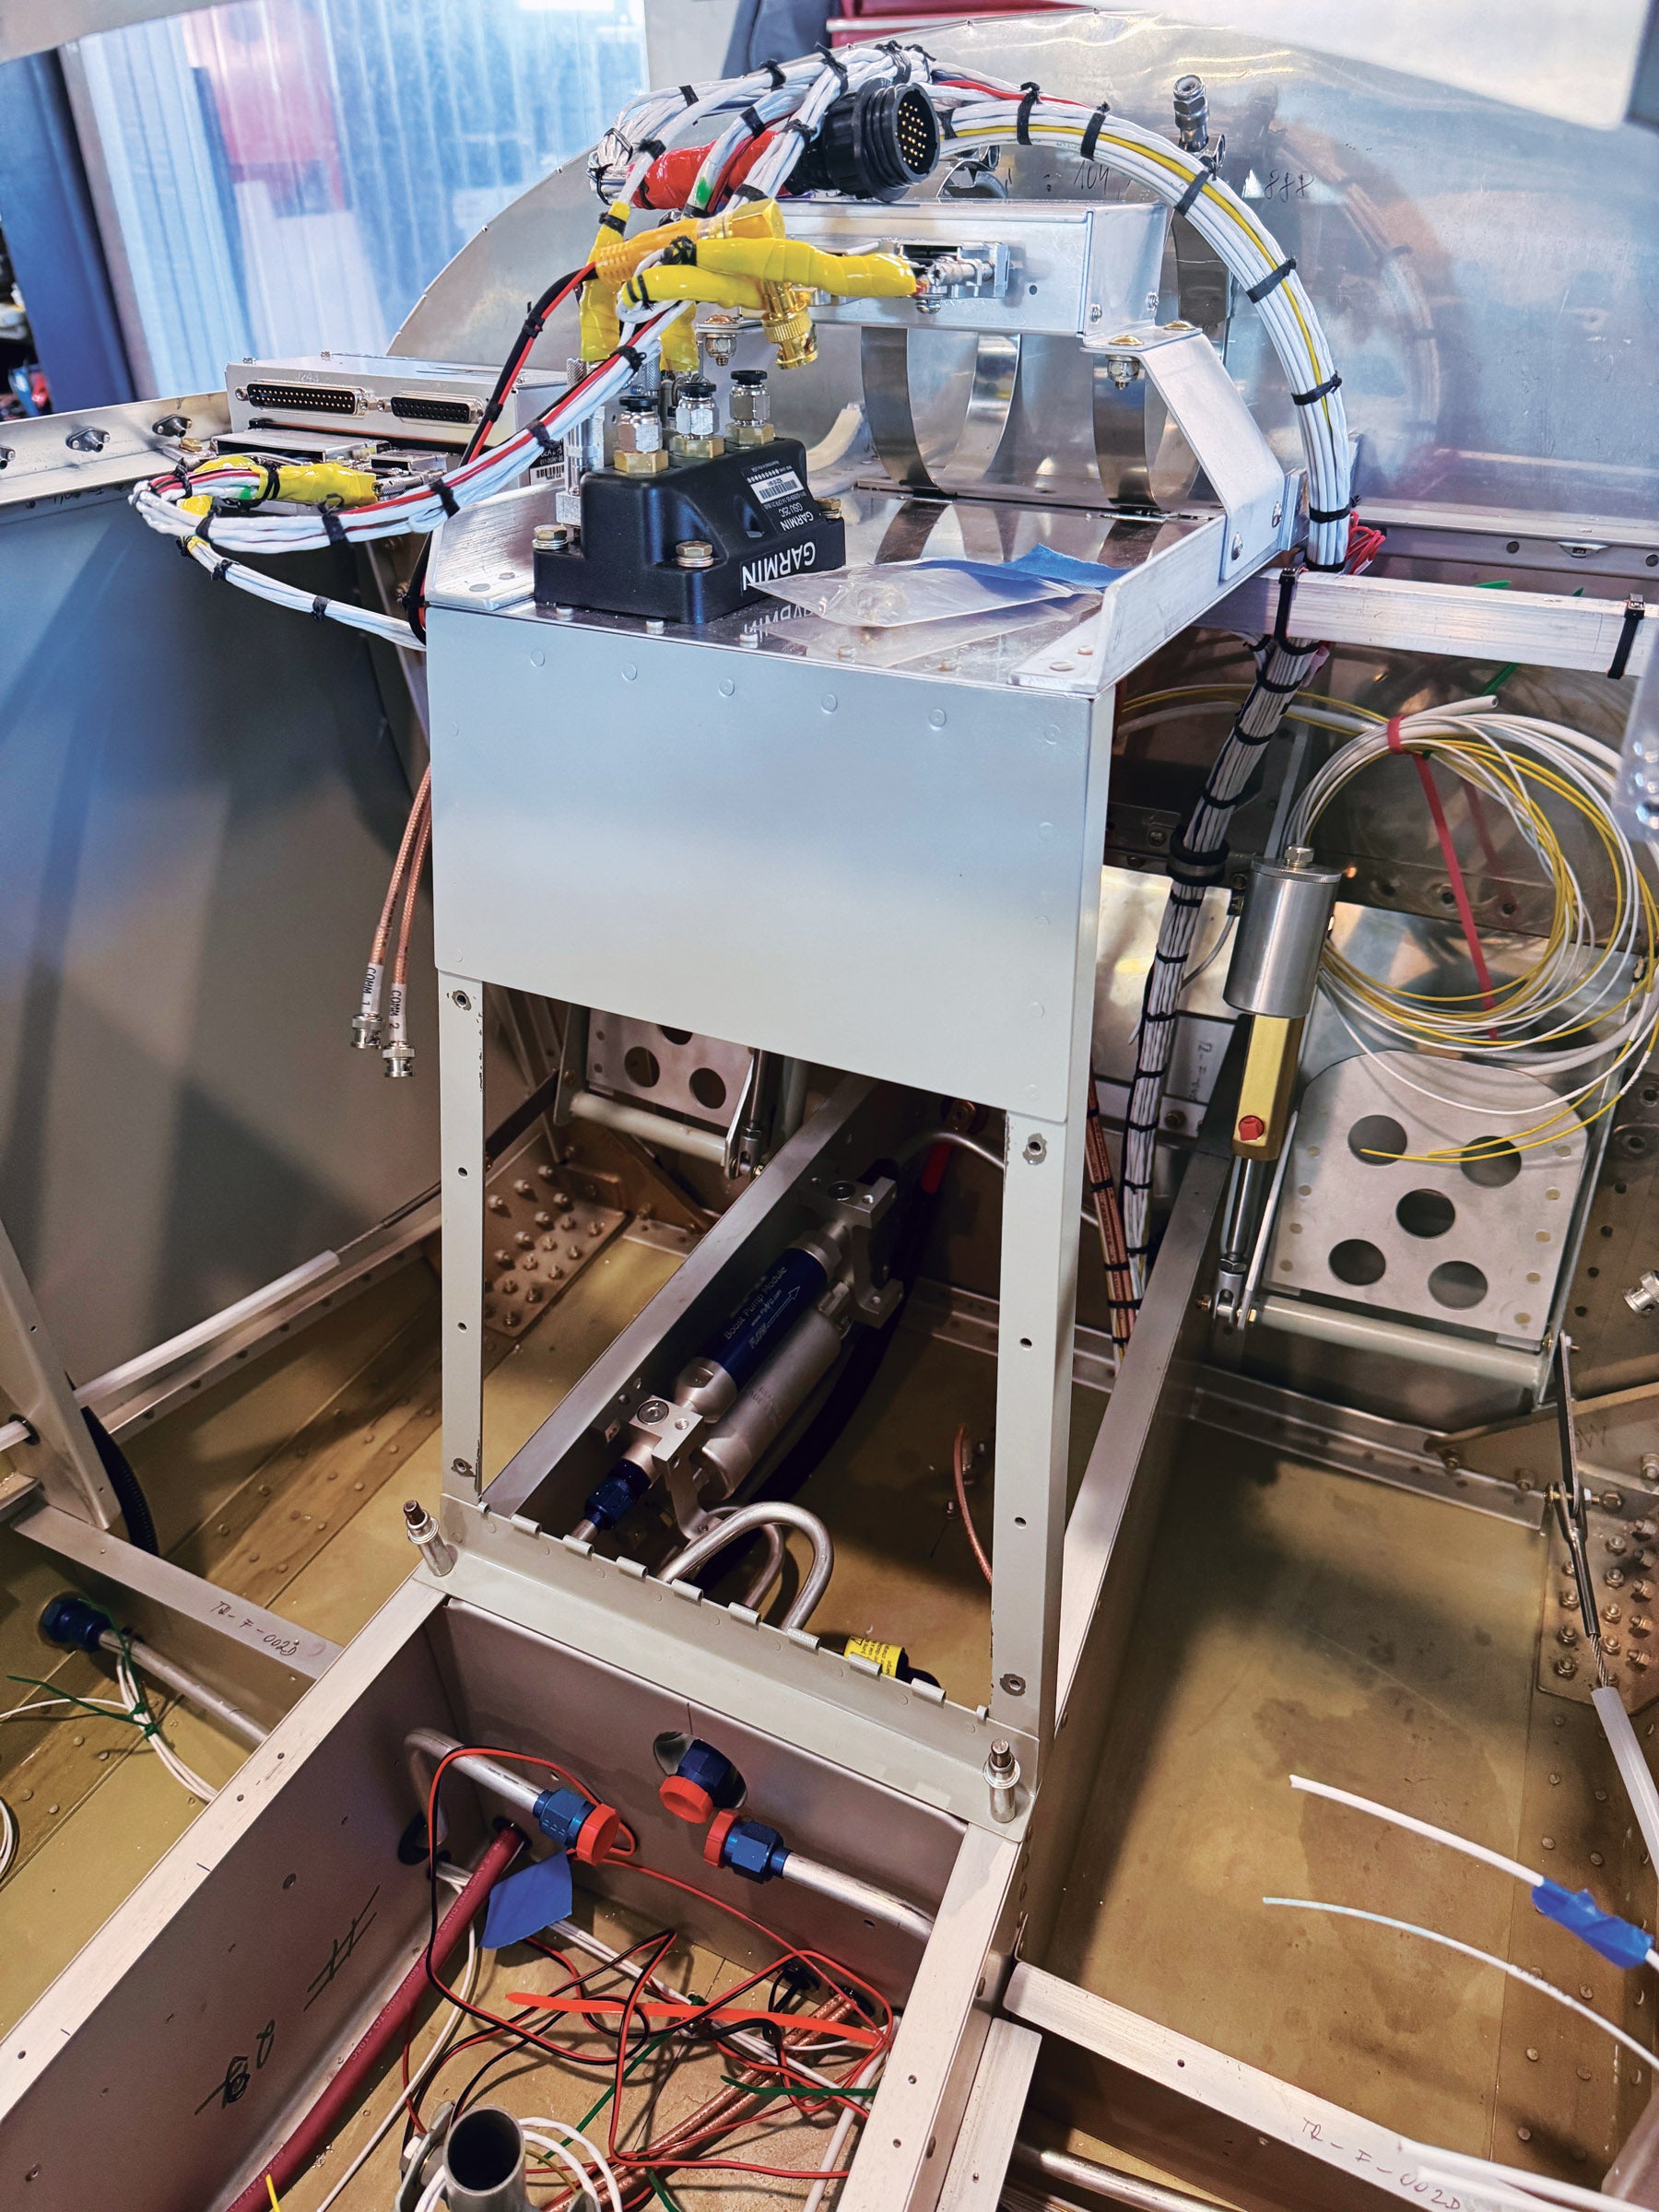
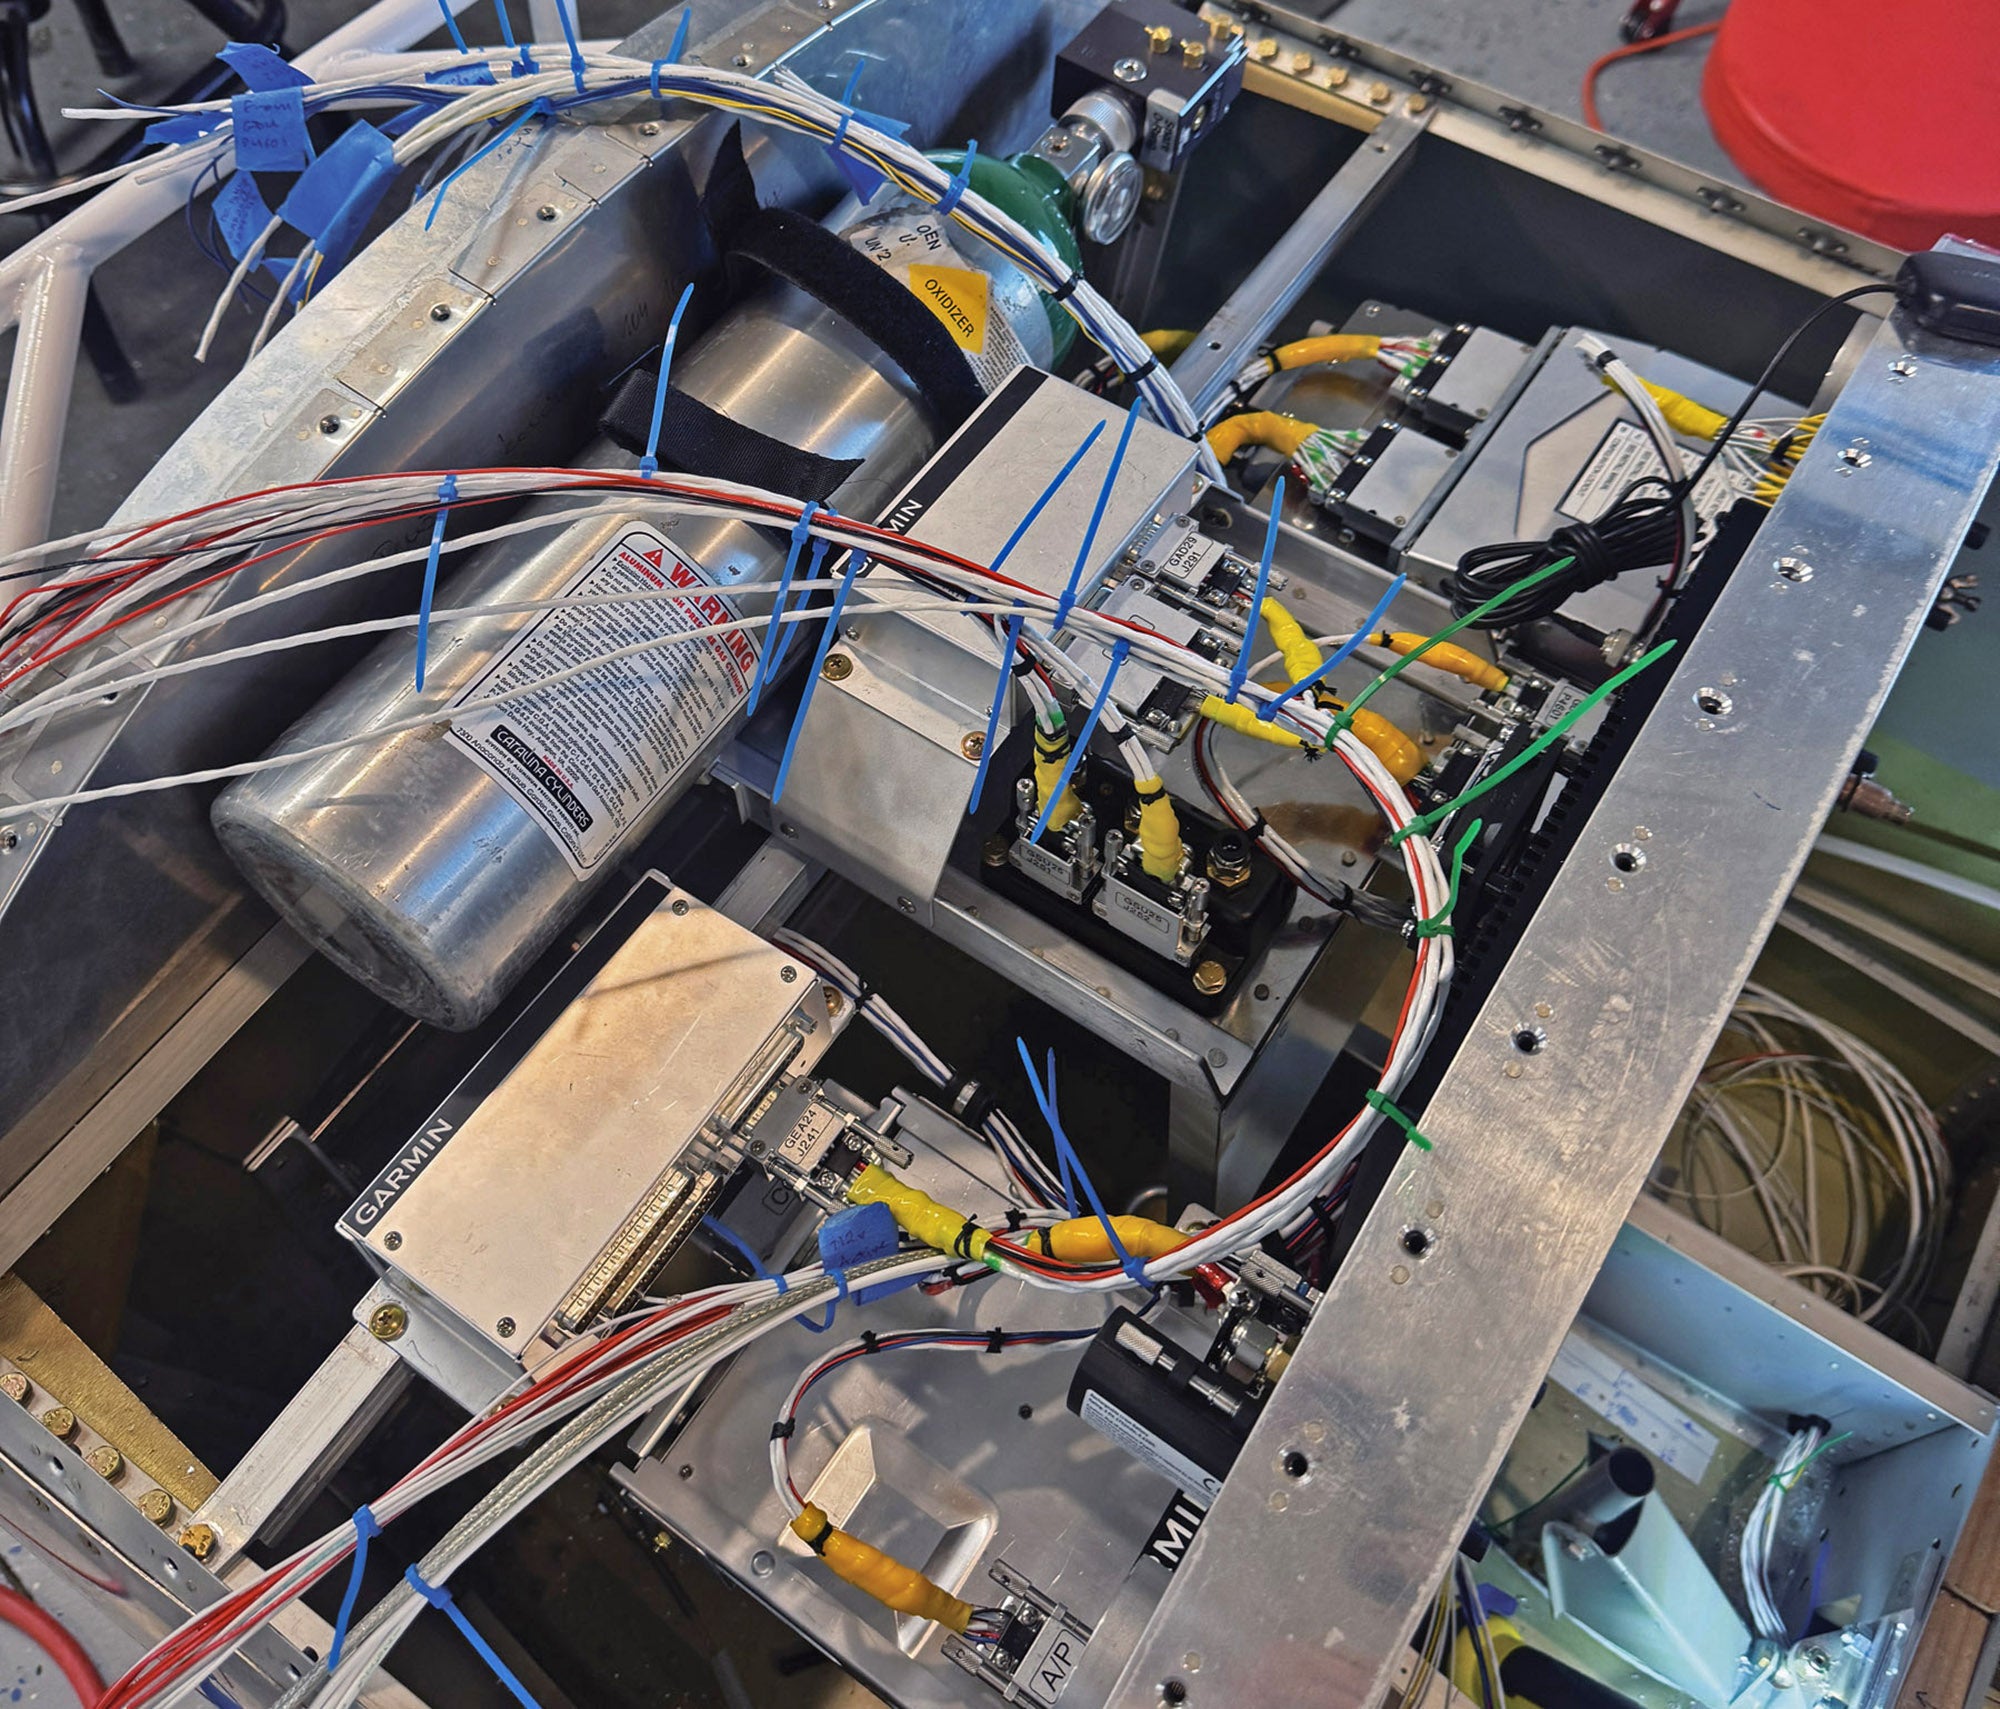
One component I decided to custom build is a storage compartment between the pilot’s legs. This storage compartment is mounted to a frame that I built. That frame holds several of the remote-mounted avionics boxes, such as the ADAHRS. It also mounts the oxygen system. On a complexity of design/build scale, it was probably a satisfying seven out of 10. Once it was in, I mounted the electronics, then started building up the wiring harness for those items and mating them to the wiring back into the fuselage (under the floor). Eventually, I knew that it all was going to have to come out in order to lace the wire bundles and secure them to structure. But I needed the structure there to determine the wire routing and lengths—more chicken and egg stuff.
I just didn’t want to take apart all those pieces! I probably spent three weeks going out and adding a wire or two each session until I was fairly certain I had everything—then pulled it all apart. And you know what? It took about 5 minutes!
That’s probably the most important lesson of all—if you built it, you can “un-build” it—and probably a lot faster than you think. Grab the tools and dive in. Put something mindless on the radio and take things apart. The key is knowing what you are going to do once you get it apart. Without a plan and a vision, you are likely just to get stuck again. That’s a repeating cycle you want to avoid.


Excellent article, Paul! I’ve never built an airplane, but I have built several custom guitars, and can verify that the process is similar, although at a much smaller scale. In life as in engineering, there is no “right” answer, and everything is a series of compromises!