In my last column, I described construction details for the fuselage section of the Affordaplane ultralight project. (See the April and May/June issues for Part 1 and 2.) Now let’s look at construction of the empennage and wing assemblies. Remember, this is a plans-only type of build using off-the-shelf materials and tools intended for a novice builder. Keep this objective in mind when reviewing the construction and design details. A complete free video series on YouTube shows each step of this construction.
The components of the empennage (rudder, elevator, vertical and horizontal stabilizers) are all formed from 1-inch 6061-T6 aluminum tubing. These tubes must be bent into their respective shapes, matching template patterns drawn on your workbench. (Use some craft paper for this!) What is the easiest way to form these simple bends? I found that using an electrician’s conduit bender did the job nicely. With a little practice, each tube was formed to the proper shape and then fitted with a gusset to join its ends.
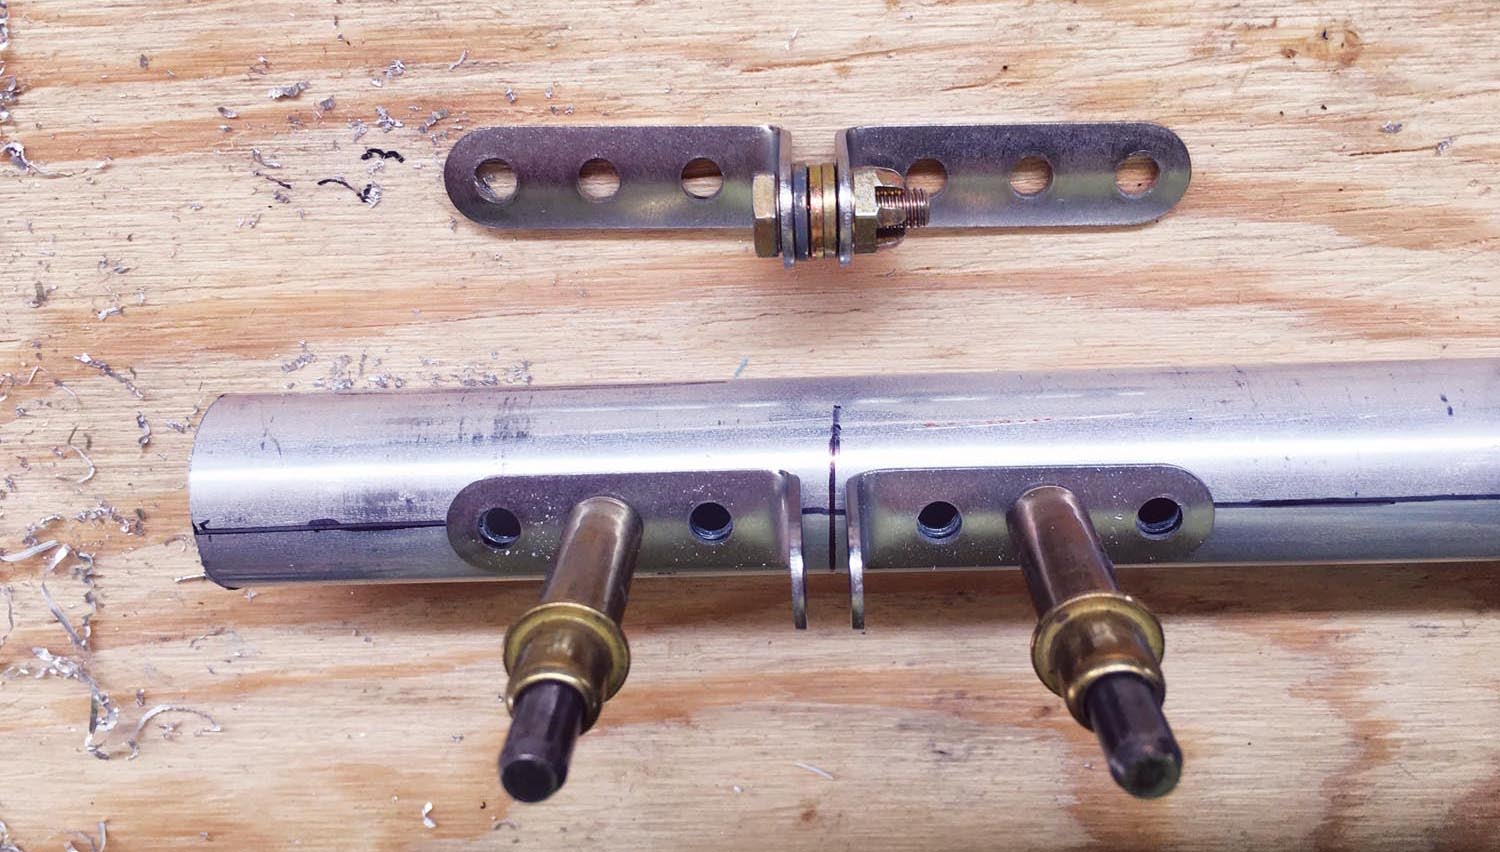
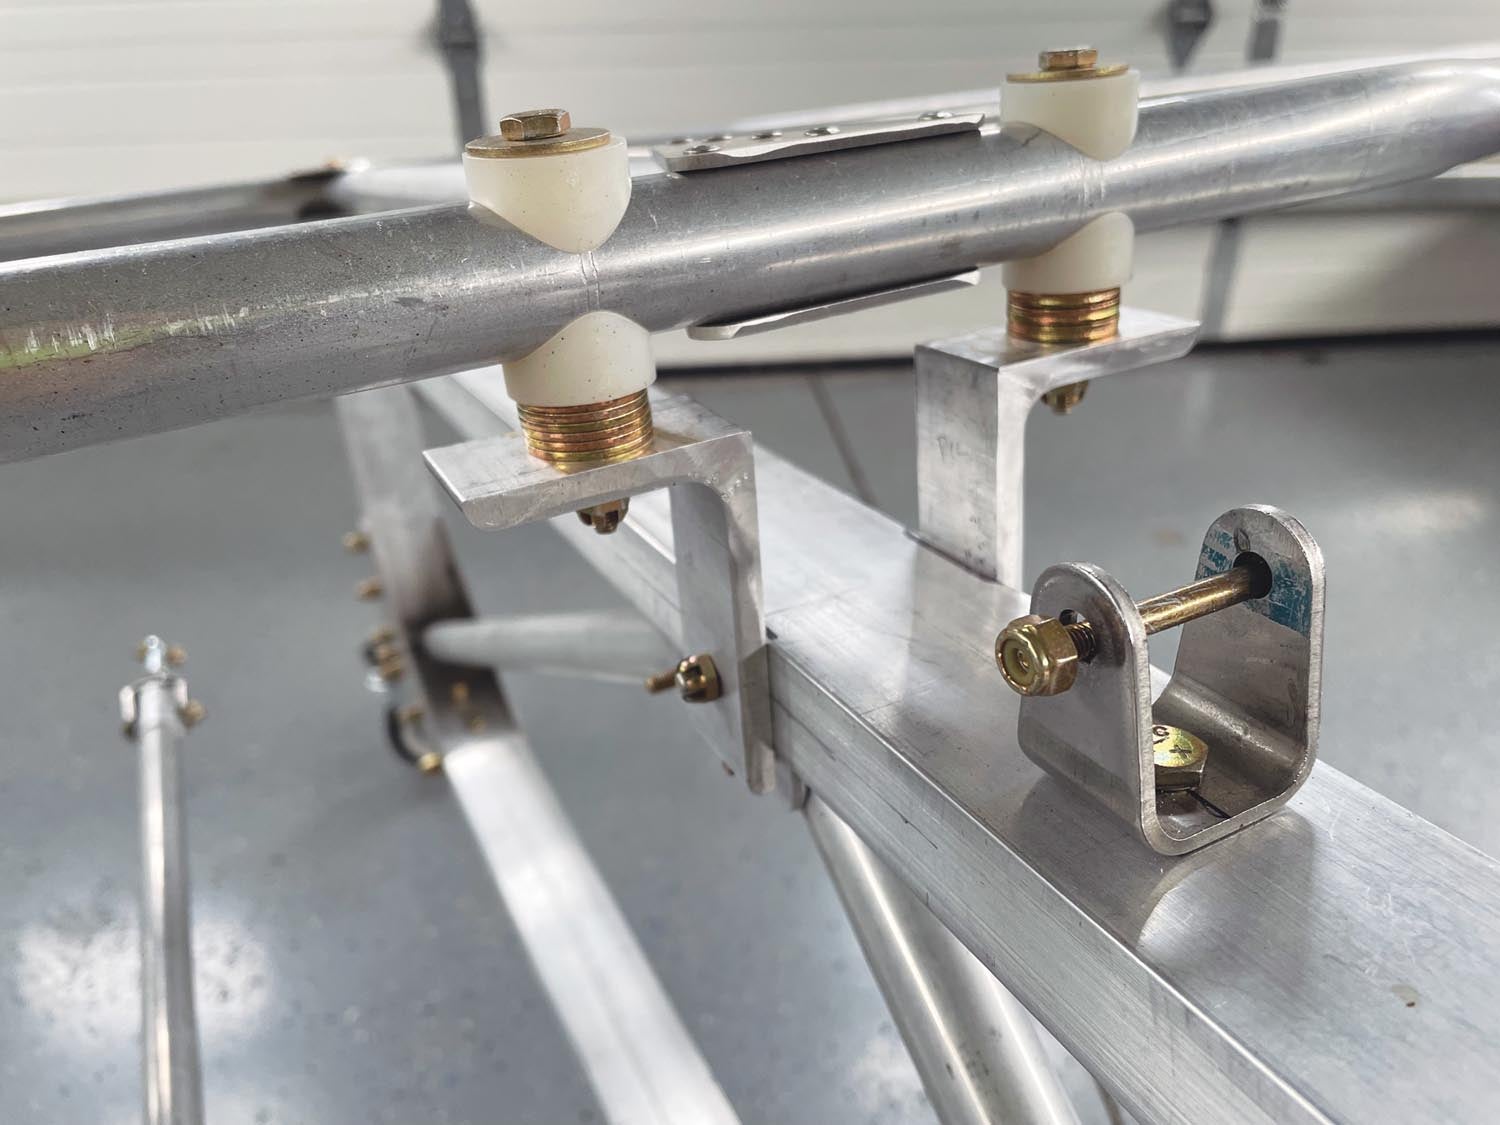
Hinges are needed between the rudder and vertical stabilizer as well as the elevator and horizontal stabilizer. The plans call for a simple, strong design using stainless steel L brackets attached with stainless steel rivets. As can be seen in the photo, the L brackets are positioned so they align for joining with conventional AN clevis pins and cotter pins. My job in demonstrating this construction was to show how to locate these hinges for perfect alignment before drilling in place. While this technique for creating hinges is not unique, it was a good fit for this project where we want easy installation using robust components. The hardware needed to attach the tail feathers to the fuselage is also shown in a photo and illustrates how only off-the-shelf hardware is used to reduce the need for complex components.
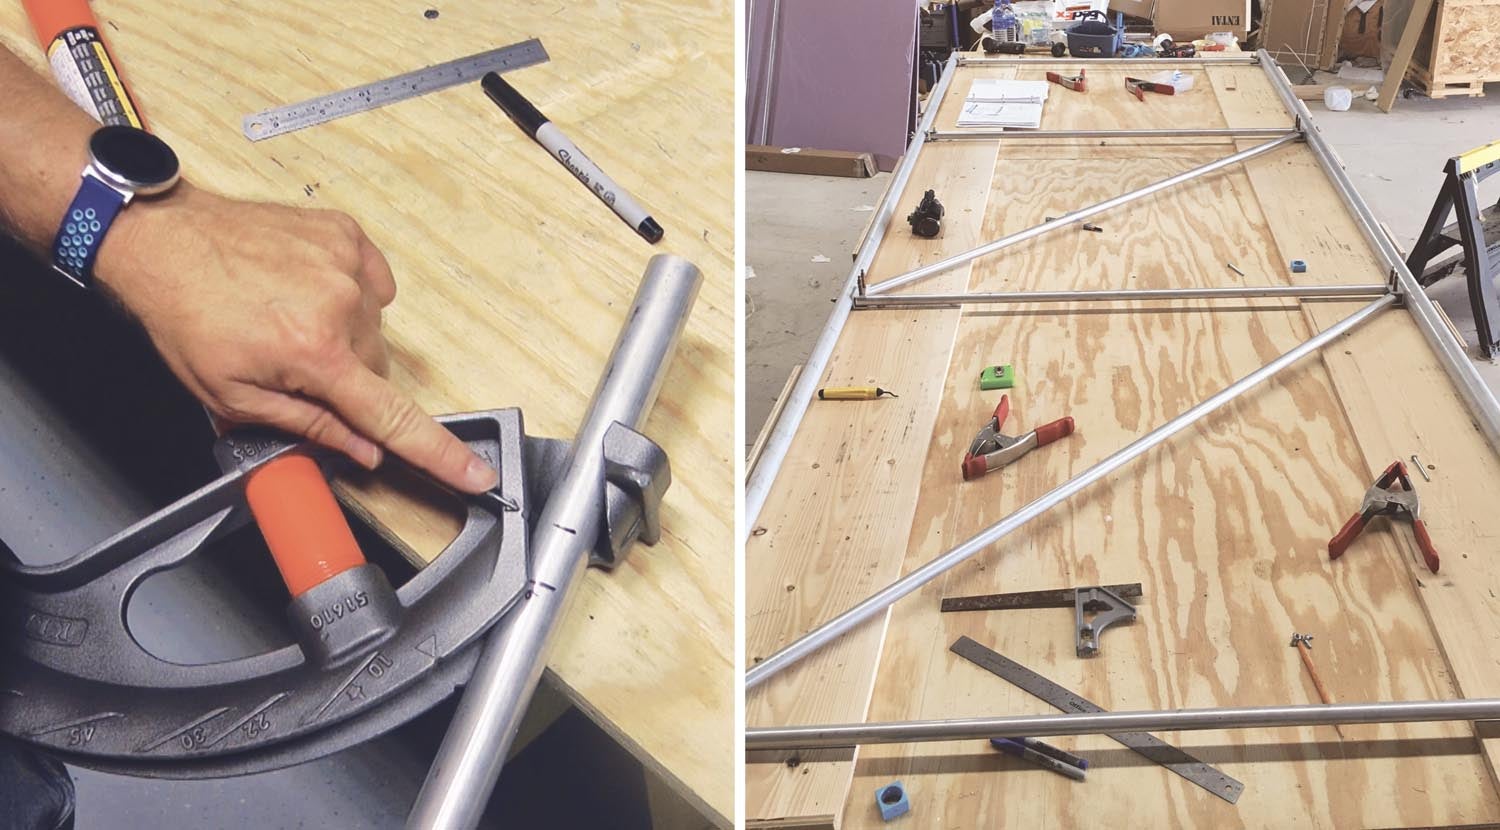
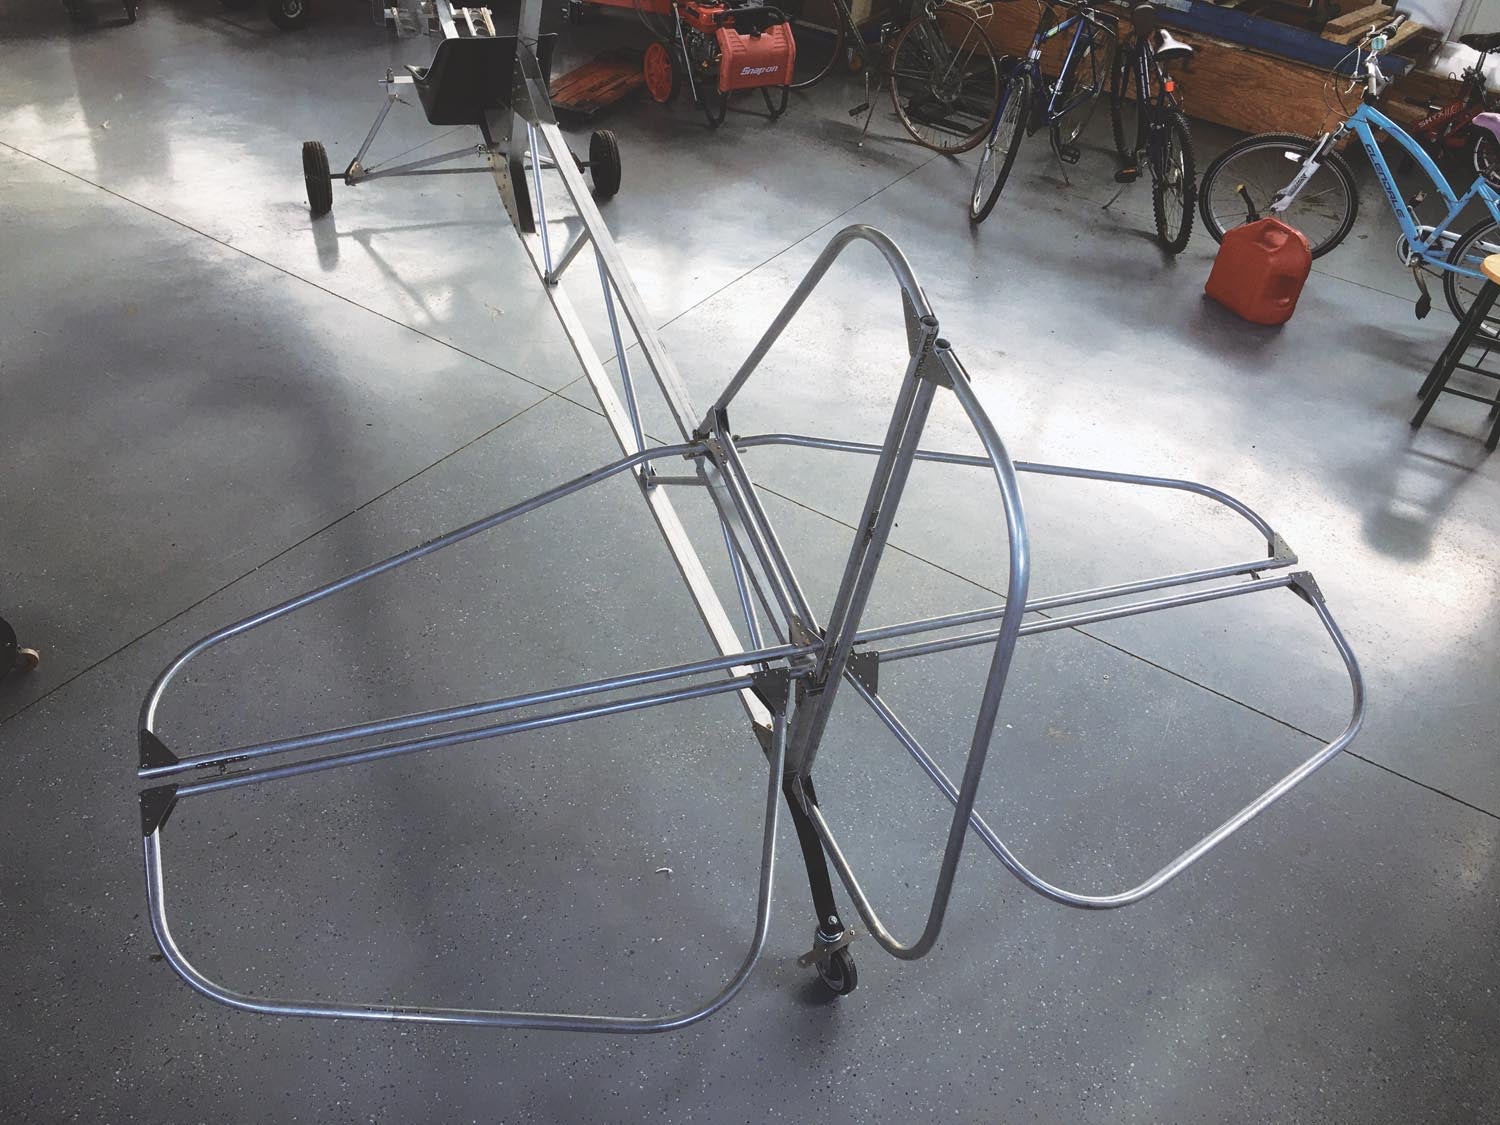
In a similar fashion, the wings for the Affordaplane were easy to fabricate from 6061-T6 tubing of various diameters. The spars, ribs and bracing structures are all made from this tubing fastened with AN hardware. Using standard lumber, I made a full-size jig for the wing utilizing the workbench as the platform. The Affordaplane wing design has a leading and trailing edge spar made from this aluminum tubing, and the lip of the workbench edge holds each of these spars in their exact position during the build. This results in wings that can be built precisely without requiring advanced skills or tools.
Wing ribs were shaped from half-inch tubing that was formed around a simple wood jig. This could be done by hand and the wood jig provided consistent bends. The ribs were attached to the front and rear spars with gussets and rivets. To obtain a strong connection to the front spar, the forward ends of the ribs were shaped by trimming with a large-diameter hole saw so that they would match the curve of the spar at the attachment point.
After weighing the wings for future reference, the tail feathers and wings were joined to the fuselage and rigged. The elevator-to-stick connection is implemented with a push-pull tube. The rudder is controlled by cables. The ailerons are managed by a combination of pulleys and cables using all AN hardware components. After rigging was complete, everything was taken apart for covering and painting.
Fabric and Paint
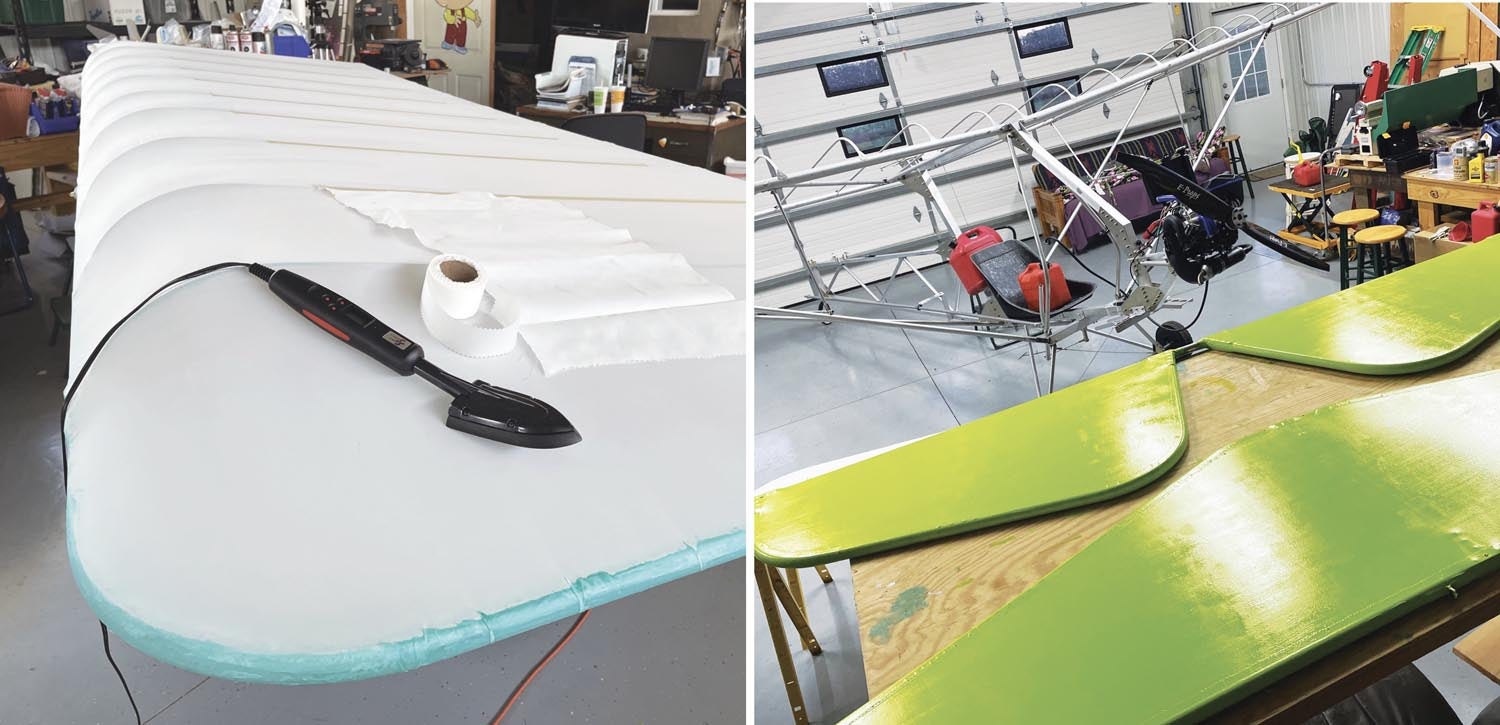
Is it fair to expect a first-time builder to be able to fabric cover their aircraft? Yes! My videos show the step-by-step process for covering this ultralight with the extra-lightweight Poly-Fiber fabric using water-based glue from Stewart Systems. While I am not a fabric covering expert, there is no specific task that is difficult in this process. The water-based glue system means there are no bad fumes or dangerous solvents. Scissors, an electric iron and a paintbrush will get your wings and tail covered and ready for flight. I am not exaggerating that this final step of aircraft building (which often scares first-time builders) is quite easy when you can watch videos showing each step of how to cover specific Affordaplane components.
You can’t leave the fabric uncoated—and I was not going to fall into the trap of using expensive aircraft paint—as the Affordaplane would quickly become not so affordable. I experimented with premium, exterior, high-gloss latex house paint. Just a couple coats and it worked great. I was very happy with the result and the ease of applying it with a foam roller. You can spend as much or as little time as you want with colors and designs, and the paint is available at your local hardware store.
In our final installment next issue, we will entertain the need for an engine and engine mount. Can you guess how a first-time aircraft builder is going to fabricate an engine mount? And remember, no welding! The Affordaplane plans do not require a specific engine for this airframe, so builders are on their own to choose one that fits their needs. Remember, our need is that the aircraft makes the 254-pound ultralight weight limit, so this will guide our decision. Plane and Simple.


Awesome stuff. You’re making me want to break out my plans and take a second look.