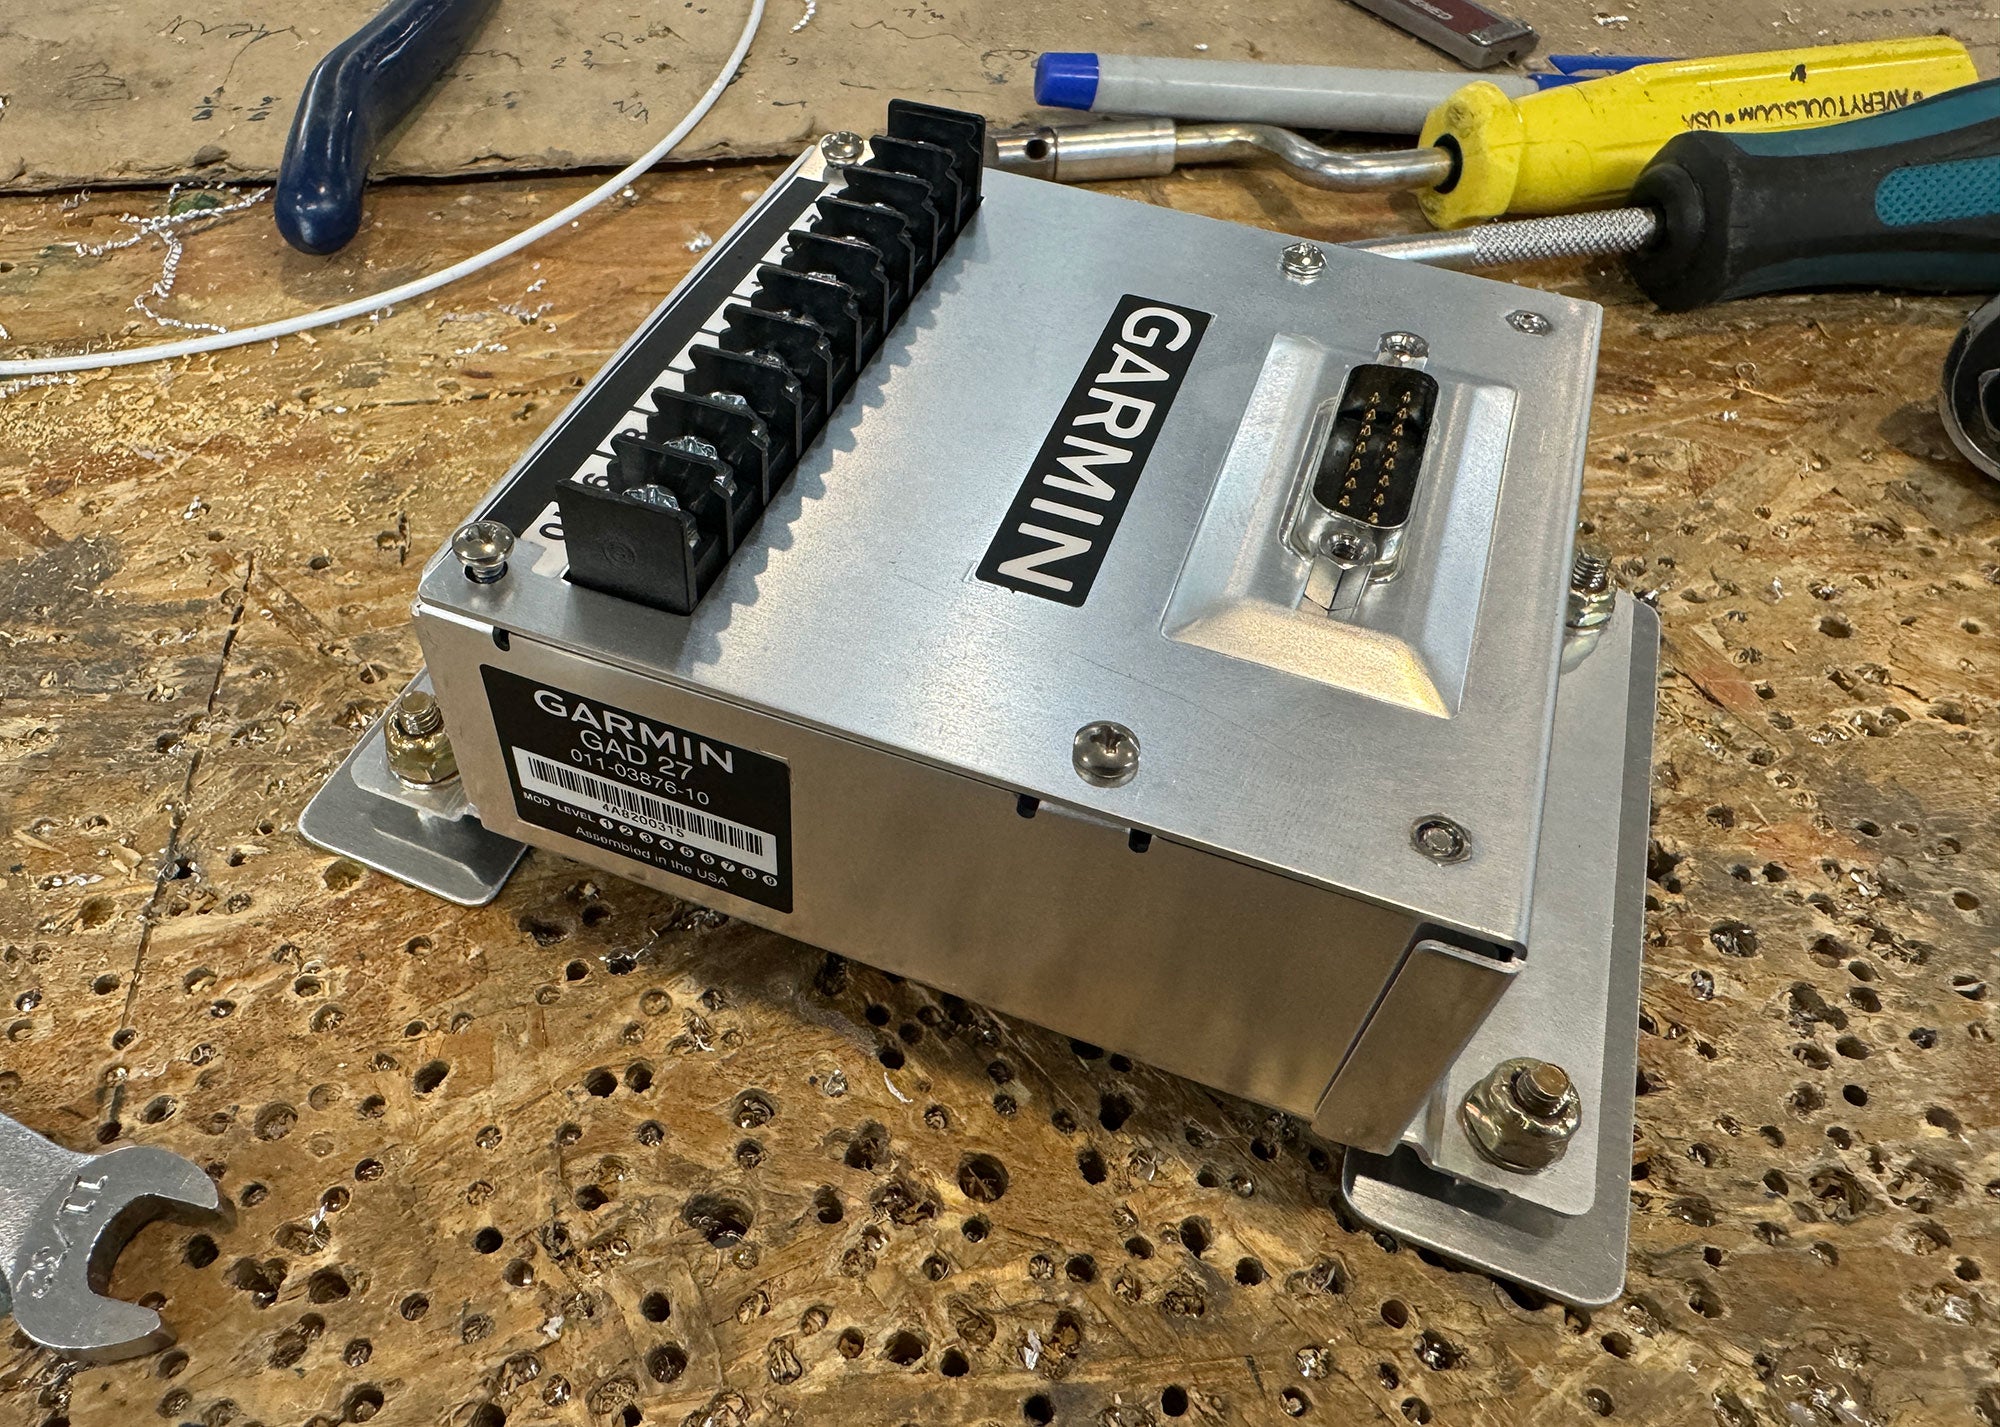
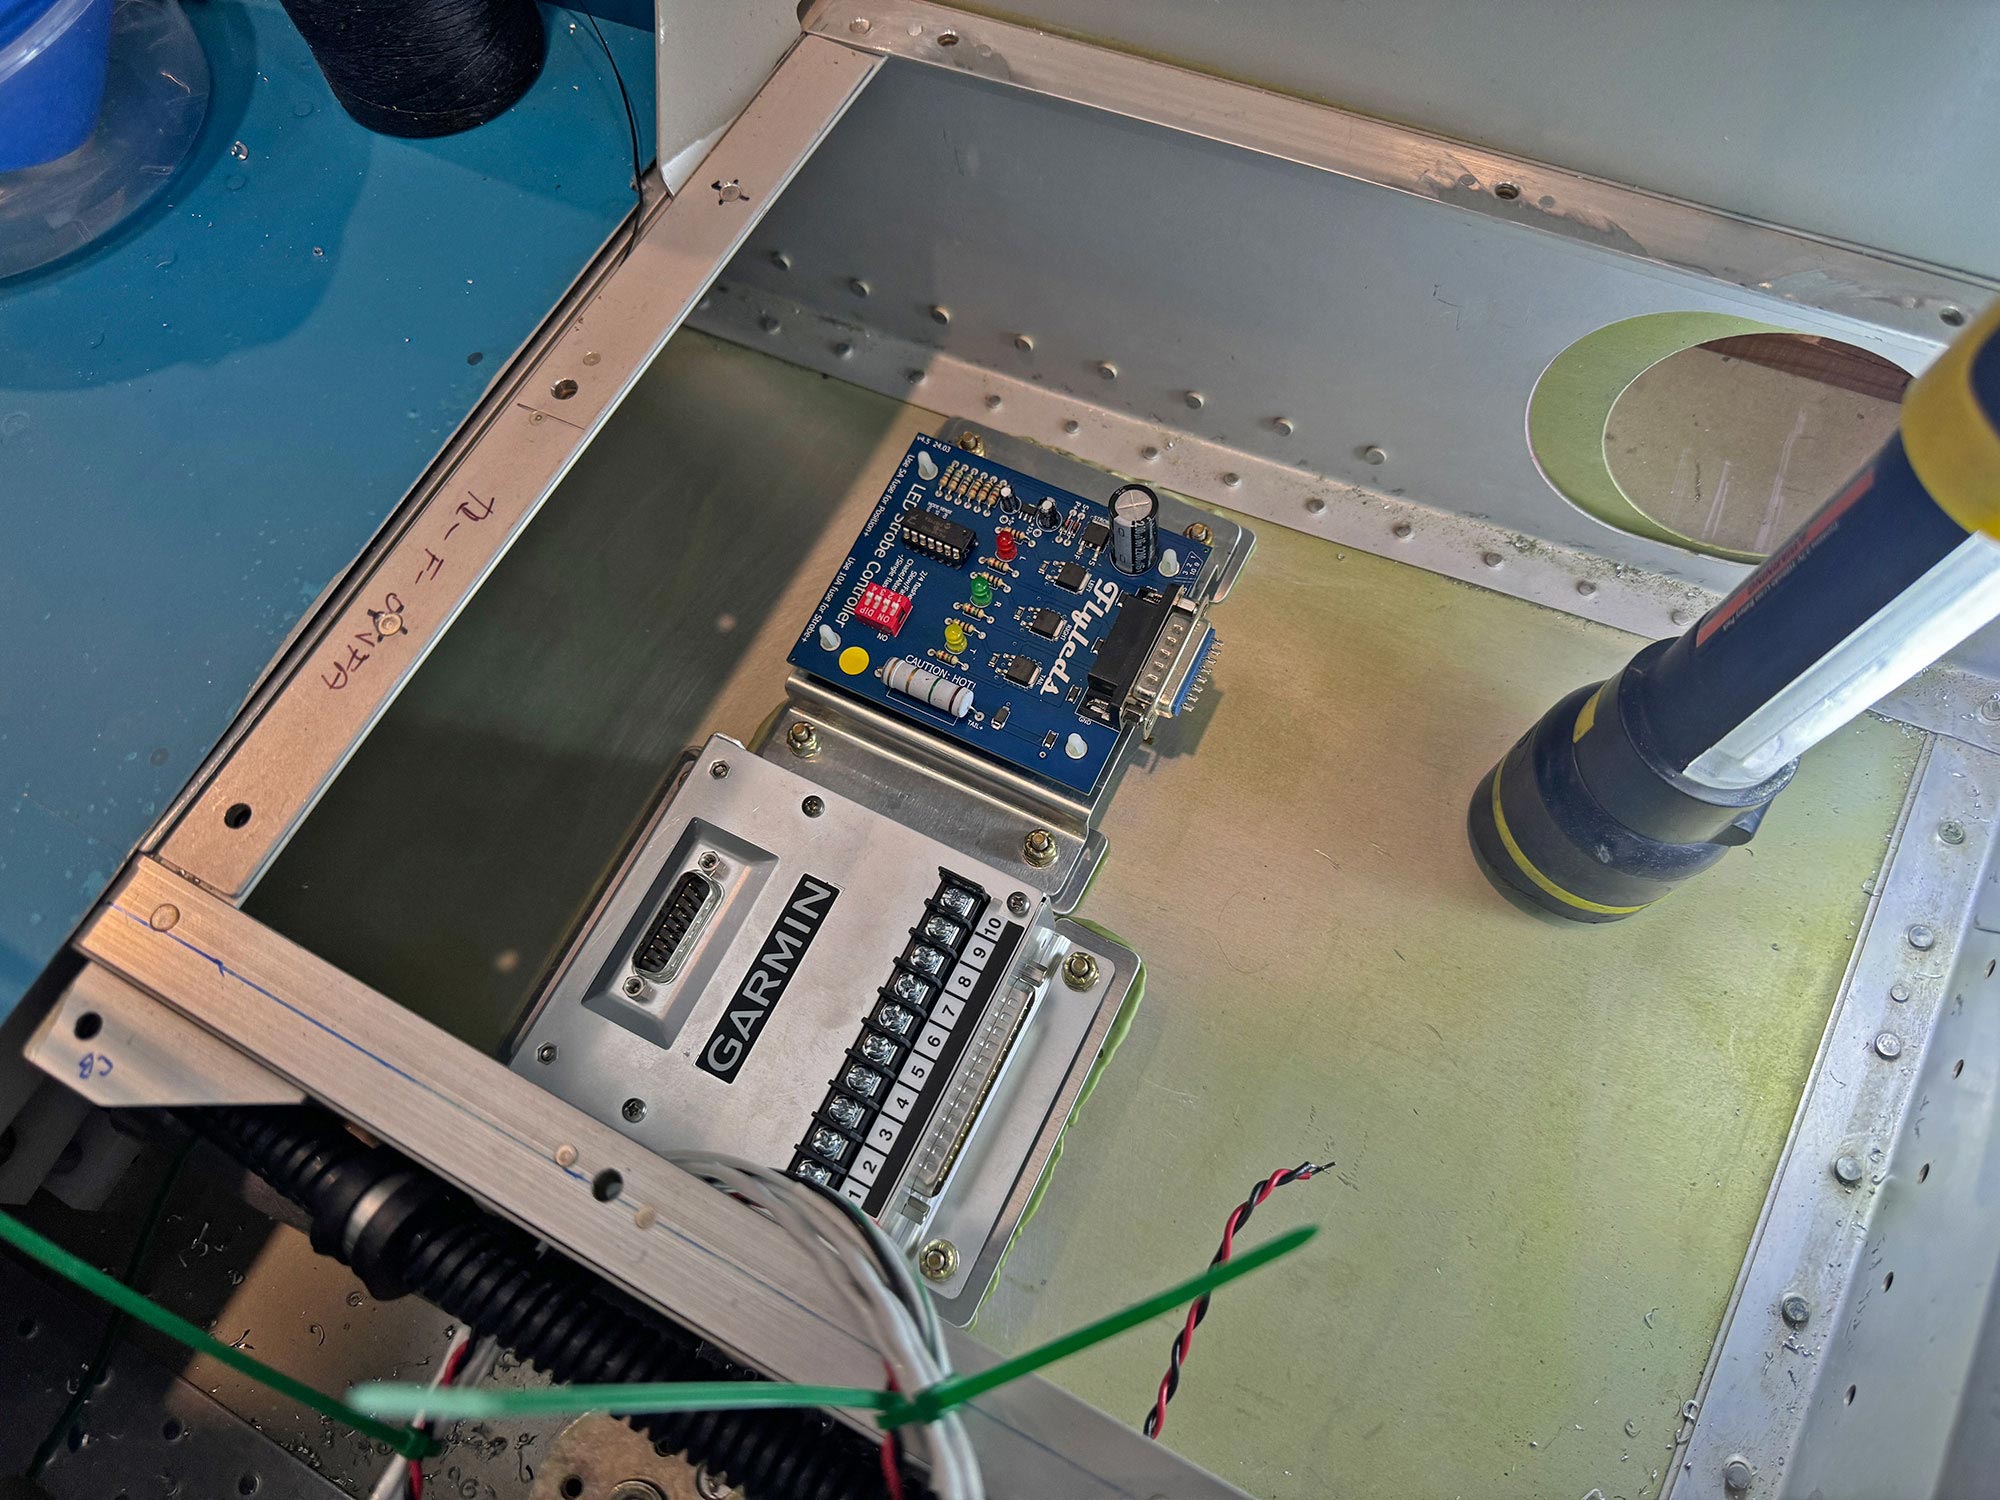
There are a lot of remote boxes in a Garmin G3X system, and they all have to go someplace. After looking at various ways of running wires, it made the most sense to put the GAD27 (basically a trim/flap/light controller) under the seat pan of my Rocket project. It would nestle well right next to the Nav/Strobe light control board from FlyLEDs, but how to mount them?
One way is, of course, to drill holes in the belly and use pan-head screws put in from outside. But that is tough to do with one person, and leaves unsightly screw heads (admittedly on the bottom, where only Oshkosh judges will see them) on the outside of the skin.
Without screws or rivets, you’re looking at adhesive. I thought about 3M trim tape, which is really good stuff, but I was a little worried about very high temps compromising it. These boxes weigh almost nothing, and if they came loose in flight, they’d stay attached to their wiring and be captured under the floor, so it’s really not very risky. But it’s better if they stay attached. And, you want to be able to remove them if you need to, for maintenance, or if there is a failure.
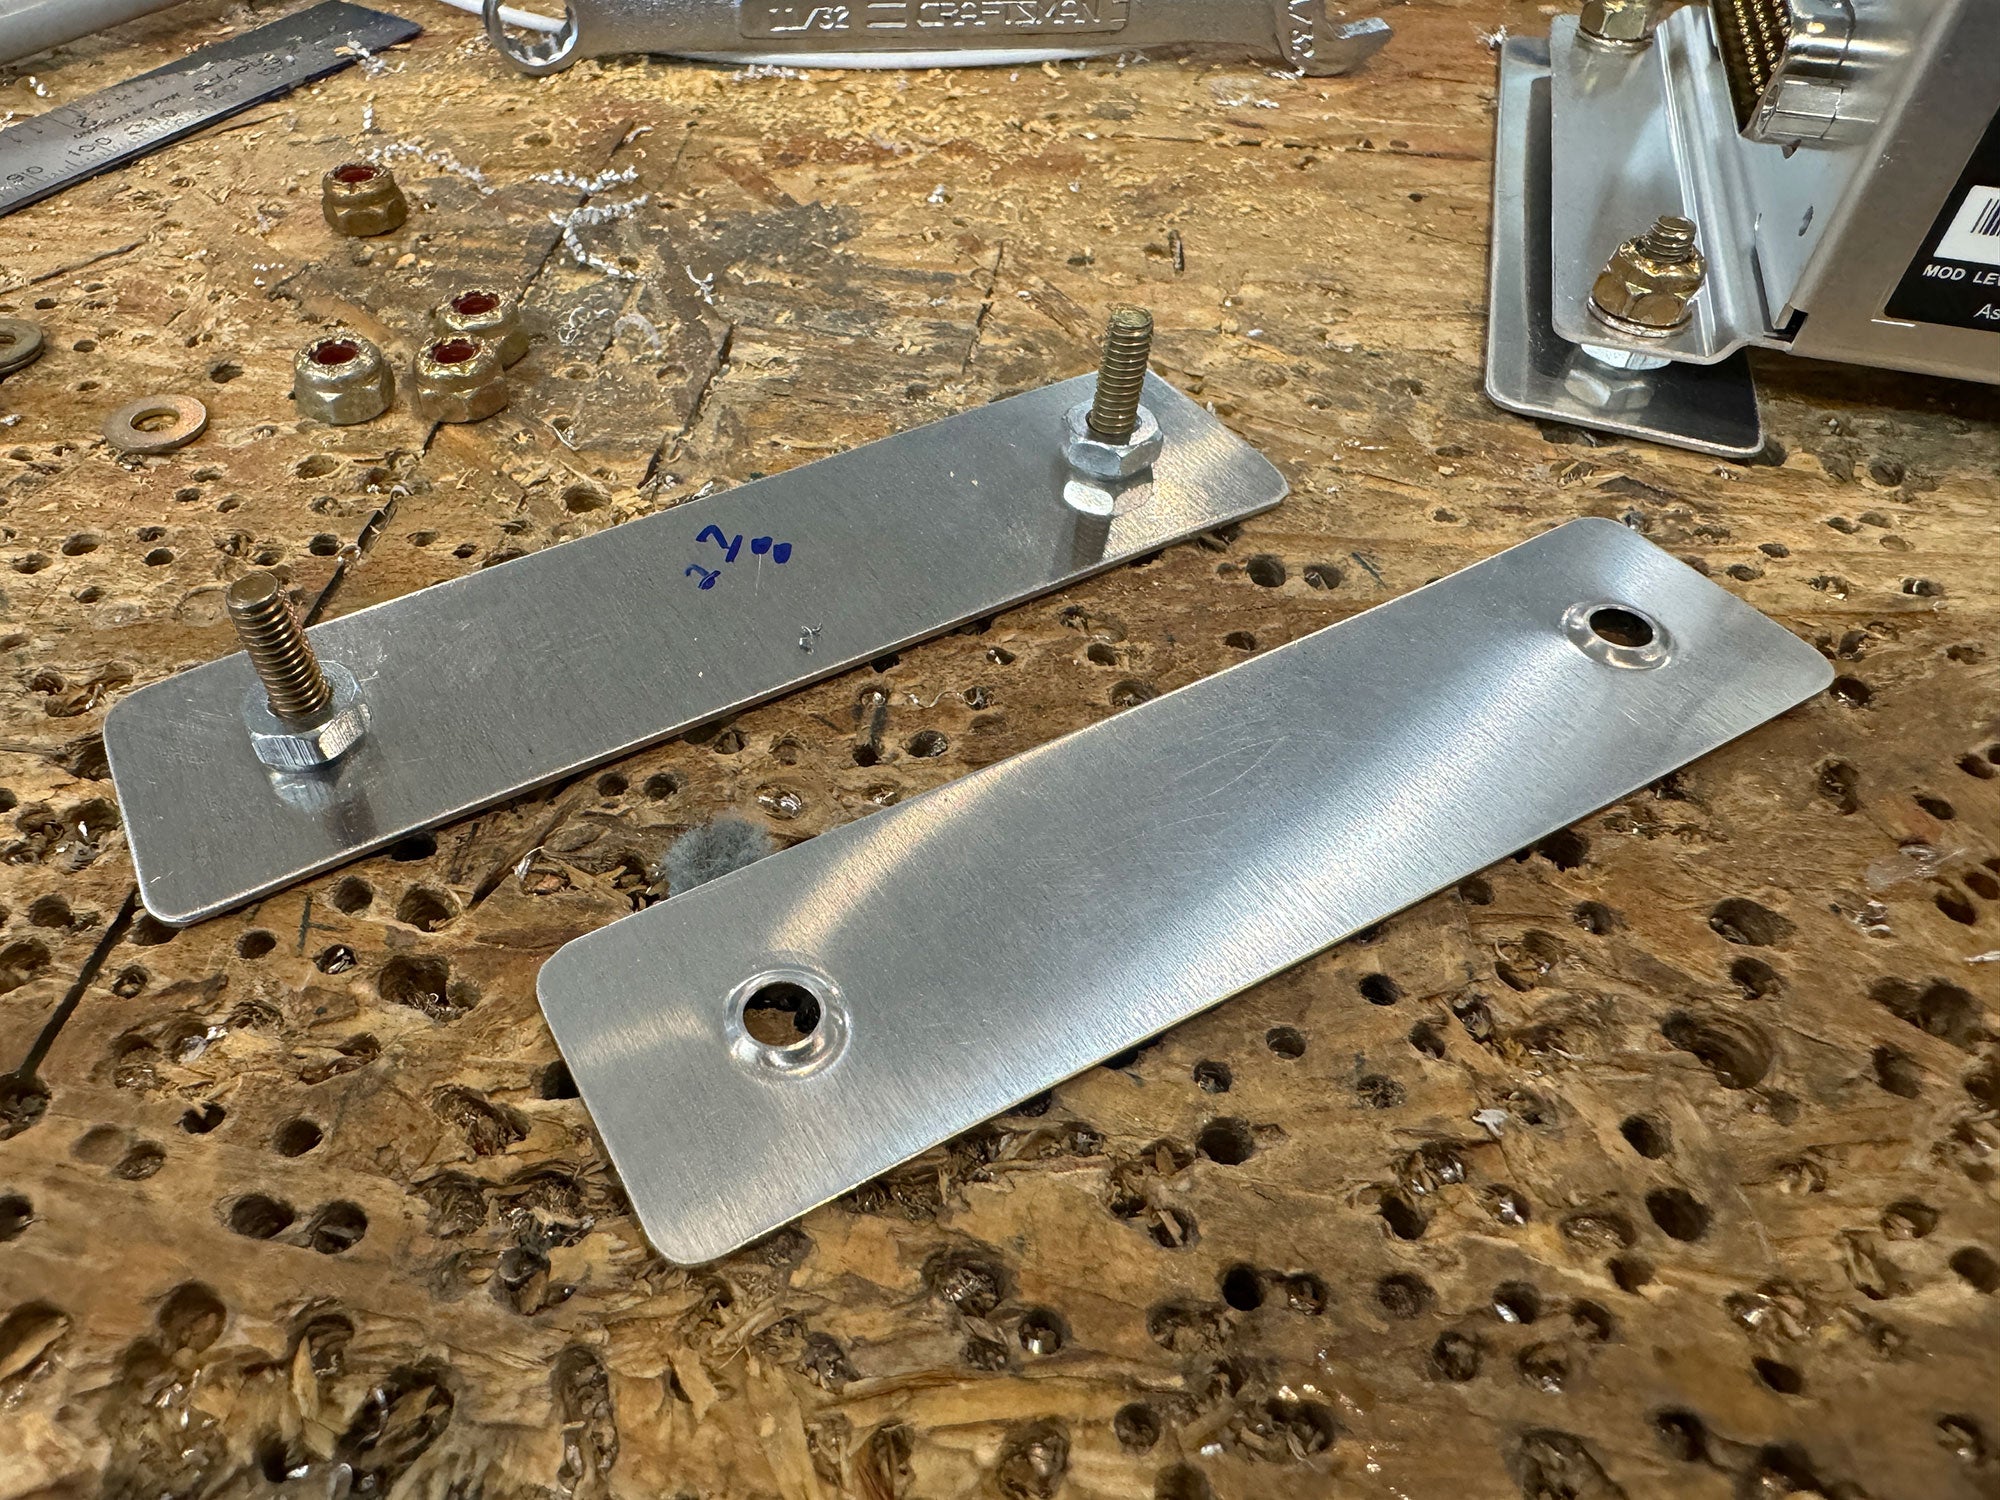
So I needed studs sticking up from the floor, and I thought about my box of ClickBond fasteners. The glue-on studs would be perfect, but they were large enough in diameter that the boxes wouldn’t fit where I needed them to go. So I came up with the idea of making my own studs—in fact, making stud strips. These were then attached to the boxes, adhesive applied (after very thorough scotchbriting and solvent cleaning), and put in place. An hour later, the adhesive is cured, and they won’t move unless I unbolt them.
The stud strips were 0.032 aluminum, drilled for #8 screws, then dimpled. Countersunk screws were put in from the “bottom”, and a regular #8 nut tightened in place with red LocTite. The box sits on top of the nuts and a nylon locknut is used on top. They will come off when I want, and not before.
(Oh, I do occasionally use rivets or nuts on the belly—particularly to attach mounts for servos. Those DEFINITELY can’t be allowed to come loose!)

 Wordless Workshop")


Dear Paul,
Thank you for this great solution. I’ve tried using the 3M tape and have had your predicted experience.
May I please ask, which adhesive did you use?
Yours,
Ben Hardy
So this is a DIY ClickBond stud? (Except your bolt isn”t captured, other than by the spacing nut). It looks like four ClickBond studs would run about $31, so you may have saved some money in exchange for time.
I use a lof ClickBond products – studs, nutplates, Zip-Tie anchors – and am a big fan. In this case I did a “roll-my-own” becasue it was going to be tricky getting the anchors located in eactly the right spot since the CB fixtures woudl be in the way when trying to line them up. So it wasn’t about saving the money (although that is nice) as much as it was about ease of getting the studs in exactly the right spot.
I would also like to know what kind of adhesive to use for a similar project. Thanks
Ummm, youv’e left us hanging – which adhesive did you use?
For those wondering what adhesive I used, in this case I did use some leftover ClickBond CB200….but I don’t know if they support using their adhesive for products other than their own. It is hard to control the film thickness the way that they do with their very clever installation fixtures. There are a number of good acrylic adhesives available from 3M that I’d look at (DP8710, DP8805….), and I know folks that have had great results with Shoe-Goo that you get at the local hardware store. I’d stay away from any epoxy that dries “brittle” – you want something with a tiny amount of give in case your airframe flexes.
Frankly, there are many adhesives that will do the job so long as you do a good job of scuffing (with scotchbrite) and cleaning wit something like Acetone.