Trying to keep number of family airplanes flying and up to date is never easy, and since one or two fly a couple of times a week, taking them down for upgrades is tricky. So, even though there is no real rush to get everything 2020 compliant for another three and half years, those years can go by quickly– I’m trying to bring avionics up to par whenever I can.
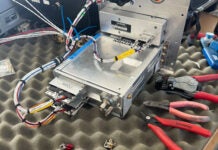
With our RV-6 already fully compliant (G3X Touch, GTN 650, and an ES transponder), I turned my attention today to our little RV-3. This is the airplane where the avionics cost WAY more than the airframe kit! The original avionics suite is still intact, with non-touch G3X screens, and Avidyne 440 (replacing a 430W for now), and a Mode S 330 transponder. Because of the cramped nature of the cockpit, the traditional “radio stack” is between the legs, forward of the stick – making it hardware work difficult without hiring a contortionist. For this reason, rather than trying one of the new generation Garmin transponders, which would have required a new rack installation, it was simpler to just upgrade the GTX-330 to an ES model. This meant sending the unit in to Garmin for the upgrade – but fortunately, the turn-around was only four days at their end.
Unfortunately, the new installation required a couple of additional serial data lines to be installed, so off came the forward top skin from the airplane, and out came all the fancy boxes to give access to plugs and pins. A couple of hours of poking, probing and prodding and the additional wires were in place. Then it was time to hook up external power (external power is essential, in my mind, for any glass cockpit airplane for configuration purposes) and bring everything up in config mode to set the ins and outs and data formats. This is when accurate records of what serial lines on which box are connected to which serial liens on other boxes is essential.
Finally, with everything talking, it was time to button up the airplane – the entire job probably required about five hours of actual shop time from start to finish. Having built the airplane is a huge plus to doing this efficiently! Now all I need to do is go flying and file a request with the FAA for a report to see how my output looks. Hopefully, if it doesn’t get a passing grade, it will simply be a software or settings issue. I’ve done my contortions for the month. Then it will be time for airplane number three.


