Boy, I am enjoying building “simple” for a change. Most of my airplane projects are fairly complex machines with multiple EFIS screens, IFR capability, and all the bells and whistles. The Xenos, on the other hand, is a straightforward motor glider–just the stuff we need, and none of the complexity of the bigger craft.
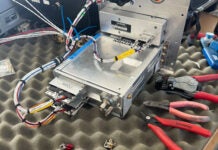
I pulled out the panel blank the other day, along with the Avionics that we’ve put aside for the project, and within a couple of hours, the holes were cut and the units test fit. Essentially, we have a single screen EFIS to give us flight and engine data, a single Comm radio, and an electronic Variometer for soaring (the MGL EFIS has a software-derived Vario, so we thought it would be fun to install a dedicated unit and see how they compare). Switches are minimal – a Master, to ignition toggles, a start switch and an avionics master. Four circuit breakers handle the loads, and heck, I had this little corner for a couple of warning lights, so I installed two from my stock drawer – one for the EFIS warning, and another for oil pressure.
After everything was fit, I took it apart, scotchbrited, and shot some primer and paint. While that was curing in the sun, I pulled out the manuals and figured out how the CAN Bus connections work for MGL. The answer? Quite simple and easily!. The MGL units al came with pre-made harnesses from Approach/Fast Stack, so when the paint was hard and the units re-installed, it was a matter of minutes to connect up the data lines and another half hour to mock up the power feeds so that we could throw the switch and – voila! We have a panel!
Now, of course, I have to tidy things up, figure out where to mount he RDAC (engine data unit) and Magnetometer, choose places for the headset jacks, and do some installation in the fuselage. But its nice to know that everything works,, and we can start to play with the MGL software environment..
Pretty cool for an afternoon’s work.


