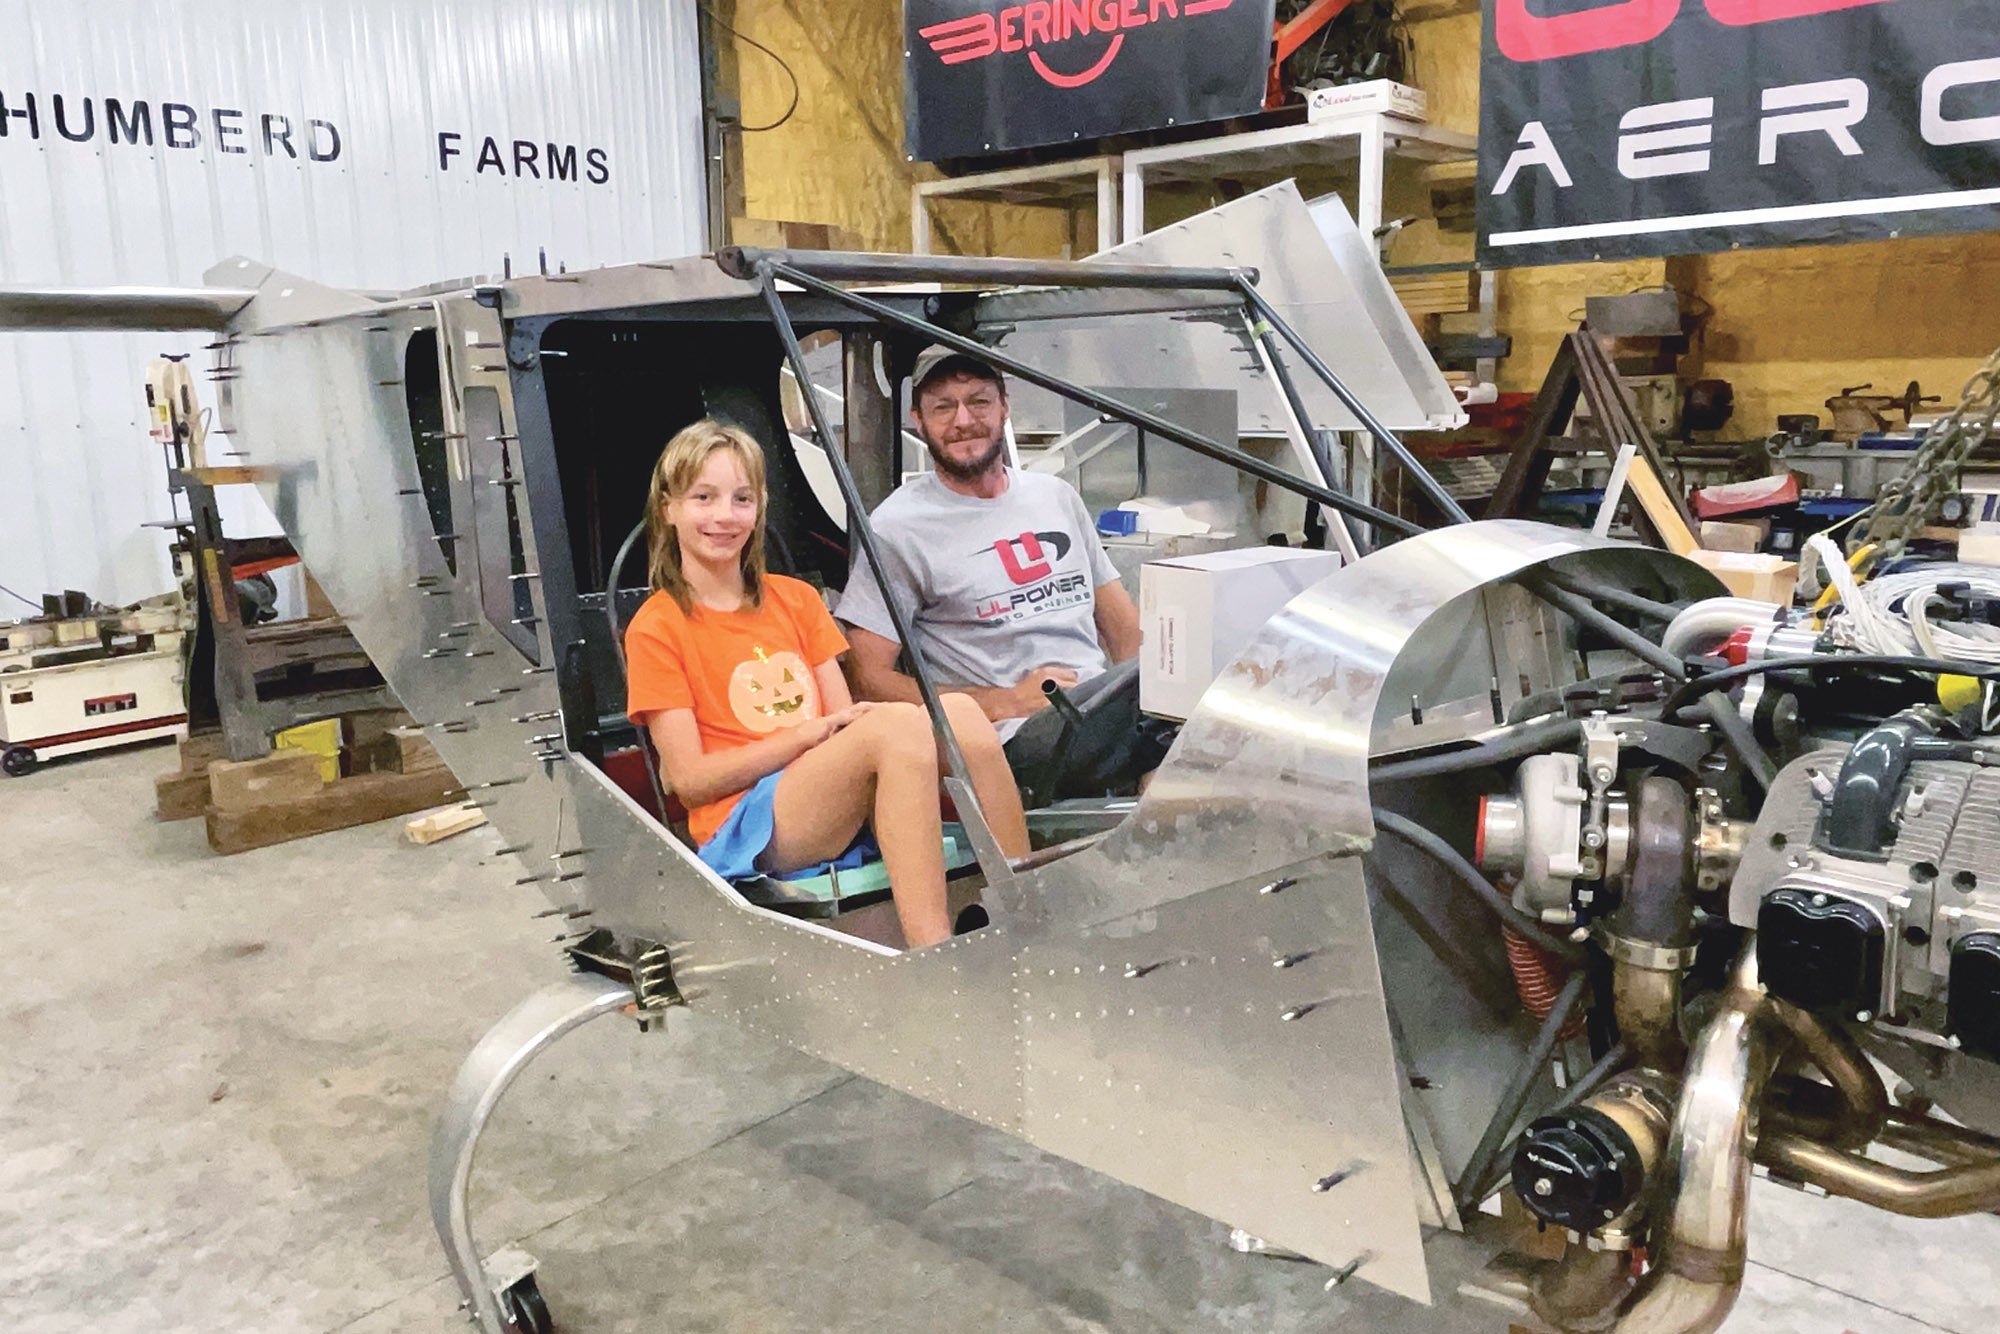
The focus in my previous article came to a screeching halt with the tire/wheel/brake assembly progress as I decided to use 29-inch Desser tires that were backordered. It was also decided that the best way to mount the Beringer axles to the Zenith main gear is to swap the predrilled main gear for an undrilled gear so I can make it match the Beringer bolt pattern.
Sometime in the near future, I plan to make a trip to the Zenith factory to swap the main gear and pick up some customized parts along the way. While waiting on several other manufacturers for quite a few pieces of this elaborate puzzle—things like suspension parts, axle parts, hardware and even tires—I have been keeping myself involved with the build by tackling other things that I have been putting off. None of these look like superb progress, but they are all still progress. Luckily, the current holdups are happening during one of the busiest times on the farm and there never seems to be any downtime. So anyway, here is the current build progress.
Intercooler
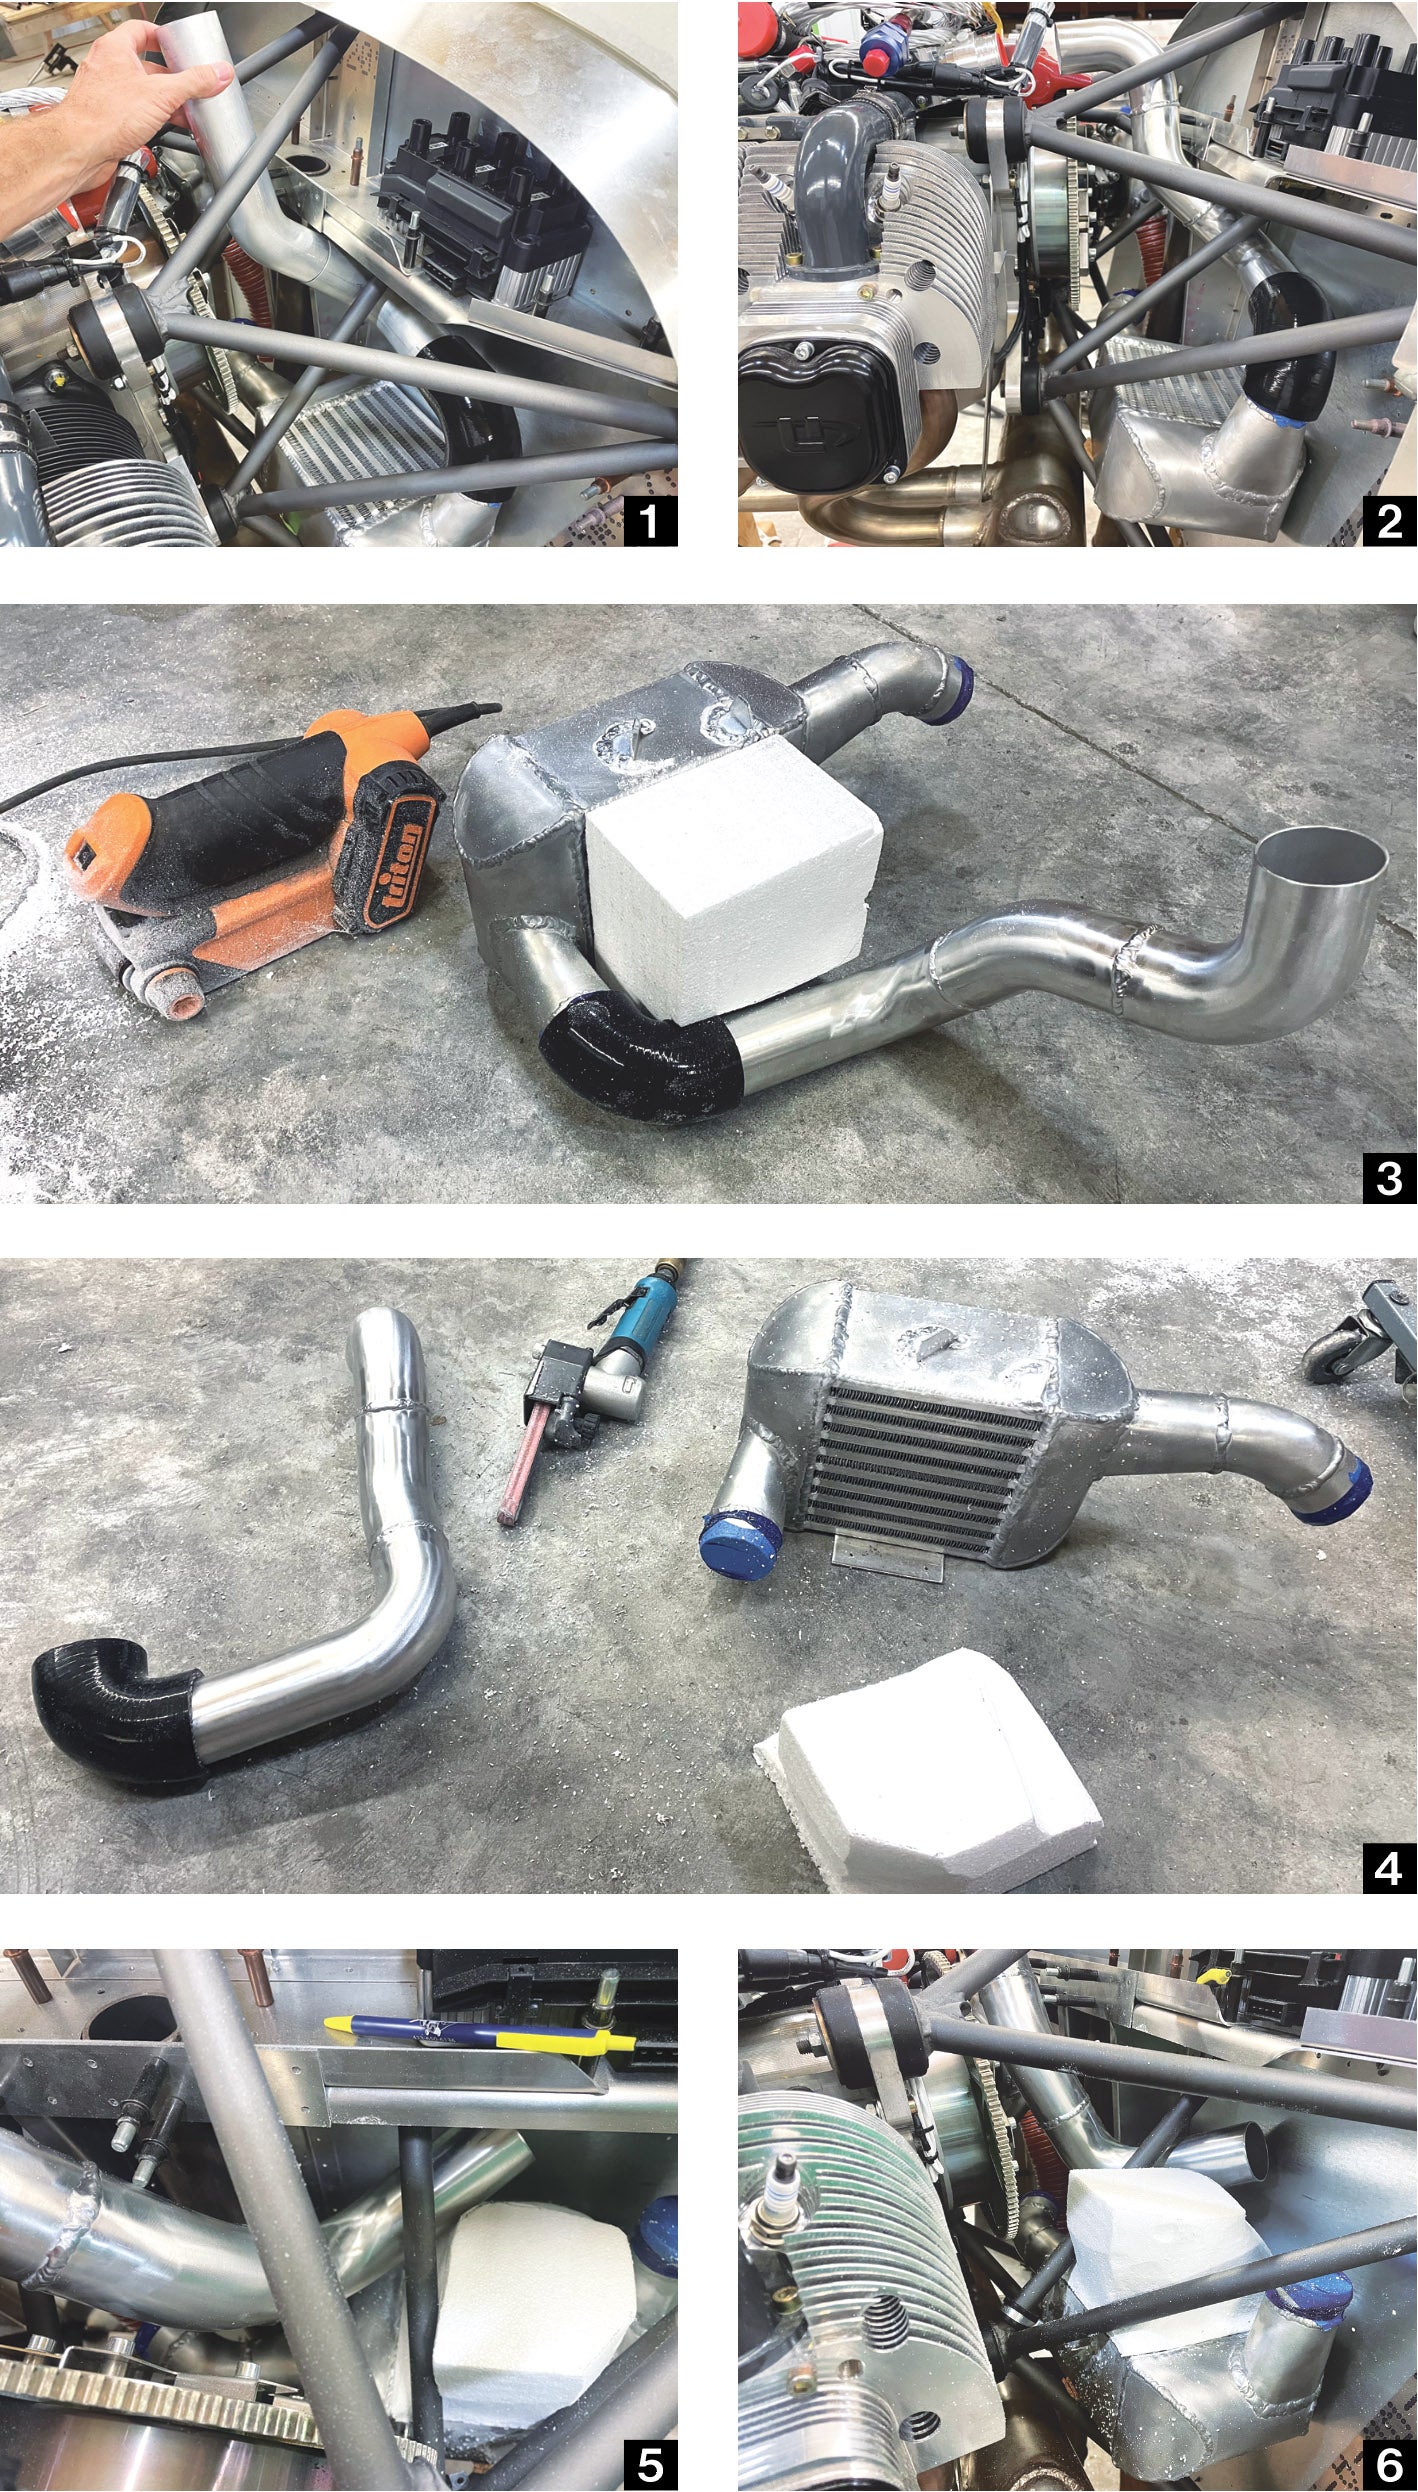
The 750 SDX’s custom intercooler from Part 11 (July 2024 KITPLANES) is completely welded, including the mounting tabs that allow it to be attached to the firewall and also to the engine mount tubes. Along with this intercooler progress, I have also managed to fabricate and weld the aluminum intake tubing to form what I think is the best route (and with the least amount of power-robbing bends) to get the intake airflow from the intercooler to the ULPower 520T engine’s throttle body and intake system.
This entire process took quite a bit of time to fit up nicely into the tight-fitting custom engine mount, but I am pleased with the result so far and I think it should flow nicely. Once the intercooler and intake pipe were complete, I began the next tedious process of building a mold for a carbon fiber intake shroud, which will bring fresh air from a scoop on top of the engine cowl, down through the engine mount and then through the rear-mounted intercooler. At least that is the current plan. That being said, I do not intend to complete the shroud until I have built the engine cowl because it will need to closely connect and join nicely with a silicone coupler. So I will go into the carbon fiber build process a lot more once the firewall forward is nearly complete and I am ready to begin the cowl project.
For the intercooler shroud, I just want to get the basic shape of the lower mold going so I can picture the amount of room it will take and so I can work around it with other components as I continue with the firewall forward. The basic mold creation is actually quite simple. I just take pieces of white foam board, cut out the rough size/shape with a band saw, then start whittling it down to the proper final shape using belt sanders.
Tool Time
Now might be a good time to mention my favorite all-time shop tool. Almost everyone has one tool that stands out as a most-used or favorite shop tool. I am not affiliated with this one in any way, but my favorite is called a Dynafile from a company called Dynabrade. I use the air-powered type and it is basically just a small handheld belt sander that is small enough to fit many cracks and crevices that other tools just can’t reach. It is one tool that I will have to replace immediately when it wears out because I use it for all kinds of fabrication, including shaping molds, port matching on race engines, smoothing rough edges and shaping aluminum airplane parts and even sanding polycarbonate windows to fit. It is not a cheap tool but, in my opinion, it is useful enough to be well worth the price.
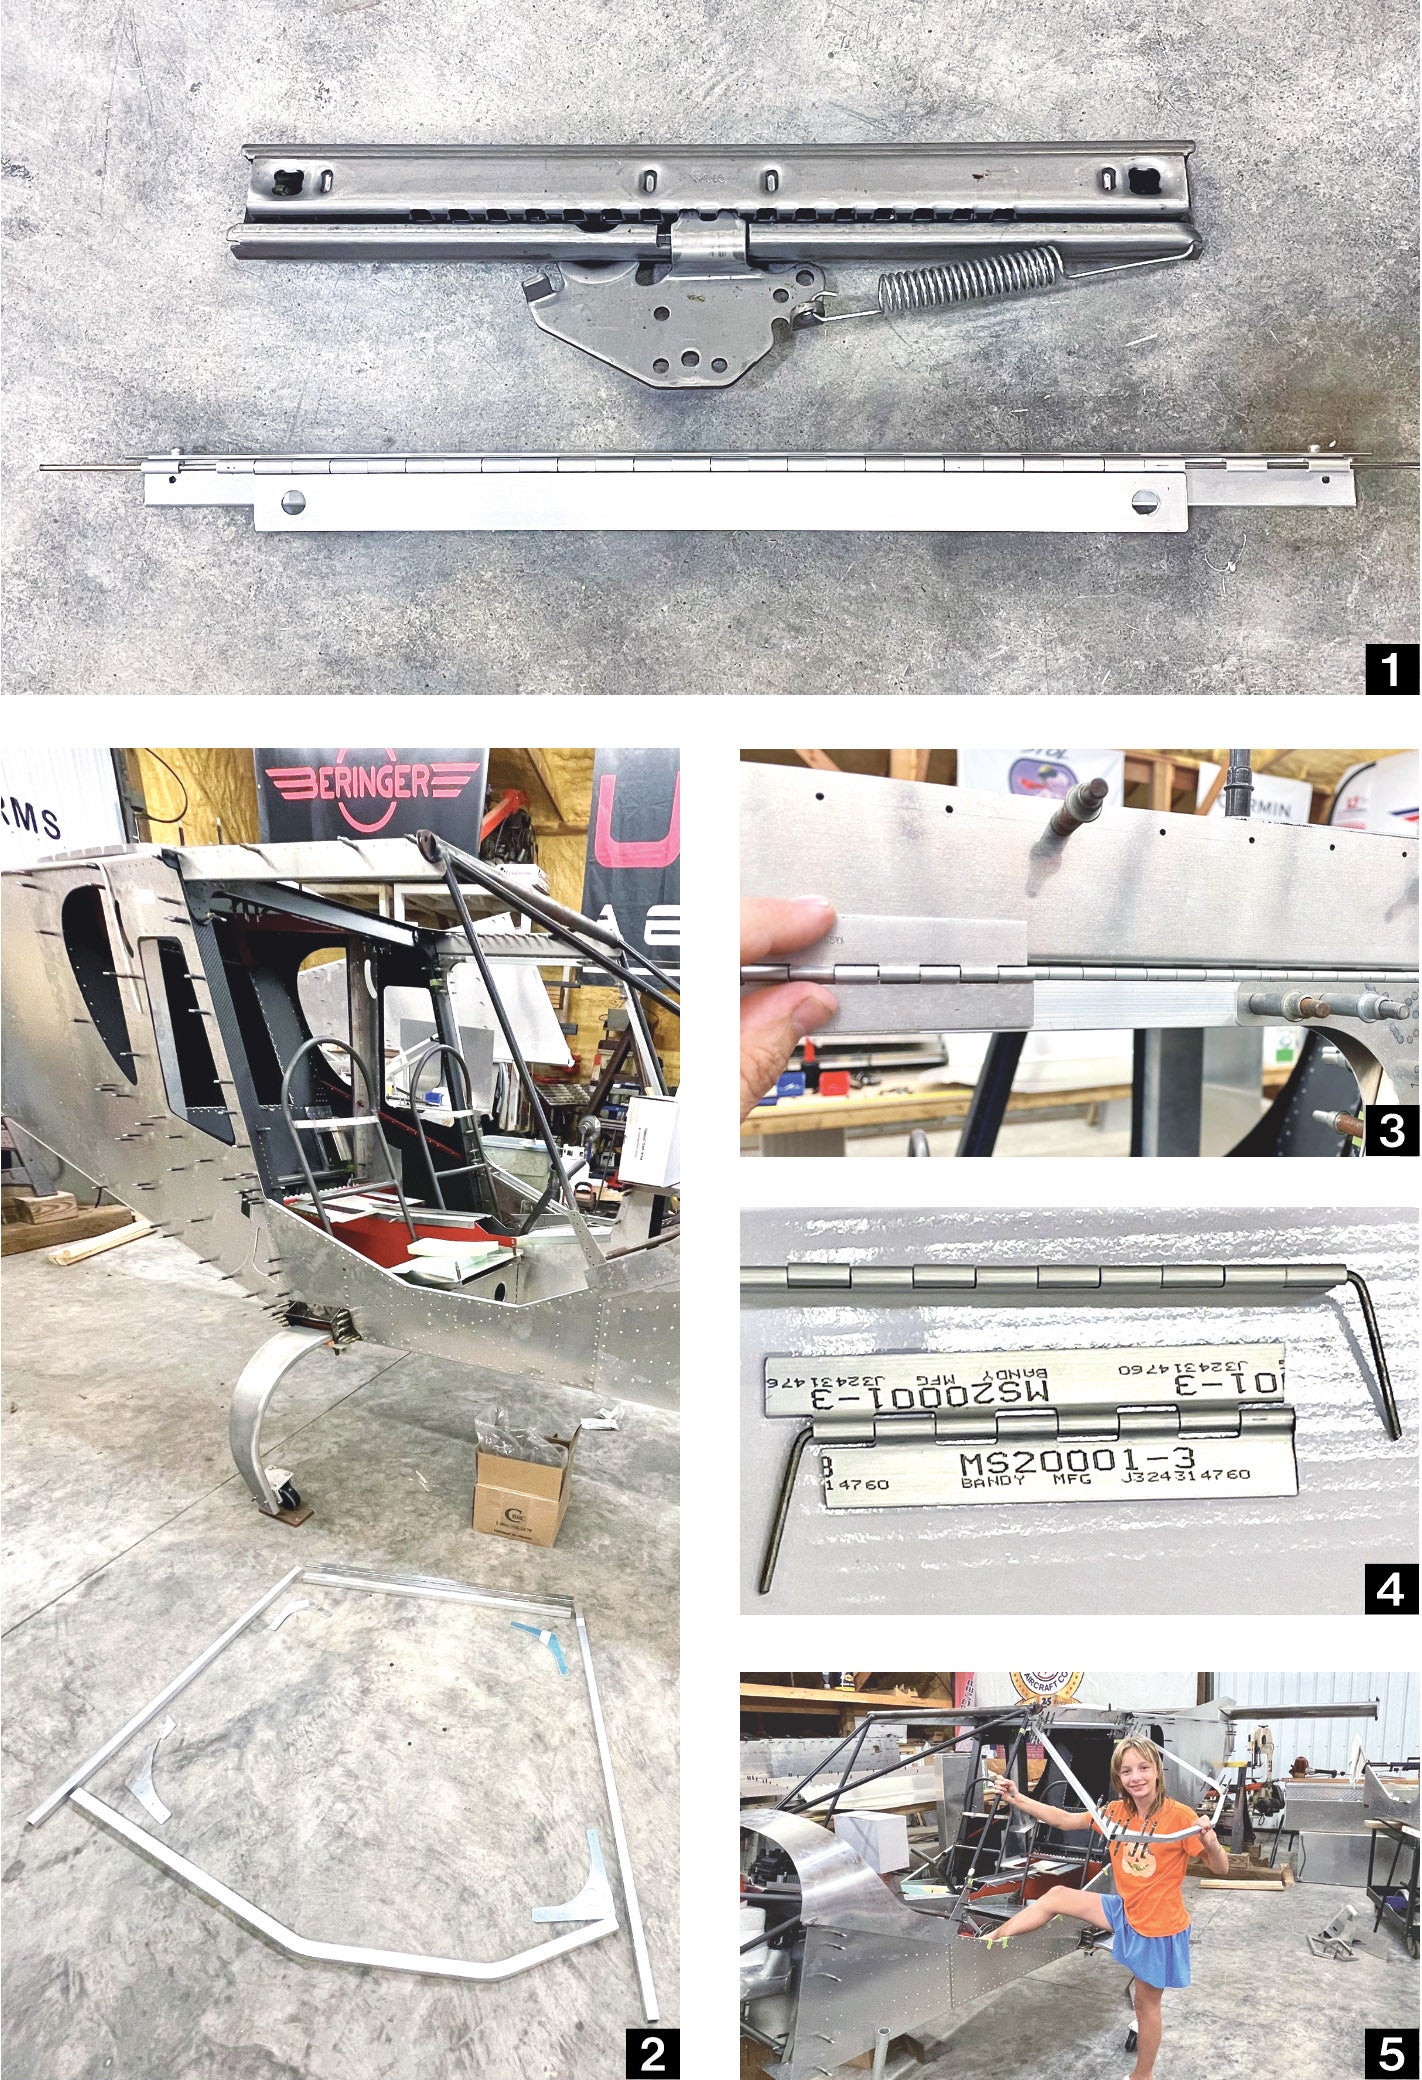
The next thing accomplished since last time is the second seat assembly and seat attachment brackets. You may remember from Part 7 (September 2023 issue) that I decided to use piano hinges for the seat attachments because they are much lighter than the sliding seat option but still offer ground adjustability and hopefully quite a bit more versatility. Just how much lighter? Well, I have spent a little time at the scales on several components, just out of curiosity, and this seat mount setup is significantly lighter. The optional sliding seat rails weigh in at 3.75 pounds per seat, while the piano hinge setup is barely less than three-quarters of a pound. So this adds up to a 6-pound weight savings for both seats.
Since this was custom and not in the Zenith assembly plans and I had already struggled through figuring out how I wanted it to work on the first seat, I was basically able to use the first seat as a pattern to build the second seat. This was now a straightforward and fairly simple process, which is usually to be expected on someone’s second go at building components.
That second-time experience philosophy actually holds true for most of the airplane. Even with the amazing advancement for the simplicity of the Zenith kits, being a second-time builder also tremendously helps cut down on certain build hiccups. This has definitely been true with the 750 SDX, as there are many things that seem much easier and quicker to figure out compared to building the Super701.
Doings With Doors
While talking about these hinges, their usefulness and more custom components for the 750 SDX, I will go straight into the next modification, the door hinges. The door assembly was the next thing on my long list. I had been putting it off because I wanted to have the fuselage ready to put the doors on so I would not have to store them, but also because they are different from the doors used on my Super701, which made them somewhat unfamiliar territory to me.
The 701 kits came with fiberglass-framed bubble doors when I bought my first Zenith kit. Now the 750 series kits come with square aluminum tubing and brackets that have to be fitted and assembled as a doorframe before the bubble window can be installed. I am proud to report that, as usual, Zenith has done an excellent job prefabricating the parts for the door assembly. Once all the pieces are laid out and ready, you just have to spend some time to carefully measure, cut, fit and mock up the pieces. I did the rough cuts to the aluminum tubing in a band saw, then tweaked the final fit with the belt sander.
The doors swing upward with the use of a piano hinge along the top, but as per my usual, I am not doing it the way the plans show. The standard door is attached (closed) with both legs of the piano hinge mounted vertically on the outside of the cabin. While this is probably the easiest way to install them, it leaves a slight gap between the hinge joints and leaves the hinges exposed visibly.
My Super701 is extremely well insulated/sealed and I like to fly year-round, so it is not uncommon for me to push out the plane and fly during the cold winter months around our Appalachian Mountains. I had to add extra latches to the Super701 doors to help make them airtight so I could withstand temps down to 0° F. This had to be done because the 701 doors close against the outside of the cabin frame, whereas the 750 series doors close into the cabin’s doorframes against an internal door trim that also holds a rubber trim piece (much like an automotive door setup).
The one area that I noticed where the Super701 is not airtight is along the piano hinges. I have mostly sealed those using foam rubber, but with the 750 SDX, I wanted a cleaner and tighter fit to begin with. So the 750 SDX door hinges are being fitted closed against each other when the door is shut, which almost completely eliminates them visibly and any gap they would create. I should also mention that I am using the extruded piano hinges for the doors. This started because I had enough extruded hinge left over from previous projects to complete one door.
Well, when I moved on to the second door assembly, I found out that the extruded hinges have basically doubled in price within just one year. I really like using the extruded hinges in several situations because of their extra strength and precision when compared to the standard piano hinges. This seems great, but with today’s pricing, I figure the 750 SDX will now easily have over $1000 of extruded piano hinges once completed. With the first doorframe mocked up with the cabin, it is almost time for the final door assembly.
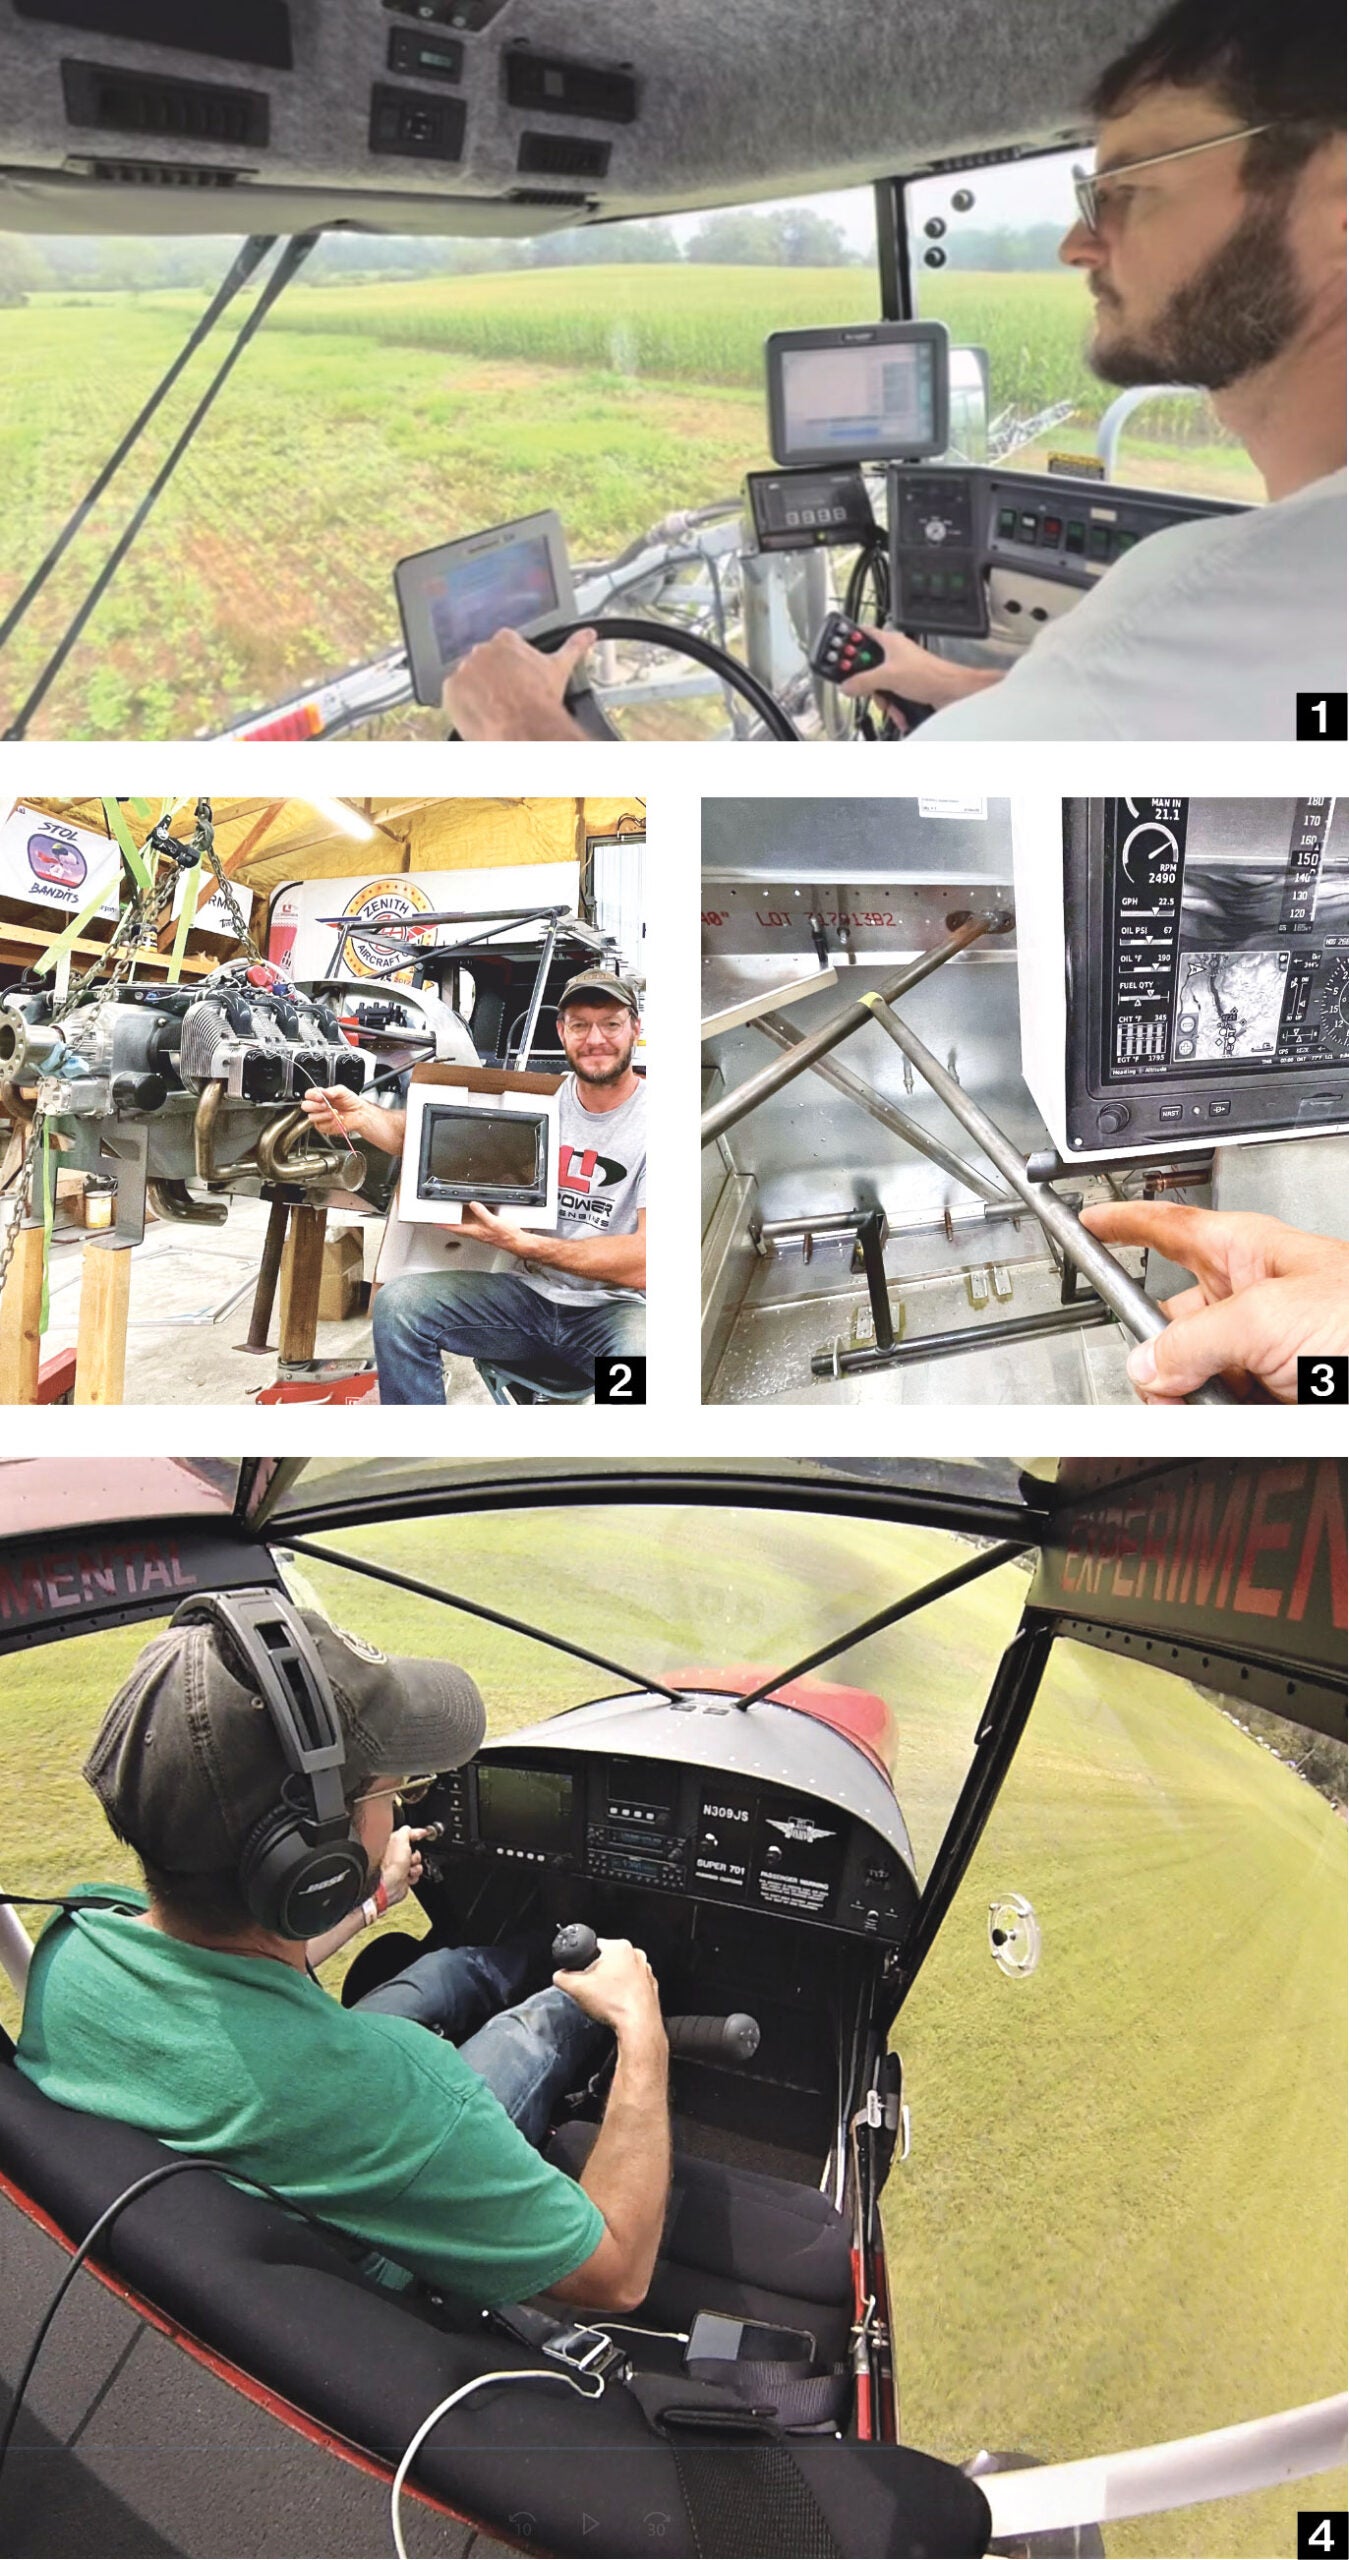
With our farm growing season currently in full swing, I have spent a fair amount of time on our big spray rig. Interestingly, I have found some similarities between this sprayer and our STOL airplanes. Our sprayer has a boom width of 80 feet and with our rolling farmland, this means that both the sprayer and the airplane require the operator/pilot to be alert and keep their head on a swivel. They are also both very expensive pieces of equipment that require extreme attention to operate.
Instruments for Visibility!
I recently received another big piece of the puzzle, the Garmin G3X Touch display and some of the engine sensors. With the G3X in hand, I can go back to focusing on the custom instrument panel/pod, continue the process of finishing up the last pieces of the cabin frame and move further forward with the FWF.
I really have high expectations for what will become exceptional visibility from the 750 SDX. I have been figuring and playing with postboard mockups for a while now and believe I have decided how I want the instrumentation to look and function. When you don’t use a standard Zenith instrument panel or their optional unique Unpanel setup (mentioned in Part 12 in the September 2024 issue), the center tunnel/console is left mostly unsupported from side to side because both of those options structurally tie the center tunnel in with the cabin frame and/or firewall.
Since I am building a custom center instrument pod style setup, I had to find a way to tie everything together to make it all robust while still trying to avoid weight penalties. I have already done some extra welding to the chrome-moly cabin frame when I built the shorter-than-stock engine mount. I am also working on triangulating the last pieces of the chrome-moly cabin frame structure within the instrument pod top/side cover with another lightweight chrome-moly crossover tube that will be TIG welded in place. The center pod along with the center control stick will also require a left-hand mounted/operated throttle cable.
I really like this control setup in my Super701 (right hand on the control stick and left hand on the throttle) and I am trying to reproduce its controls with the 750 SDX. However, since there will be no instrument panel on the left (or right) side of the cabin, I will have to fabricate a throttle bracket that will also be welded to the left side of the cabin frame. Hopefully these two components will wrap up the aluminum and chrome-moly TIG welding required for my modifications. Once these are complete, I will be ready to tear the entire cabin area and FWF back apart one last time in hopes to have the cabin frame and several other pieces Cerakoted before their final assembly.
Many times I really wish that I just kept it simple and built according to the plans, which would mean I’d be done a lot sooner. It seems like everything I do for this 750 SDXtreme is taking far longer than expected (or wanted) because of my many modifications and having to engineer/fabricate custom parts and components. I am reminded of a quote: “An engineer’s greatest strength is their ability to see the big picture and break it down into manageable parts.” Let’s just hope that all these manageable “custom” parts will one day finally go together to create the big picture I am seeing in my head.


