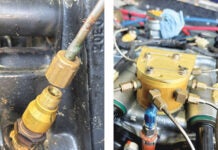
 I have performed countless Lycoming compression tests in my life. While that’s what we all call them, they are more accurately referred to as cylinder leak-down tests. Simply put, the test—using a dual-pressure gauge device with a specified-size orifice in between—tells you the capability of the cylinder/piston/valve assembly to hold pressure. The better it holds pressure, the more power it will develop. The less pressure it holds, well…it will probably still run—so long as it isn’t shedding pieces—but your power output is going to be low. I used to own a J-3 Cub with some partners and we joked that on a good day, it had a three-cylinder engine, because one of the jugs was always low compression. The weak one just changed every other day.
Of all those countless compression tests, most have given satisfactory results, which Lycoming proclaims to be anything better than 60/80. What if it measures less than that? Lycoming goes on to say, “Button it up and run it for five hours, then check it again.” Their procedure is a virtual do-loop, however; if all you do is measure compression with a gauge set, you can fly indefinitely with a low-compression cylinder, according to the manual. And this is where common sense has to come in—you have to ask yourself, “Why (and where) is it leaking?”
Unless you have an actual crack in your cylinder (or a spark plug is missing), there are really only three places the air can go—past the rings, out the intake valve or past the exhaust valve. When you have the cylinder pressurized, it’s easy to listen at the oil dipstick tube, engine intake or exhaust pipe to determine which of these is the culprit. If the problem is the rings, then you know you might have to pull the jug. If it’s past a valve, then it’s time to think hard about what the problem might be—and this is where a good borescope comes in handy.
The Modern Paradigm
It’s only been a few years since high-definition articulated borescopes have become generally available. Before that, some mechanics used expensive borescopes to have a look inside a cylinder, but with the advent of modern digital units that can hook up to your phone, tablet or computer, the knowledge base of how to use them—and what you are seeing might mean—is becoming mainstream.
While intake valves can leak, it’s the exhaust valves that are more often the culprit because they have extremely hot gas flowing around their edges and out the exhaust port. Life is just harder on the exhaust valve, so let’s concentrate on those.
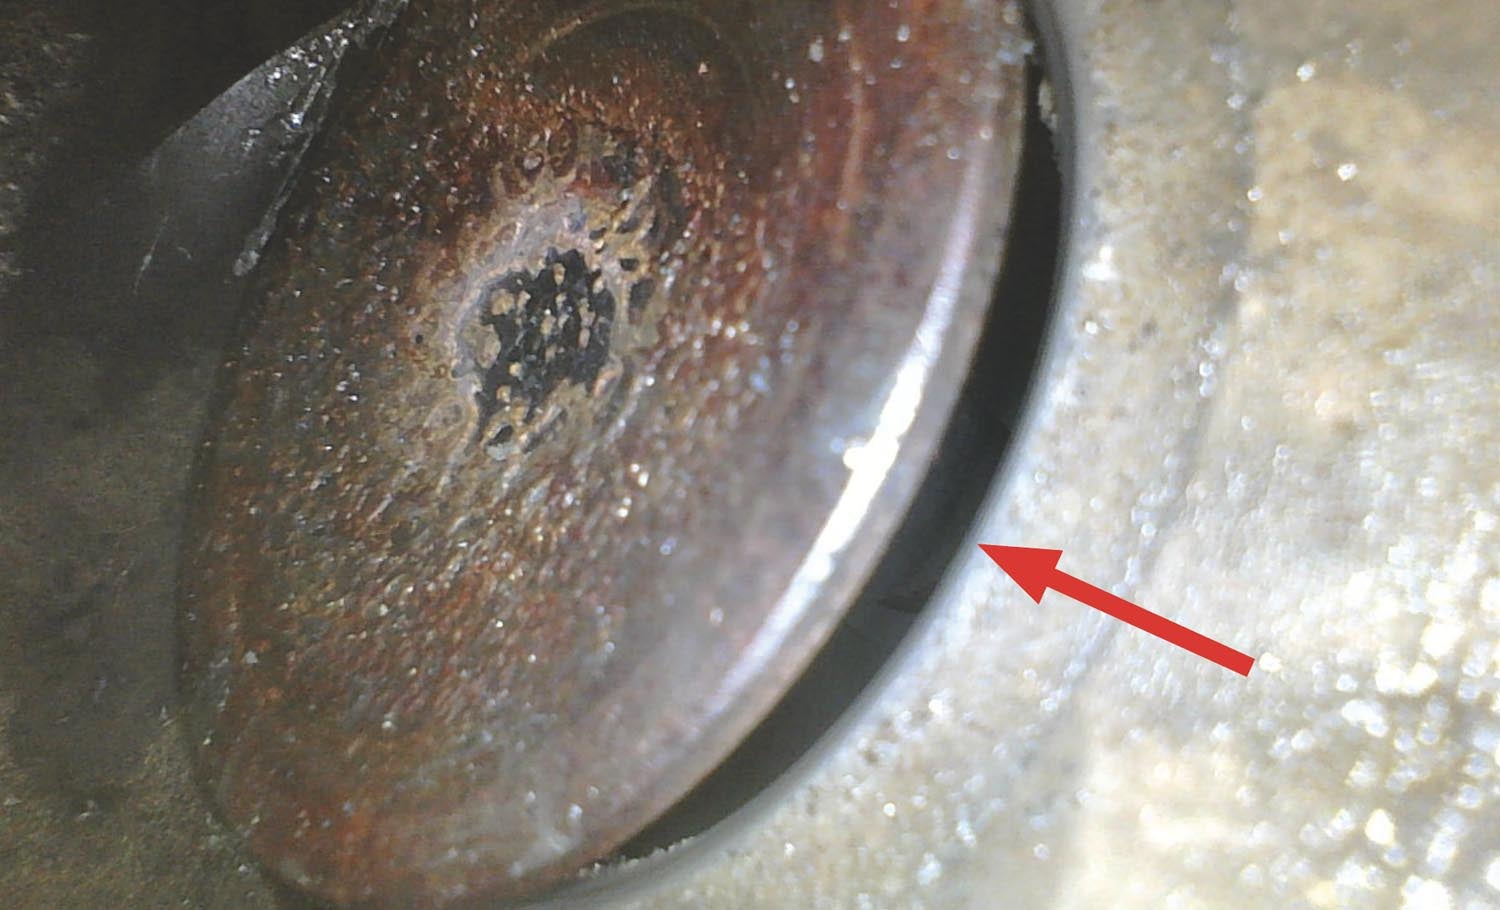
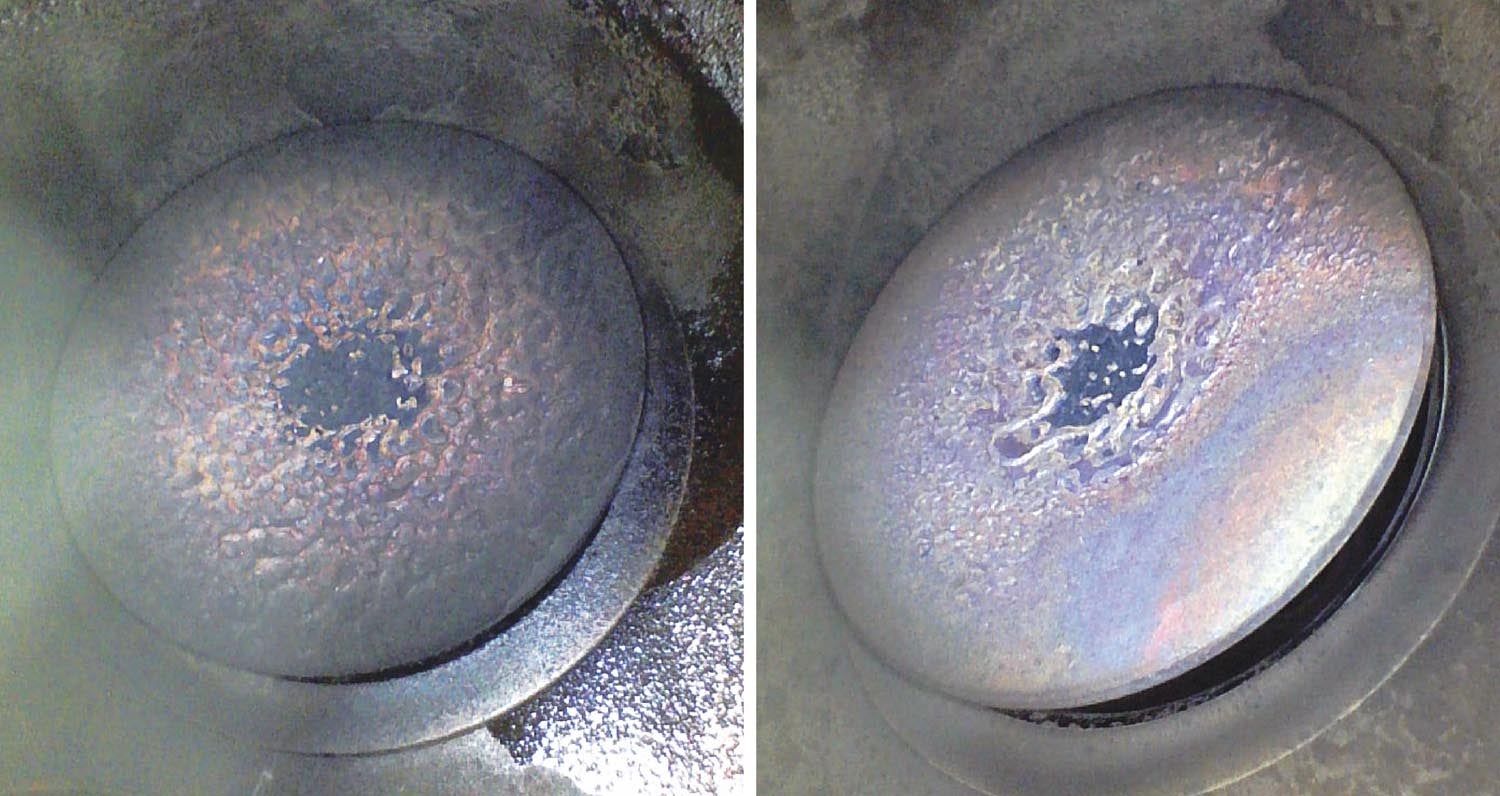
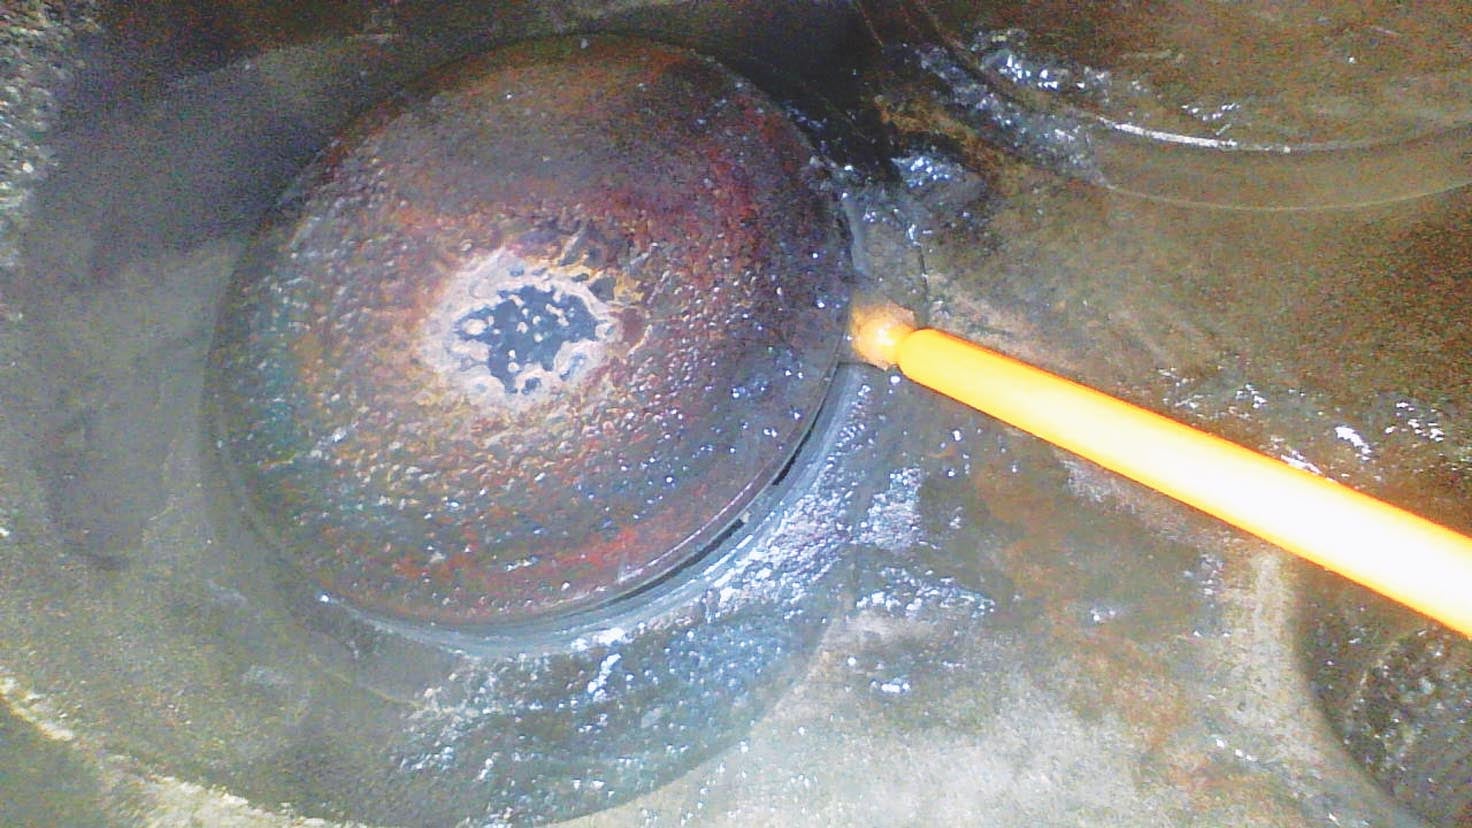
When you take a look at an exhaust valve with a good HD color borescope, you are looking for an evenly burned pizza—black bubbled “cheese” all over the surface. What you don’t want to see is one area that is smoother and shaped like a shallow arc—this indicates a place where the valve is leaking. The leak can be due to erosion in the seat or the valve, a piece of carbon or debris that got trapped and stuck in place or some surface discontinuity. Before the days of borescopes, all we knew was that there was a leak with air coming out of the exhaust pipe and that generally meant pulling the cylinder if the problem didn’t go away with a little bit of additional run time. Typically the first stab at a solution was to “stake” the valve—essentially hit the end of the valve stem with a hammer to try and dislodge anything stuck in the seat that was preventing it from closing fully. In my experience, this rarely worked, probably because by the time you caught it, whatever was stuck there had already caused valve or seat erosion and the damage was done.
Let me step back a moment to point out that valve lapping is different from the procedure Dave Forster described in the August 2023 issue. He outlined the procedure for checking valve guides and reaming them if they were too tight. Guides with junk in them are the most common source of “morning sickness” in Lycomings—that is, when the engine runs rough when first started. The tight valve-to-guide clearance makes the valve stick open. It’s not great with the engine at idle, much worse should it happen at cruise speed. That’s a different issue even though some parts of the procedure are similar. We’re going to focus on the procedure to make sure the valve face contacts the valve seat properly.
Is It Right for You?
With the advent of the ability to see inside the cylinder, however, it has been more common to try another method of repair: lapping the valve in place, on the engine. Valves are always lapped in place on the bench, with seats ground using special machines, and finished by spinning the valve with grinding compound against the seat. It’s often done on the bench because you have access inside the cylinder to apply lapping compound to the valve seat and to clean things up easily after seeing what you have done.
But with the borescope, it is now possible to lap the valves in place before having to pull the jug. If the leak is caught early, when there has only been minor erosion, lapping in place might well solve the problem. At the very least, it does little harm if you do it properly and take your time. You can then fly the plane—hopefully over friendly terrain in daylight—for a couple of hours and see if you have solved the problem with another compression check.
Consider the bigger picture, though. I have no problem lapping a valve in an engine with just a few hundred hours that has just picked up an exhaust valve leak in a few hours. There is a good chance of success and little chance of harm. However, it’s worth considering the overall condition and time on the motor. If you have 1900 hours on a Lycoming that is beginning to show other signs of wear, you probably need to admit that the low compression is a sign of an impending overhaul. You’re better off in the long run to do the overhaul now—or at the least a top overhaul—rather than try a little fix here and a little fix there. If you routinely fly lots of IFR or night over unforgiving terrain, you might want to consider pulling the jug to get a surefire repair.
If you have a cylinder shop on the field or nearby, talk to them about the pluses and minuses of lapping in place. If they can do the job quickly and at a reasonable price…why not let them do it? But a good cylinder shop on your field is a real luxury. So if you’re living far away from a cylinder shop, have a relatively low-time engine and the problem is caught early, then lapping the valve in place might be a good thing to try first—so let’s talk about how it’s done. Once you see the process, you can decide for yourself what’s easier—going through the lapping process or pulling the jug and sending it to a pro.
Let’s Get Ready
In order to lap an exhaust valve, there are a few things you’re going to need:
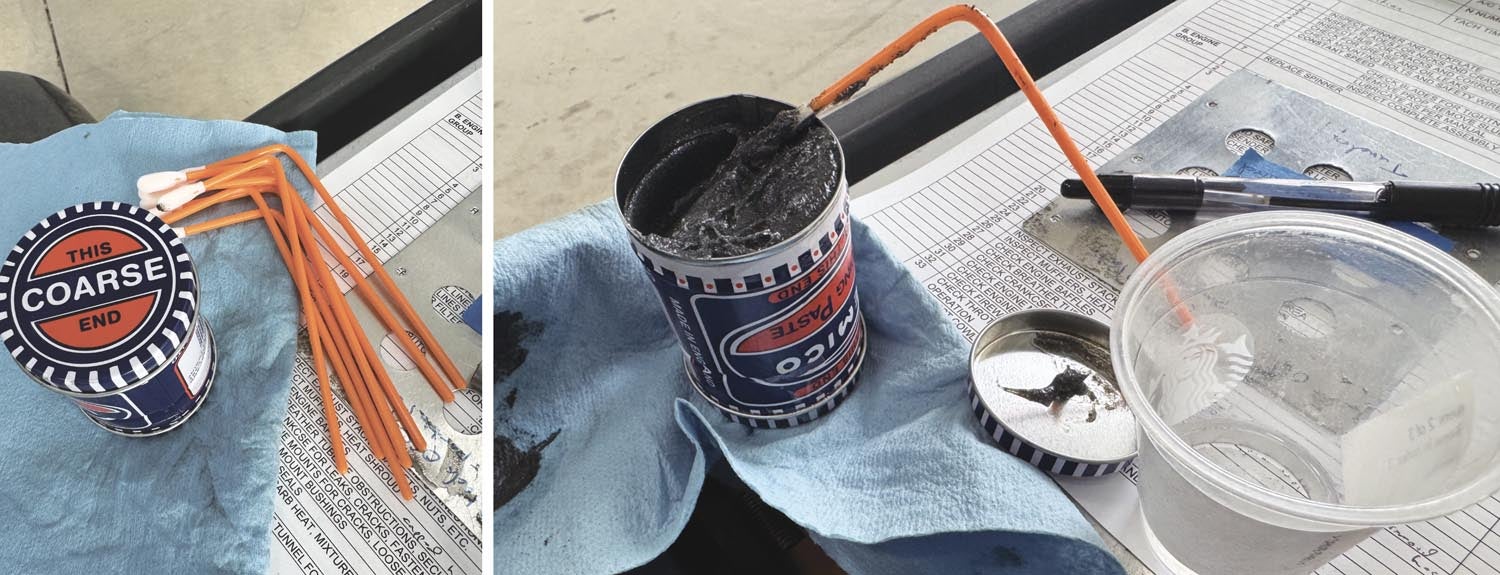
- Grinding compound—Chemico is available from Amazon
- Foam-tipped plastic applicators (6 inches long)
- Twenty-five feet of ¼-inch nylon rope (cheap stuff is fine)
- Six inches of ½-inch ID poly tubing, a ½-inch drill bit and two worm-drive hose clamps
- Common engine tools
- A good HD borescope
- Mineral spirits/Stoddard solvent
That’s actually a pretty small list if you consider that in order to get far enough to decide you need to lap a valve, you already have engine tools and a borescope!
We’ll assume that you already have the cowling off and the engine at a comfortable work height (if it’s on a taildragger). Pull both spark plugs from the cylinder that needs work and tuck things like spark plug wires out of the way—you’re going to be running a drill motor so you don’t want anything to be loose and get caught. It also helps to have a worktable or other flat surface in easy reach of the cylinder where you’ll be working—ideally you want to stand/sit in one place to do the work (think surgeon doing laparoscopy) and arrange things so you don’t have to move much.
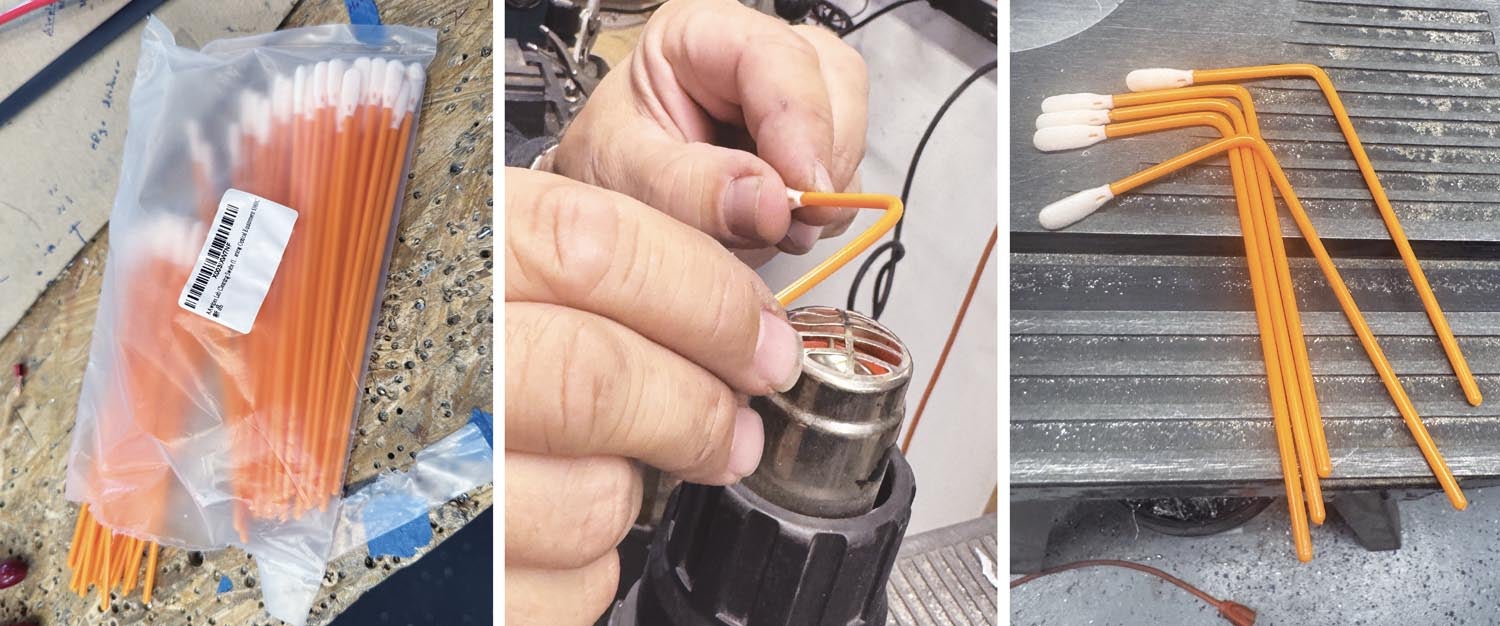
Before you actually begin work, take out your pack of sponge-tipped applicators and a heat gun. Hold the applicator shaft over the heat gun until it gets soft and put a 90° bend about an inch and a half (experiment) from the end. Hold it at 90° until cool—blowing on it makes this quicker. You’re going to need a couple dozen of these. We bought a pack of 200 on Amazon for less than $10. Don’t be stingy.
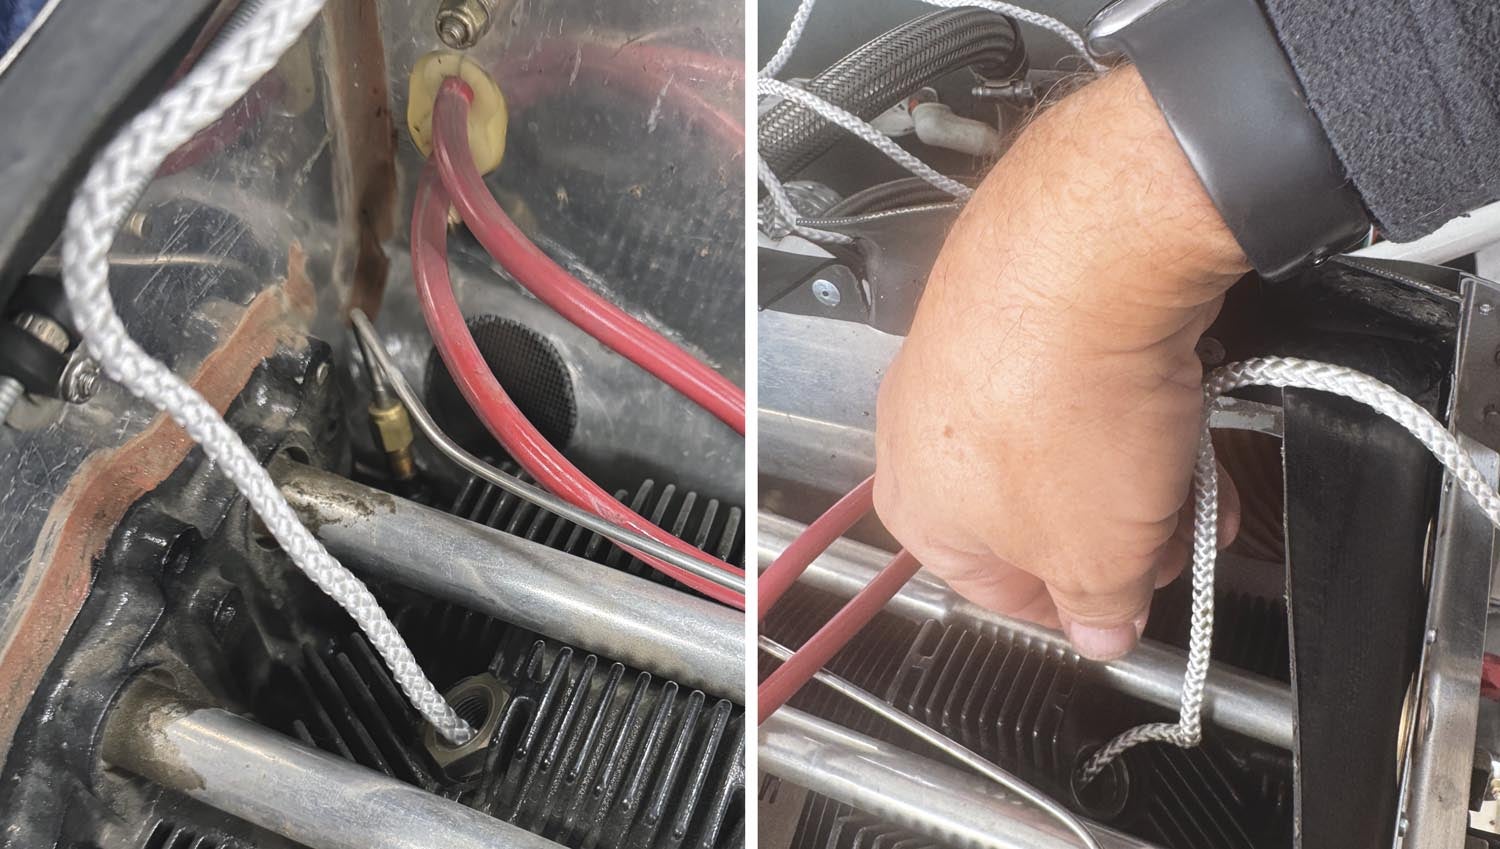
Now, to the engine! Remove the valve cover and clean up loose oil. Find your 25 feet of rope. With the piston at the bottom of the stroke, feed all but a foot of the rope into the top spark plug hole. This will act as a cushion when you bring the piston up in the cylinder and hold the exhaust valve softly in place. Bring the piston up to the top of the compression stroke—or as close as you can get with all that rope in there. Drive the rocker arm shaft out toward the intake valve side—you only need to remove the exhaust rocker. Place the exhaust rocker in a safe place, then use a valve spring compressor to compress the springs and remove the rotator cup and the valve retainers—don’t lose those two little half-moon pieces. They can jump out on the shop floor, so pick them up and put them in a safe place. Slowly release the compressor and remove the valve spring cap and springs. You should now be looking at the naked exhaust valve stem.
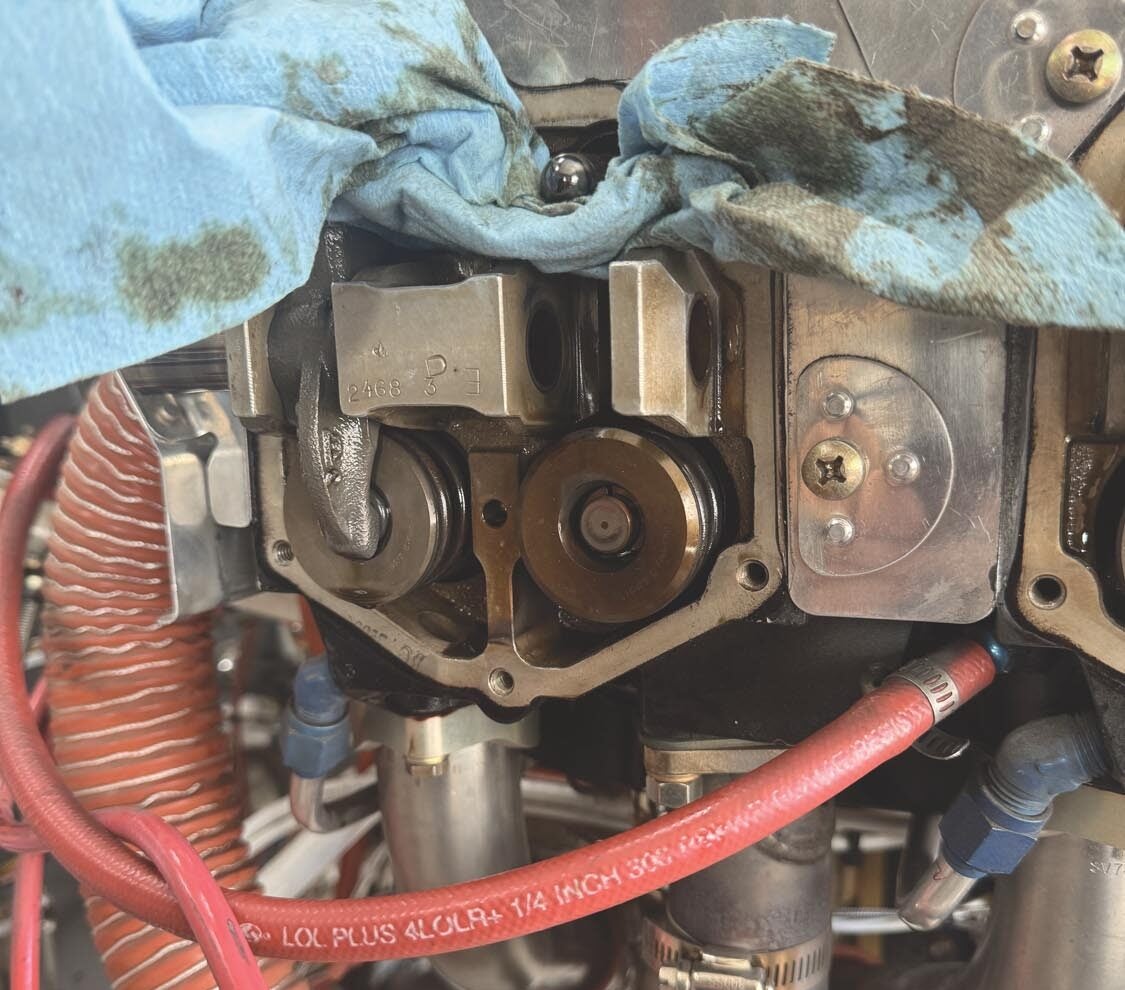
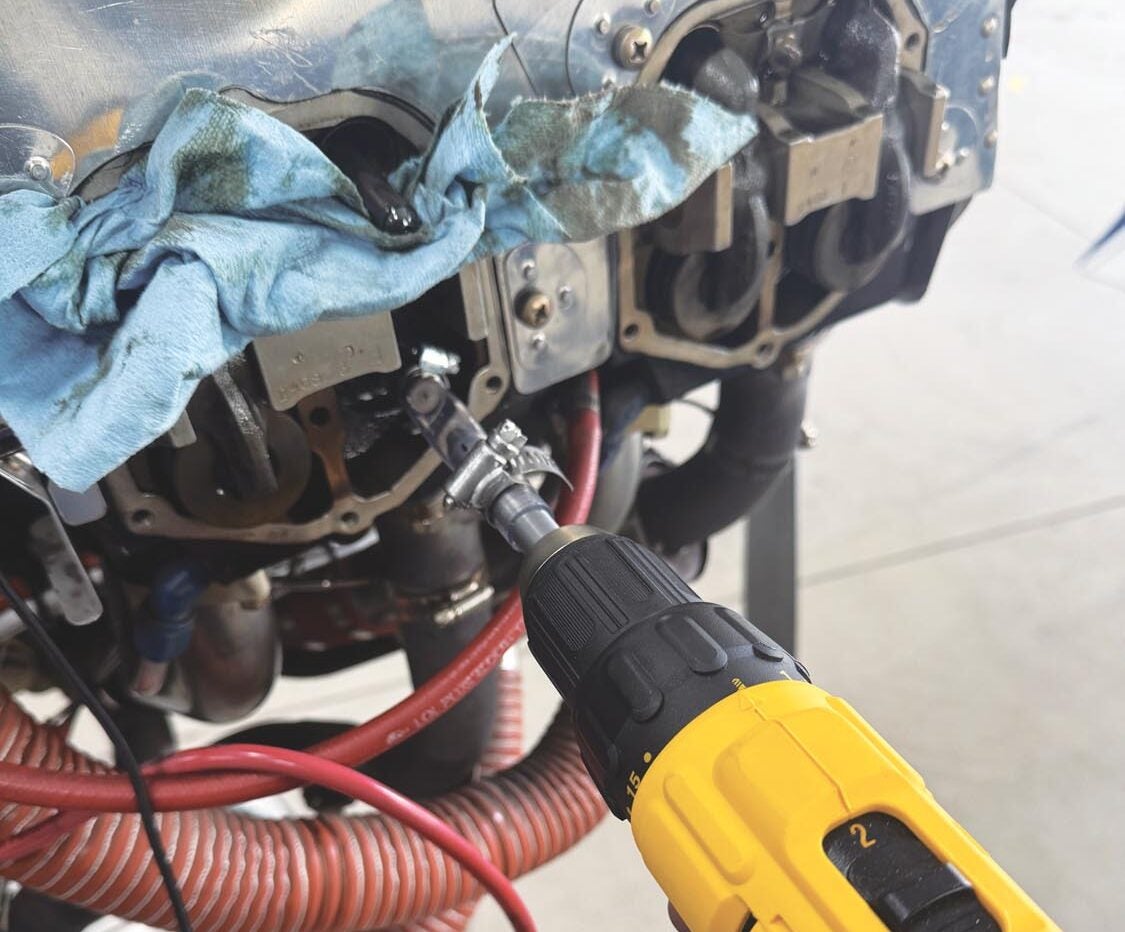
Before you remove the rope, cut a 4-inch piece of ½-inch clear poly tubing and slip it over the end of the valve. Push it on just barely past the retainer clip gap. You want a half inch between the end of the hose and the top of the valve guide so that you can push the valve in a bit. Put a worm-drive clamp over the hose and clamp it to the top of the valve stem.
Relax the pressure on all that rope and pull it out. You should be able to push the valve in by hand, as far as the tubing will allow. Spin the valve carefully to make sure that your hose clamp doesn’t run into the cylinder head as it spins. This is also a good opportunity to see if the guide feels smooth and the valve isn’t wobbling. It’s also a good time to do the Lycoming valve guide wobble check if you have the tool—and if the engine has 500 hours on it, it’s worth getting the tool! A leaky valve could be the result of a gunked-up valve guide.
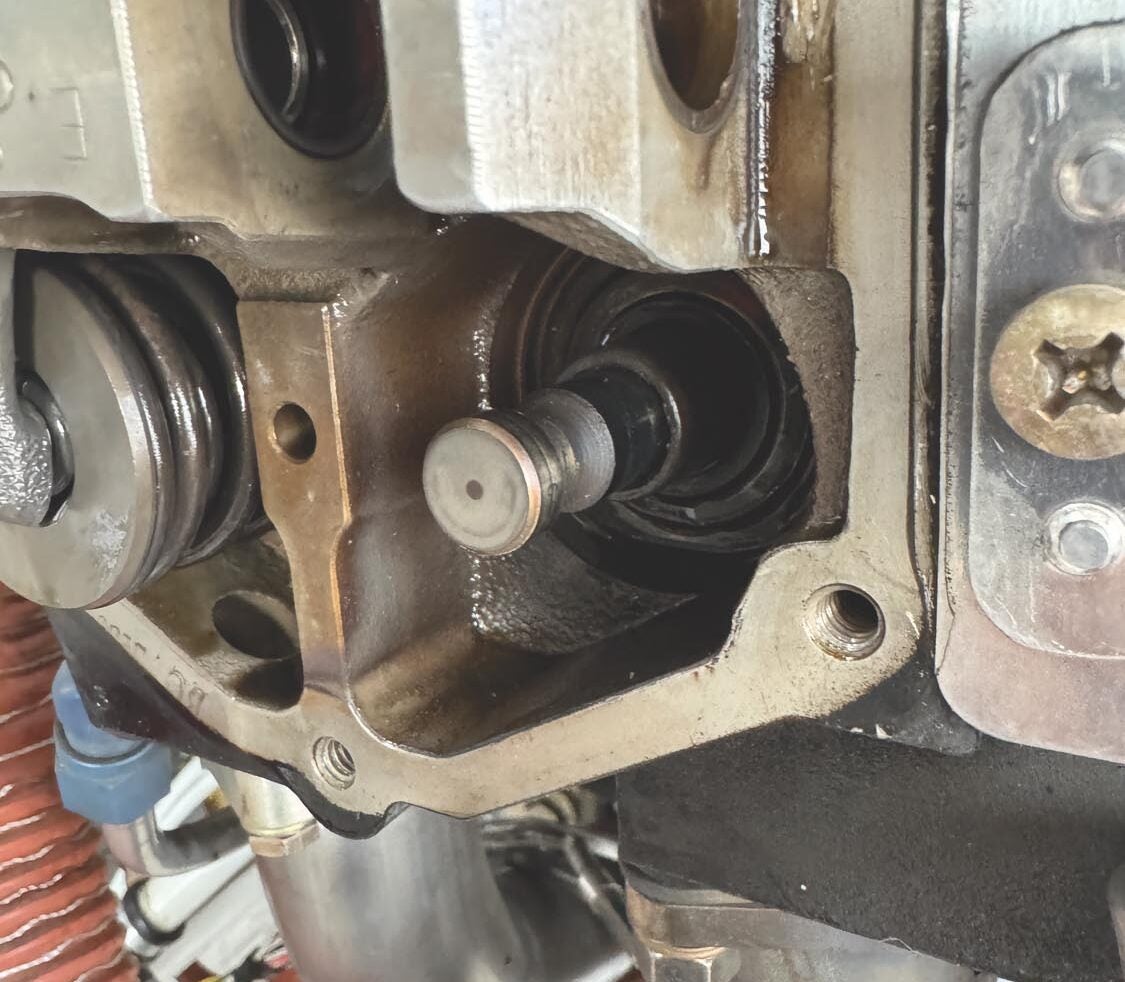
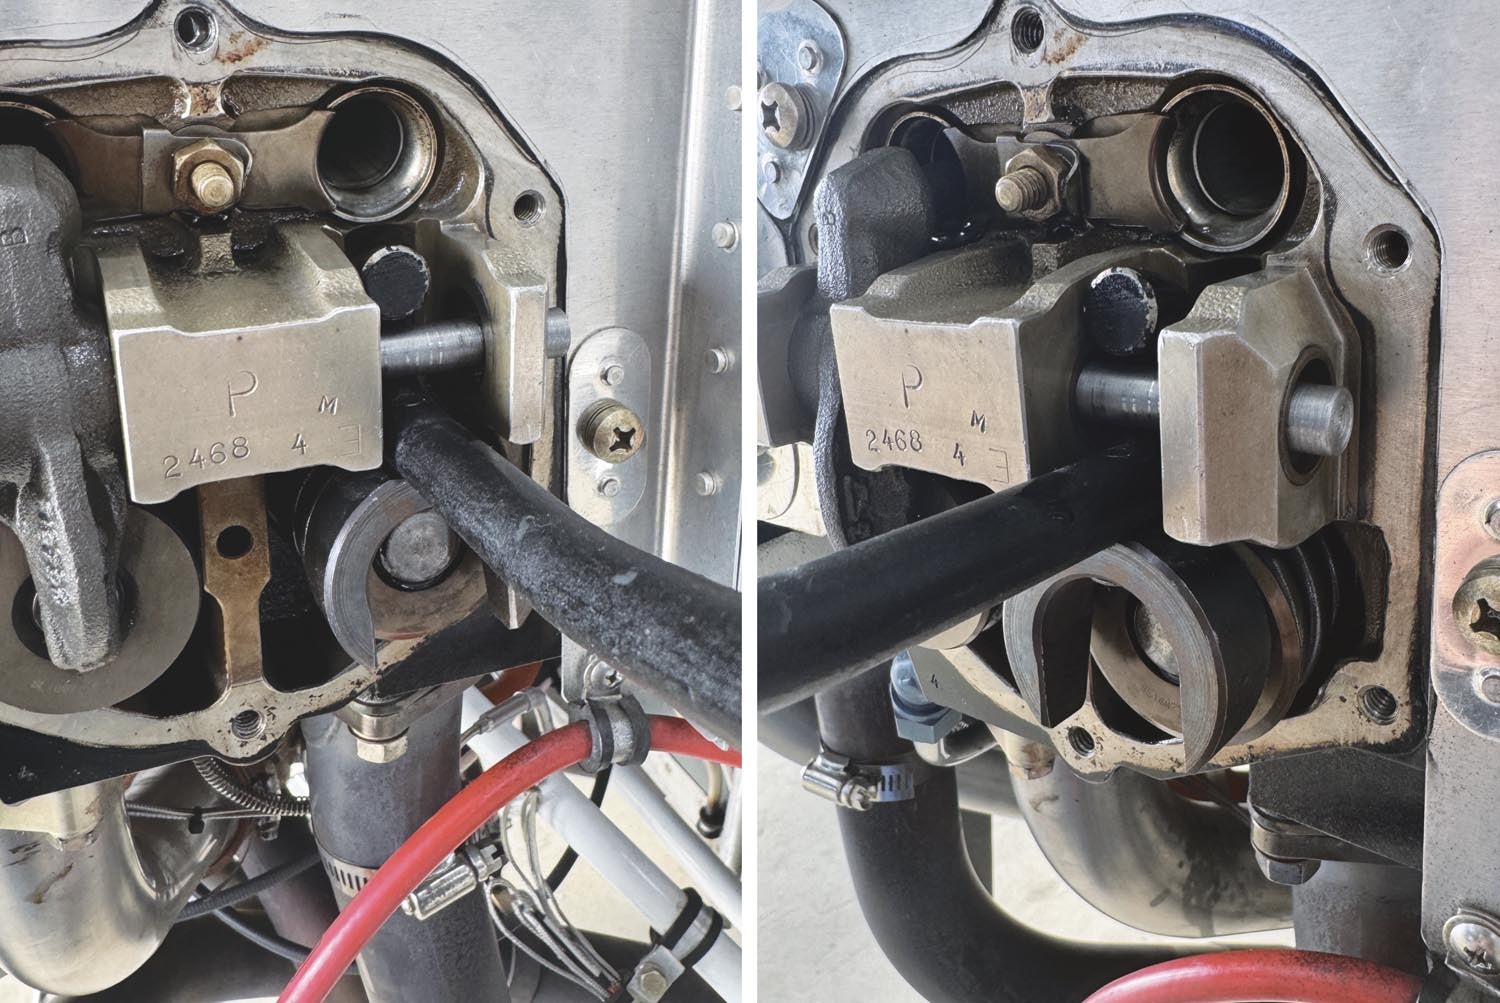
Take a ½-inch drill bit or a chunk of ½-inch rod and stick it in the other end of the tubing. Attach another hose clamp to make a good connection but leave an inch of open space in the tube between the top of the valve and your “mandrel.” This is your flexible universal joint between the valve and drill motor. You chuck the mandrel up in the drill and spin it to lap the valve. I made a little mandrel with a pointed tip on my lathe because it made it easier to insert in the tubing.
Assuming your guide is not worn and the valve motion is silky smooth, it’s time to get to lapping! Feed your borescope into the upper spark plug hole and maneuver it so you get a good video of the whole exhaust valve head and, if you can, the lower spark plug hole through which you’ll be working. You’re going to be working backward and upside-down so any reference will help your brain sort things out. I found that using a long USB cable on my borescope and placing my iPhone at the end of the cable in a place that was easy to see was immensely helpful. You want to be able to have hands free to do the work and not hold the borescope and/or camera in position.
Take a Lap
Lapping the valve is remarkably simple—put some compound between the valve face and the seat, then spin the valve using your drill motor while pulling the two together. This is why you need the hose clamps on the clear hose connecting the valve stem to the drill motor. You need to be able to add some pressure to the interface between the valve and the seat.
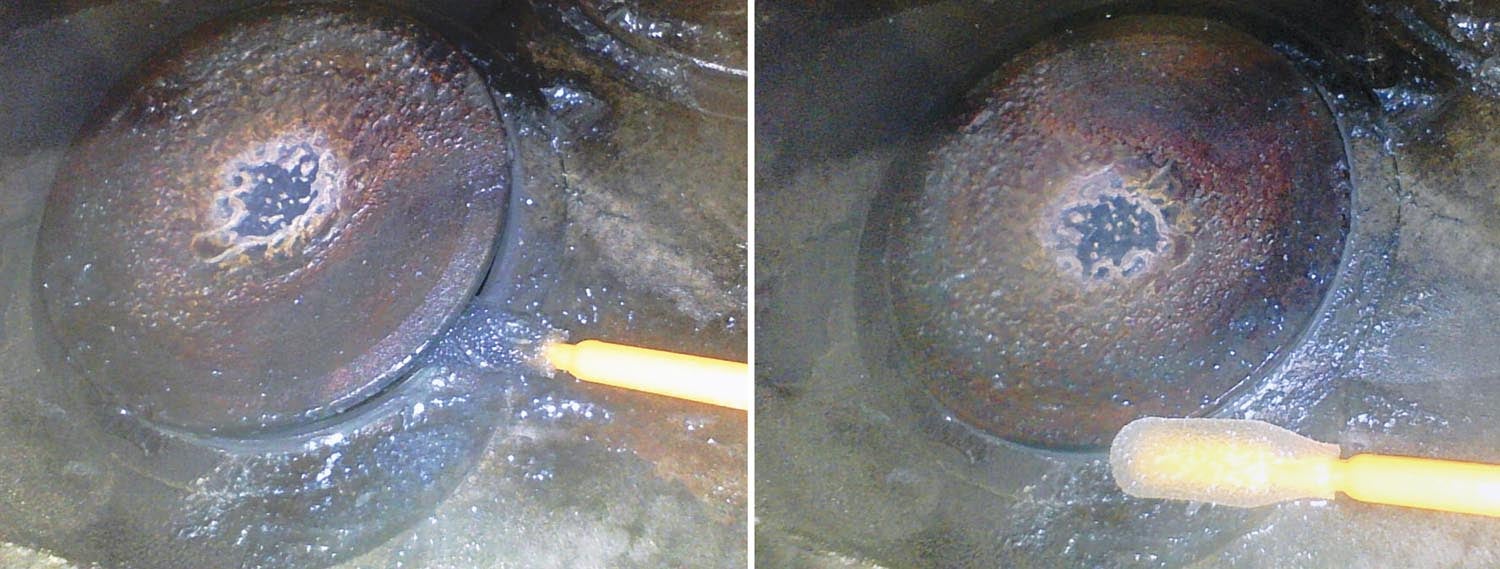
To load the interface with grinding compound, coat the foam part of one of your applicators with goop (start with the coarse stuff), then insert it through the lower spark plug hole, push the valve open and stick the loaded foam tip between the valve and seat. Pull back slightly on the valve and spin it with your fingers to smear the grinding compound onto the valve. Repeat this until you feel you have plenty of compound in there, then attach your drill motor and spin away. I do several “load and spin” cycles, spinning for a minute or so each time. You can sort of feel and hear the grinding process as it starts and then things smooth out, telling you that you’ve either done something good or have spun all the compound out of the interface and aren’t doing anything more.
There is an art to this and I can’t claim to be an artist. I just used some intuition and feel to decide when I had done enough. If you spin the valve by hand while pulling it onto the seat and if it feels smooth, then you’ve probably done well. You aren’t going to reprofile a badly worn seat doing this. You’re just cleaning up a little surface roughness or removing debris that might have stopped the valve from fully closing.
Once you feel you’ve done enough, take some clean applicators, soak them in Stoddard solvent (mineral spirits is the same thing) and start cleaning. Yes, looking in through your borescope, your cylinder head, valve seat, valve face and the spark plug hole likely look like a horror show of grinding compound! The good news is that pretty much anything you leave behind is going to go straight out the exhaust valve once the engine starts. Nevertheless, I like to clean off anything that looks like a clump. If you soak up a lot of solvent in the foam tip, then insert it between the valve and seat and close the valve, you squeeze the solvent out and it runs down the inside of the head toward the lower spark plug hole, cleaning as it goes. You’re going to use up a lot of applicators so have a garbage bag handy to throw the soiled ones away. This stuff is as bad as Pro-Seal when it comes to mess-making.
Got it all clean? Good—now mess it all up again! Repeat the process with the finer compound—if you have the Chemico stuff, it is the other end of the can. Is this necessary? I’m not sure. But the amount of work you go through to prep for the lapping is such that “why not do it while you’re in there” applies. Lap a second time, then clean things up again. Look around with the borescope to find any errant loose blobs you might have left in the combustion chamber and get it as clean as you can. I considered dribbling a bunch of solvent in and letting it drain out, but was able to clean things up to my satisfaction without that much additional mess.
You should feel done when you can spin the valve against the seat and not hear anything awful—it should sound and feel smooth. Now it’s time to reassemble. Reinsert the rope and bring the piston back up to push the valve against the head. Use your spring compressor to reinstall the springs, valve retaining clips and the rotator cap. If you’re really lucky, you might be able to reinstall the rocker arm without pulling the pushrod and pushrod tube to collapse the hydraulic lifter, but I am rarely that lucky. So do that little task and reinstalling the rocker will be easy. Put everything back together, reinstall spark plugs and check the compression, just to make sure you don’t have a gross leak somewhere—you won’t get great numbers with the engine cold, but hopefully it will be better than it was before. Now run the engine up and do a hot compression check—victory is a better set of numbers with no audible leakage coming out the exhaust pipe.
Worth the Effort?
Is valve lapping right for you? That depends on your level of comfort working around engines, the age of your cylinders, the convenience of having a local cylinder shop (or not) and the size of your problem.
If you have a low-time cylinder that is clearly leaking through the exhaust valve and the borescope inspection doesn’t scare the heck out of you—as in you’ve seen significant seat erosion or really ugly wear patterns on the valve—then lapping the valve in place is a fairly inexpensive option to try. You should know your way around the top end of a Lycoming before you start and take care not to ding or damage anything as you disassemble and reassemble the top of the cylinder. Just stop and back out if you run into something that you don’t understand.
But for the cost of a few dollars’ worth of supplies and an afternoon’s work—my first cylinder took about two hours, the second just one—it’s worth a try to see if you can fix a minor leak. You’ll know pretty quickly if you solved the problem. If not, then it’s time to pull the baffling and the jug and let the experts at a cylinder shop sort things out for you.
Photos: Paul Dye & Louise Hose


