Your airplane project has been a part of life for a long time, it seems. Out there in the garage or in the basement, perhaps, it eventually outgrew the nest and found its way to the airport.
Once there it gathered more parts as though magnetized and consumed money like, well, a suddenly well-paid merchant marine on extended shore leave. You embraced one and tolerated the other. In time, the list of to-be-completed tasks shrank and the possibility of it actually flying came into view, almost mirage-like.
The path from having a huge pile of airplane-kit components in the driveway to a flying example has complications beyond the construction process, all of which you learn as you go. But the ultimate goal for most is to have a flying airplane. (Truly, for some, the journey is the driver, not the goal.) And it’s the step from an assemblage of airplane-looking parts to an actual flying machine that is unique to homebuilding.
Every Cessna you’ve flown has had a professional test pilot commit its first hour or more of flight. For your homebuilt, the task is on your shoulders. Probably.
The question, of course, is: Should you? It depends. How experienced are you overall? How many different aircraft types have you flown? What is your experience level in airplanes the same or very similar to your project? How recent is your flight experience? These are all fixable things, meaning if you have spent most of your budget on the build, it becomes smart, as you get near the end of the project, to start investing in flying time.
Begin with whatever you’re most comfortable with or what is locally available. At this getting-back-to-it stage, it is less important to be in an airplane similar to your homebuilt than it is just to get the stick or yoke time. Find an instructor who will not let you fly sloppy and who will keep you honest. Also, don’t fool yourself into thinking that an hour or two of dual instruction after years away from the flight deck will do it. You need to get well and truly current and, more importantly, proficient.
Then it’s time to consider training in airplanes similar to yours. The average homebuilt has more power for any given gross weight. Consider that the Van’s RV-7A typically has as much installed power as a Piper Archer, yet is 750 pounds lighter. It also has less wing area but, more important, far lighter controls. While the RV series in general has predictable stall characteristics, they are not as “mushy” as your common four-seat family airplane. Training only in the Piper will not prepare you for the RV.
For some of the most popular brands, again we’re talking Van’s RV series, transition training is available, which is highly desirable. In fact, many insurance companies effectively demand it for the first flights. If training is available in your make/model of homebuilt, find the money and do it. There is nothing better than recent experience in an airplane likely to be very similar to the one you just built.
How important is this training? Accident statistics around homebuilt first flights illustrate the need. About a third of all reportable accidents during first flights fall into the broad category of “pilot miscontrol” or improper handling of the airplane. Nothing in the airplane broke or caused the accident; it was pilot error.
Of those mishaps, the greatest single category involves stalls, followed by a bad flare or bounced landing, followed by misjudged approaches and loss of control during landing. Sometimes misrigging can make an airplane touchy near the lower end of the speed range, but more often than not, it’s just flown with inadequate margin. In the first few hours, you really don’t know what you don’t know.
Just because you feel ready doesn’t mean the airplane is. In the past, Experimental/Amateur-Built aircraft were required to have something called pre-cover inspections, basically a partway check by a designated airworthiness representative (DAR) or inspector to help ensure you’re doing a good job. That’s no longer required, but you do need to have a DAR or an FAA representative inspect the airplane prior to first flight.
More often than not, this is a spot check of critical systems—flight controls, in particular—and a thorough review of the paperwork to support that you did build the airplane and that you’ve completed all the forms. It is not necessarily a guarantee of airworthiness. That’s up to you as the manufacturer.
What most builders do today is host a last-look party. Invite other builders around for an afternoon poring over your airplane. Best are those who have built and are flying the same type you have, but those with keen eyes and a mechanical bent are also helpful. Open up the airplane, stand back, and let them find stuff. Stow your ego. They will find things wrong—missing cotter pins or rivets, wires rubbing, bolts not properly secured, all kinds of things. Fix every single defect they find before you fly.
Why is this so important? Because it can prevent problems. In a recent survey of first-flight accidents, 20% were attributable to builder error—most often mistakes building or configuring the fuel system (22% of the total builder-error accidents) with problems involving the carburetor, propeller or rotor, and airframe each accounting for 18% of the accidents.
Some of these accidents begin when builders try new ways to do things—as in the fuel-system design, for example—but sometimes it’s just poor execution of common and well-understood systems. A core truth in homebuilding is that the closer you stay to the plans—meaning that you’re building an airplane as much like the factory’s efforts as you can—the happier you’ll be in the long run. Every divergence from plans is a place where you lose the fleet experience and the engineering savvy others have gained for you, sometimes at the expense of other accidents.
In the not-too-distant past, builders who planned to perform first flights (as well as the rest of the flight-test program, defined as Phase I flight test by the FAA) could piece together elements of a good program, but it wasn’t ready made for them. It is now, thanks to the EAA’s Flight Test Manual and the accompanying Flight Test Cards. The manual provides step-by-step instructions on how to commit the most common portions of Phase I flight test, including the first flight, so there’s no need to freelance the materials.
Moreover, the test cards make each flight into bite-sized missions that focus on specific aspects of airplane control and performance. The concept is to commit the flight, note the results on the cards, and then continue only when the test is completed successfully.
In fact, the flight test cards underpin a new program in the Experimental world called task-based flight testing. Before this idea, all homebuilts were subject to a Phase I flight test based on hours flown, most commonly 40, but sometimes as few as 25 when the engine and propeller combination was a certified duo. Experimental LSA are the exception. But for the most common homebuilts, the new task-based system allows builders to complete Phase I once all the tests are complete.
Most of us have found that the last few hours of Phase I was a matter of trundling around, burning time. It’s too early to tell if Phase I hours are really reduced, but some have completed all the tests in 30 hours or less.
The last question is a hard one: Are you willing to treat your airplane like the machine that it is? If the engine quits on takeoff, you have to be willing to put it into the trees off the end of the runway. Because you’ve spent years building has no bearing on the outcome. You must be willing to sacrifice the airplane to save yourself. Builders have come to grief trying to stretch the glide after a problem, trying to make the airport or a softer landing spot because they don’t want to bend their new bird.
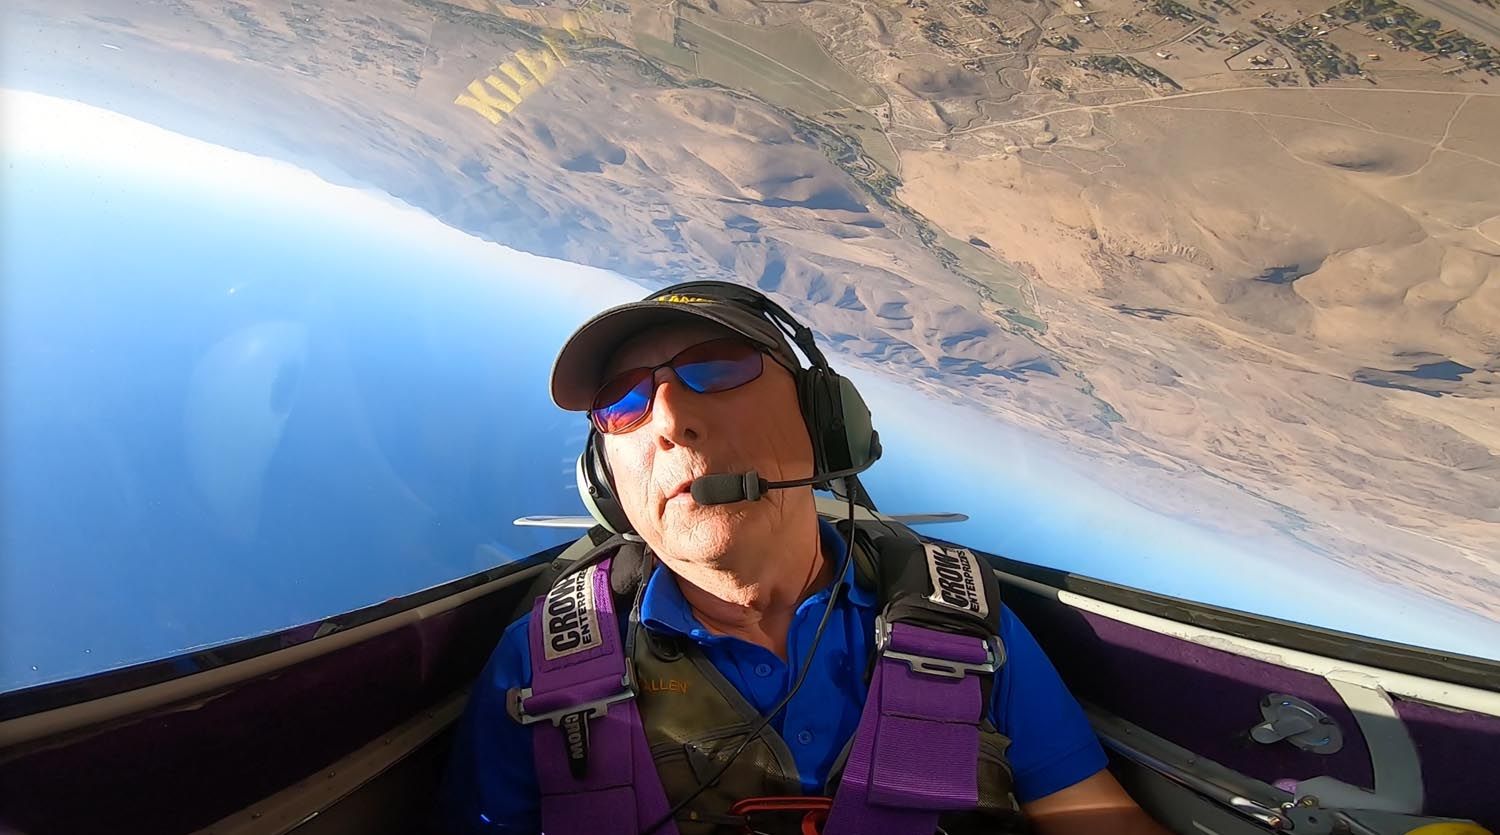
Truth is, doing your own flight testing takes more than piloting skill—though it absolutely starts there. You need to be careful, thoughtful, disciplined, and laser focused on the task at hand. When you land after the first flight and someone asks you how it felt, your answer should be more than “pretty good.” Instead, be precise: “Well, rudder trim’s a bit off, number 3 CHT is a little high, and I think the right main brake is sticking a bit.” Write that down (or, better, review the in-cabin video you so wisely employed), pull the airplane into the hangar where you can uncowl it, and inspect it like it’s the first time.
Then, once the adrenaline has worn off a bit, fist pump all you want. Just remember you have a bunch more of this ahead of you before your dream airplane is real.


